One man's struggle to take it easy
Category: Cabin
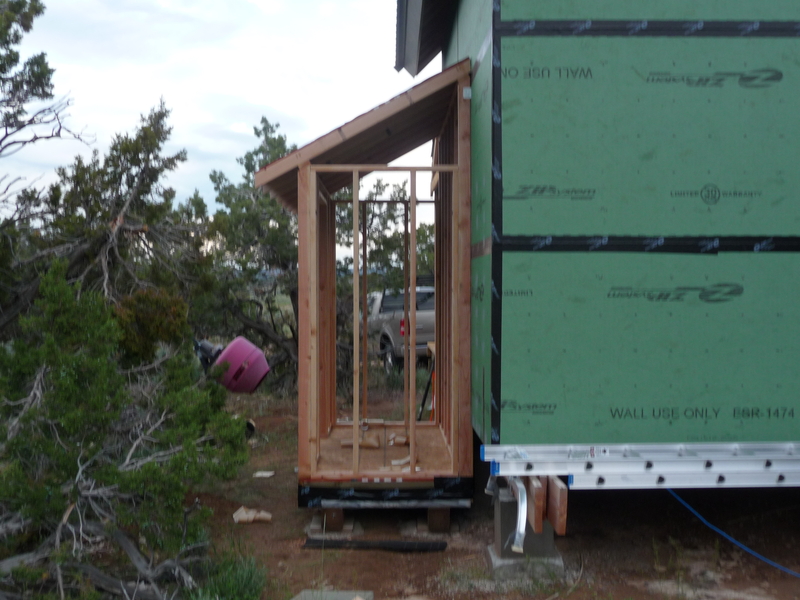
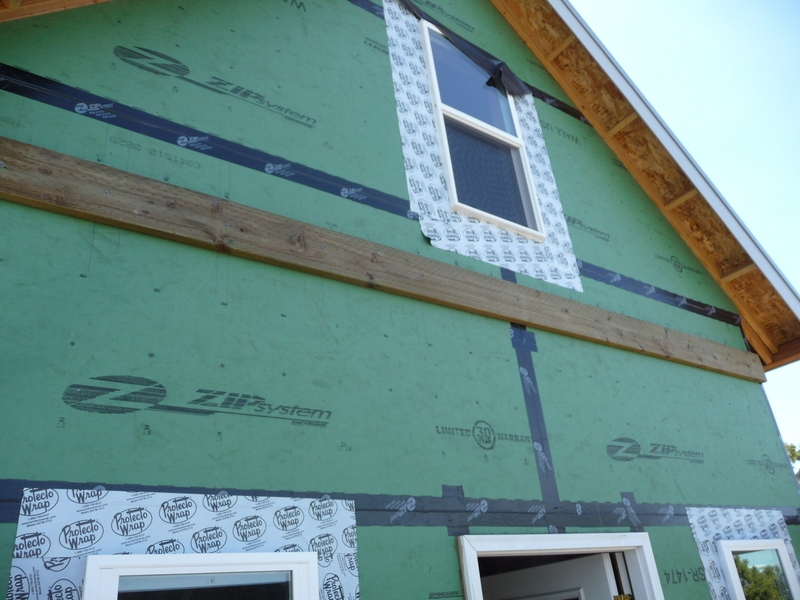
Cabin: Utility Building
Tuesday, Jul 05, 2011
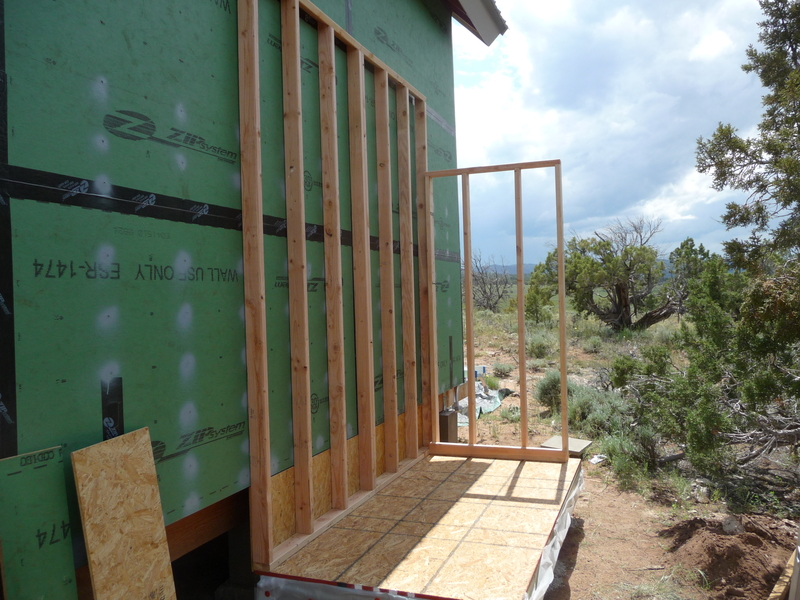
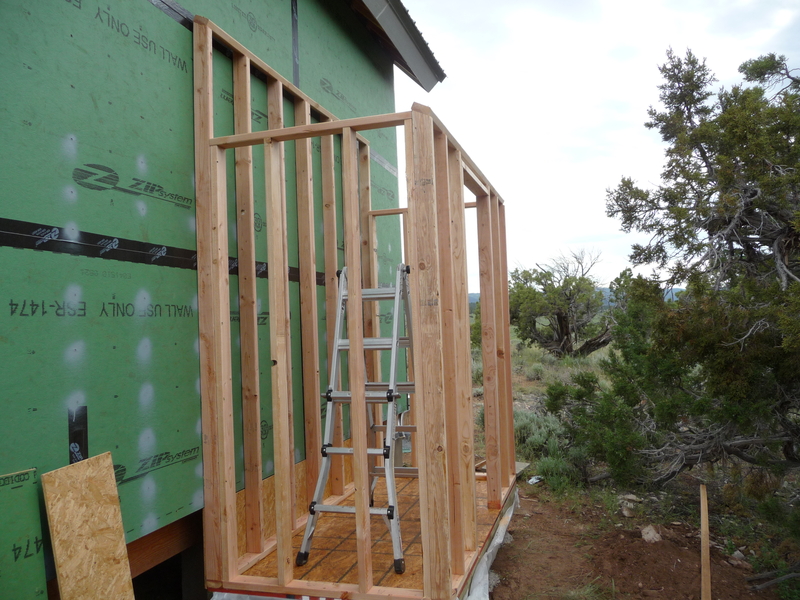
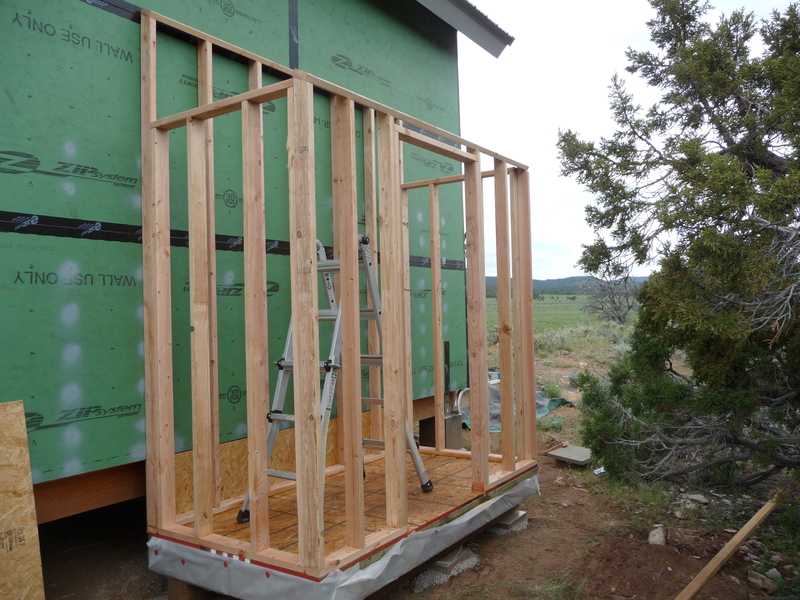
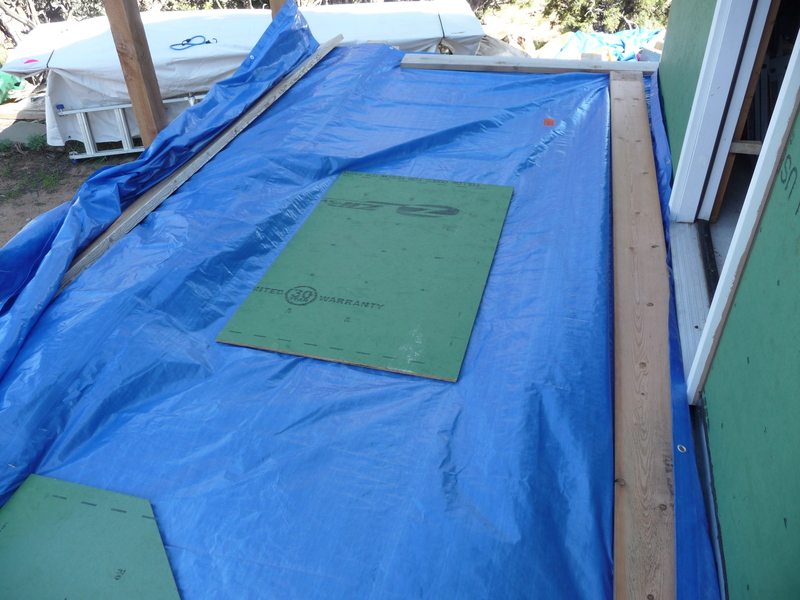
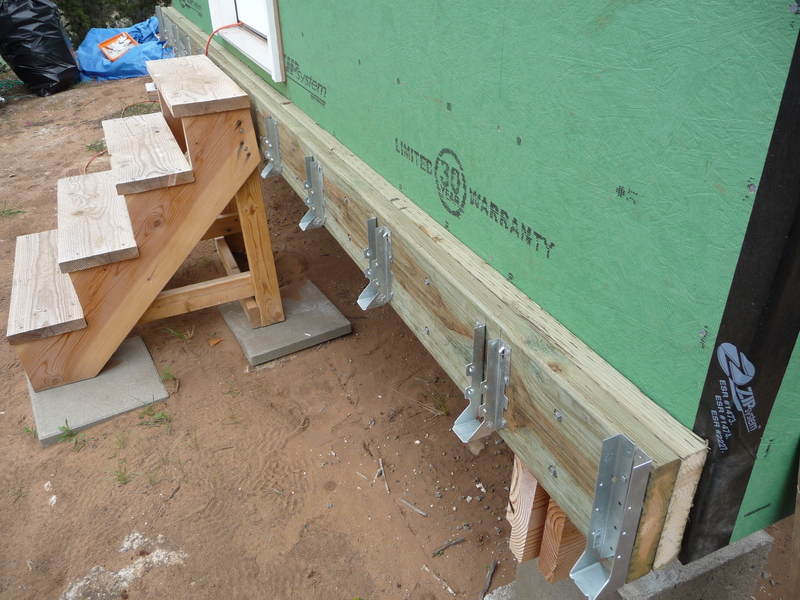
Over July 4th weekend I started building a “utility room” for the cabin. This 4’x8’ building has one wall which is adjacent to the cabin but is essentially a discrete structure. There is no direct access from the cabin to the utility building, rather the utility building has its own exterior door. The purpose of the utility building is to house a water tank, water heater, electrical panel, battery bank, water pump, etc. The wall the utility building “shares” with the main cabin is the wall where the kitchen cabinets and appliances and bathroom sink and shower will be located allowing all plumbing, gas, and electrical to be run through the shared wall. The LP tanks will be stored on one end of the utility building and run into the utility building to directly supply the water heater, and then into the cabin through the adjacent wall to supply the refridgerator and range. The only LP appliance which will not be installed along the adjacent wall is the cabin’s heater which will be located on the opposite wall. The gas line for the heater will run through the utility building and under the cabin to the opposite wall.
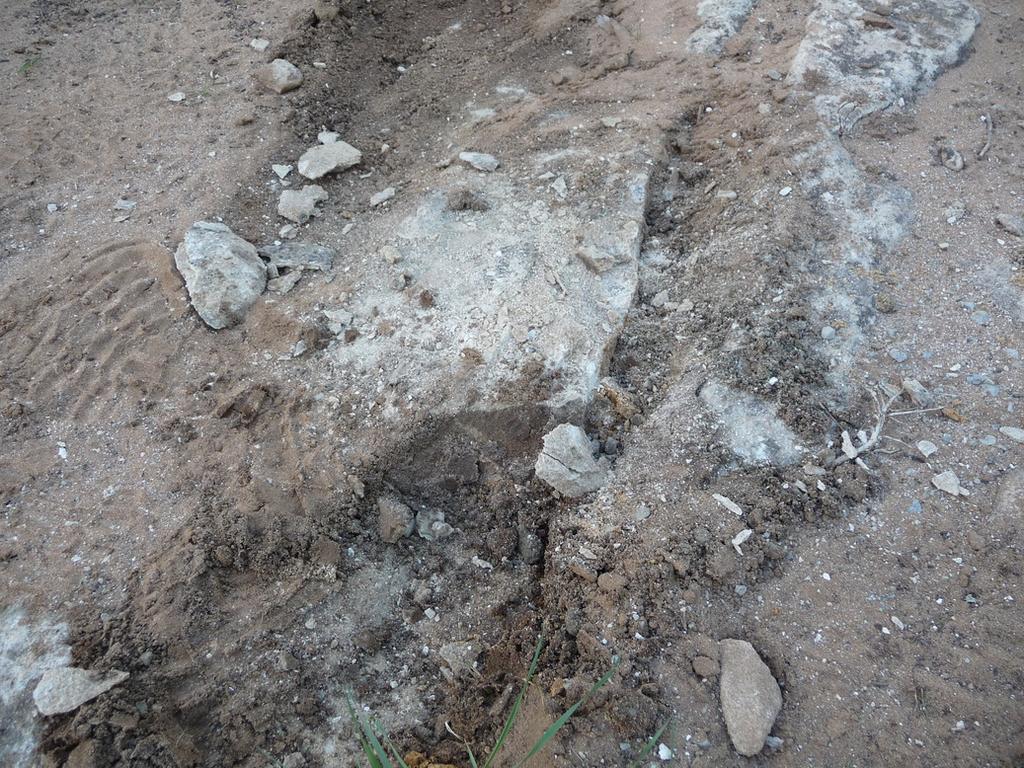
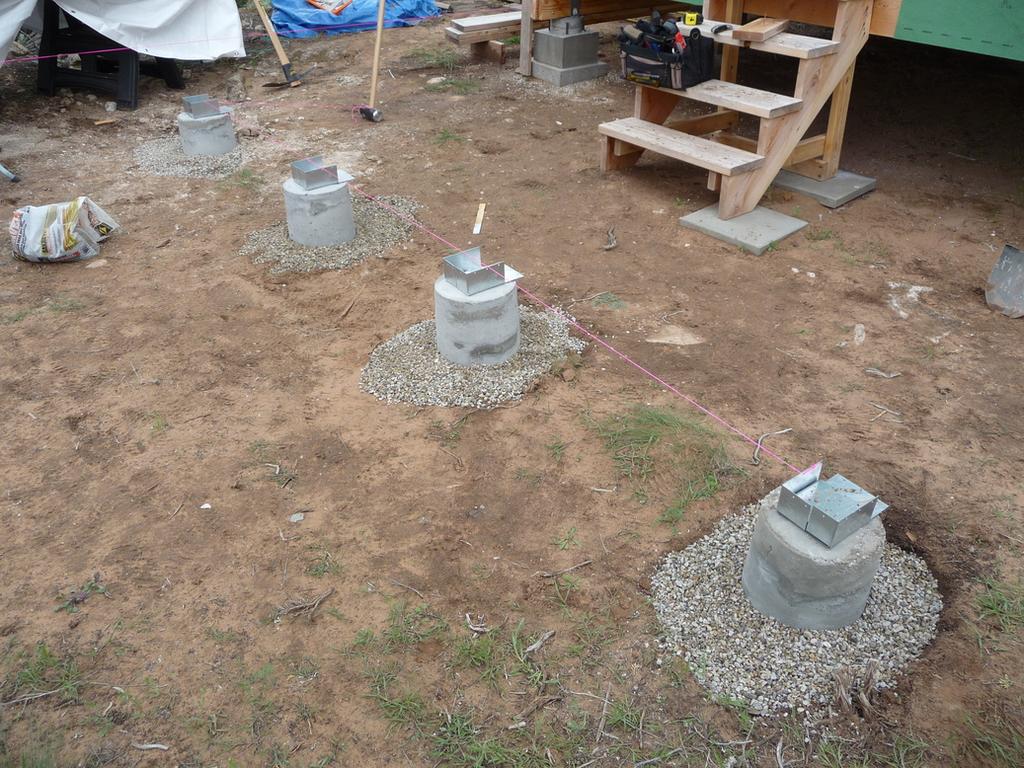
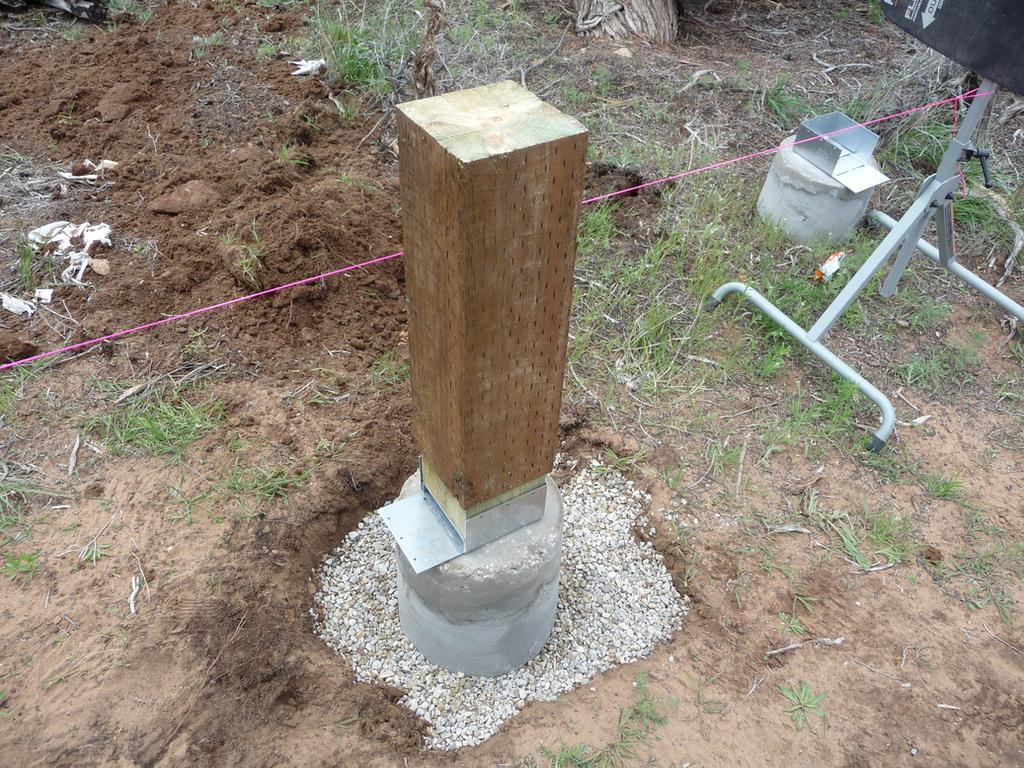
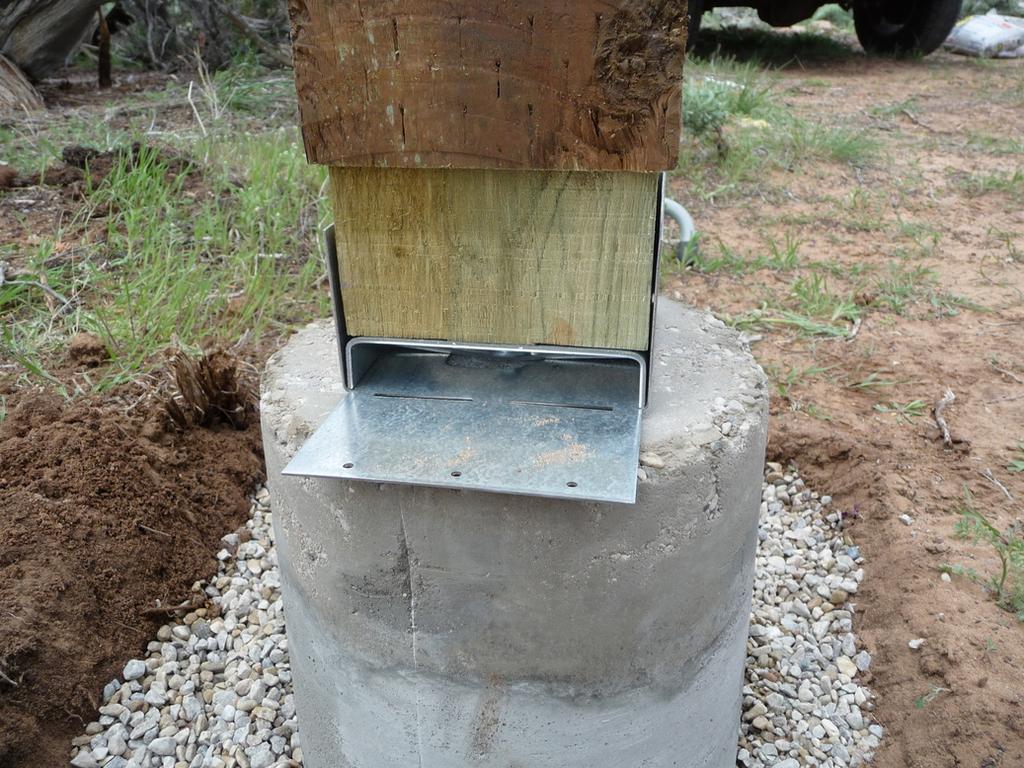
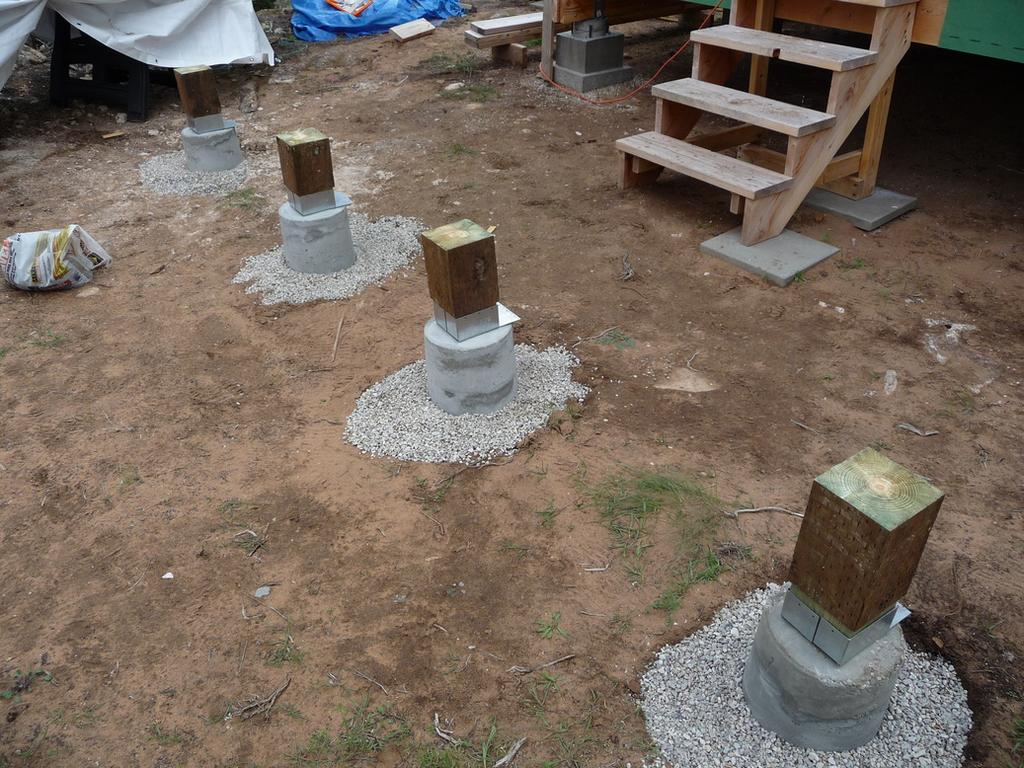
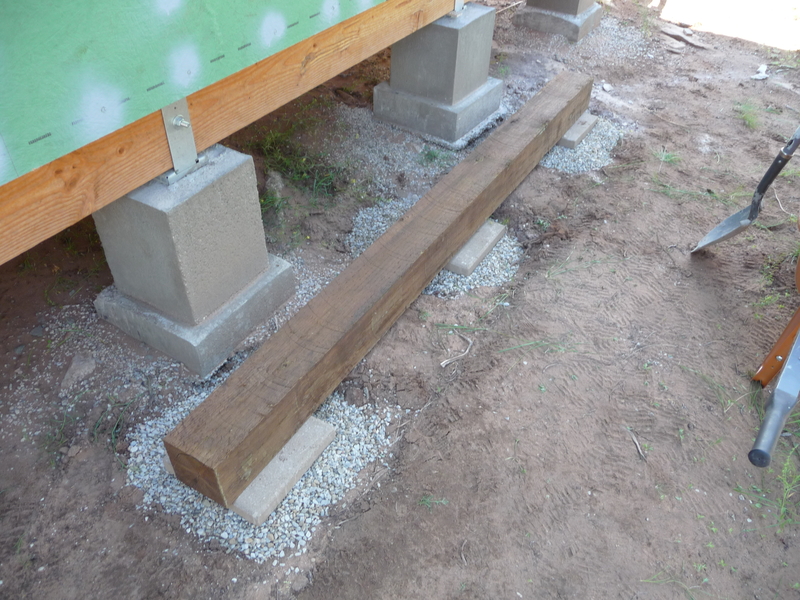
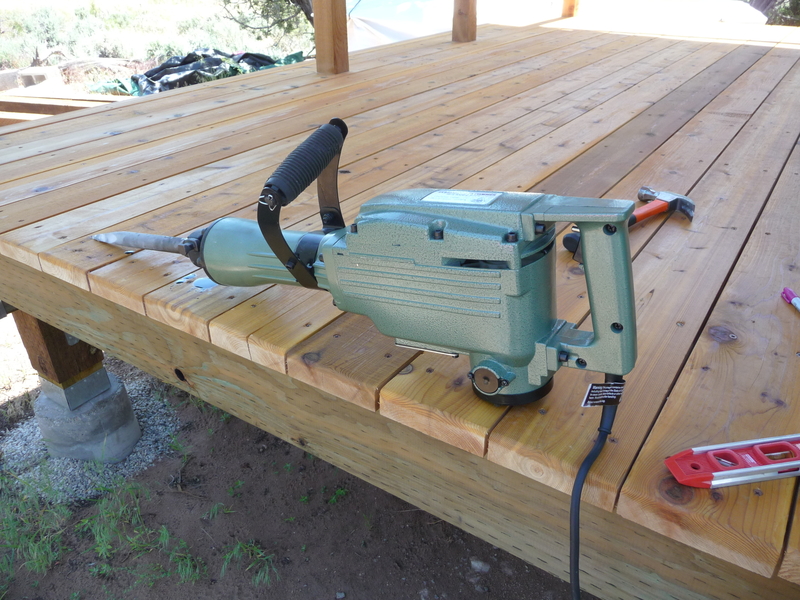
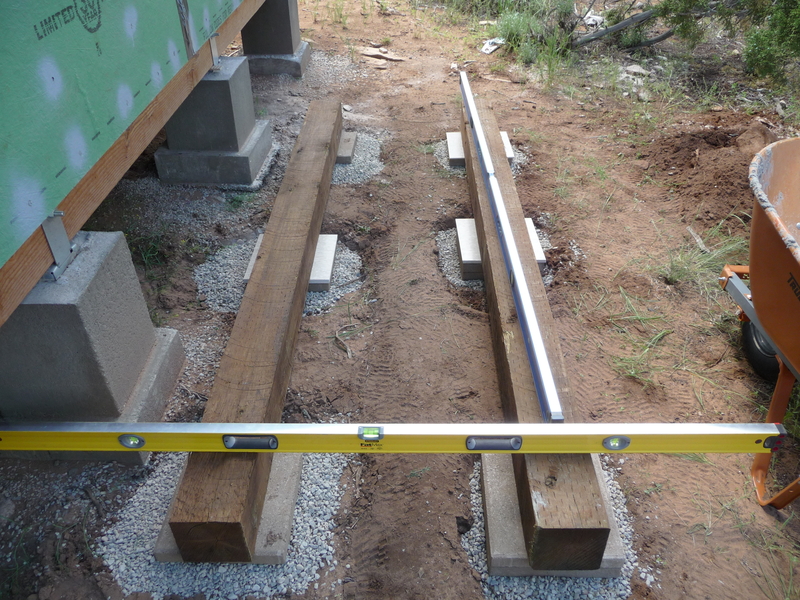
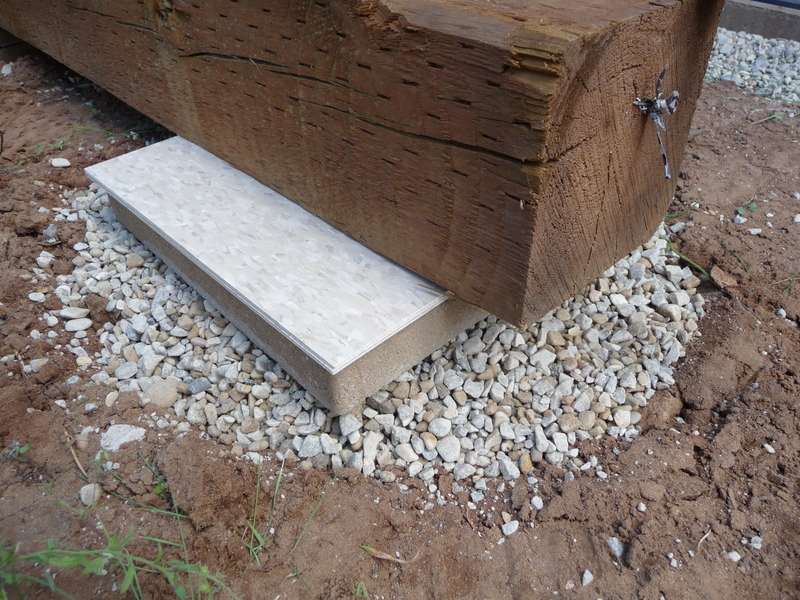
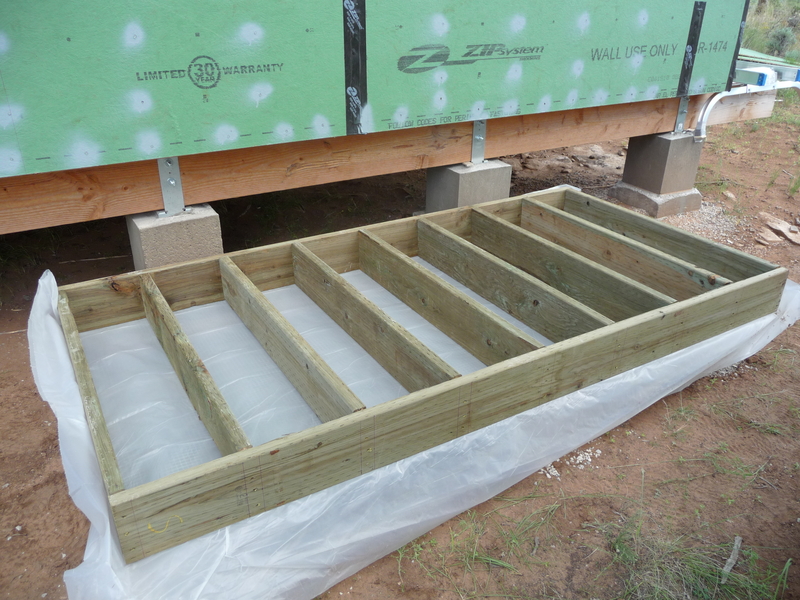
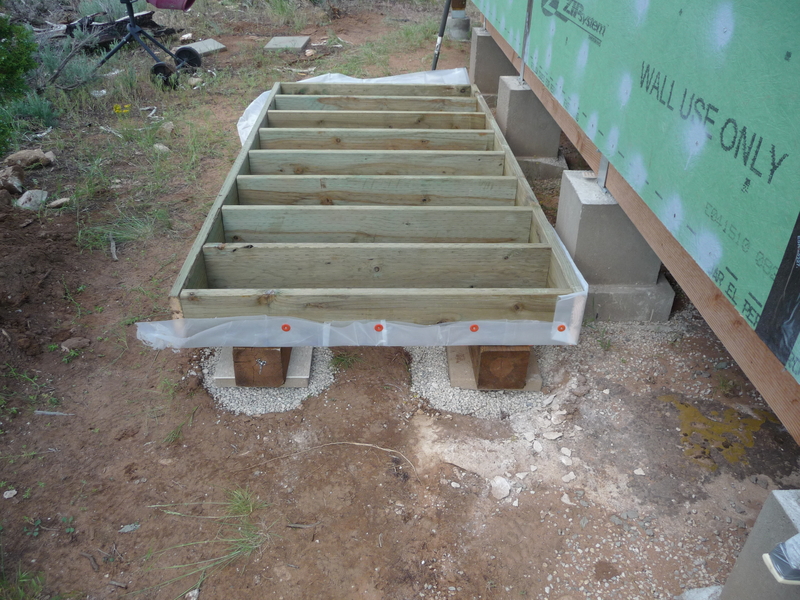
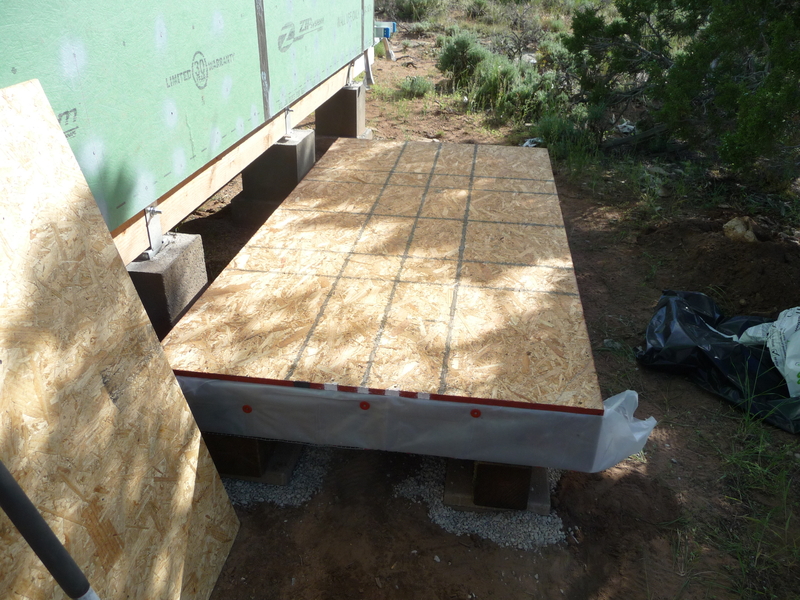
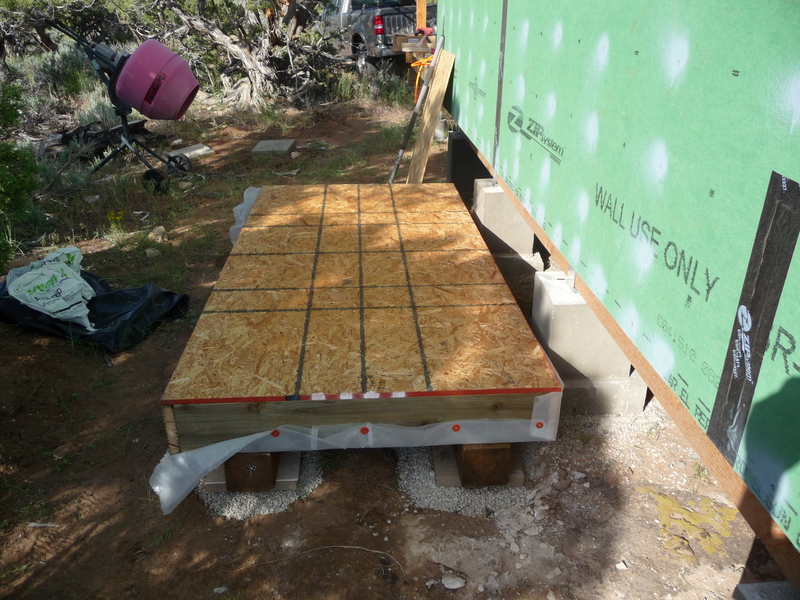
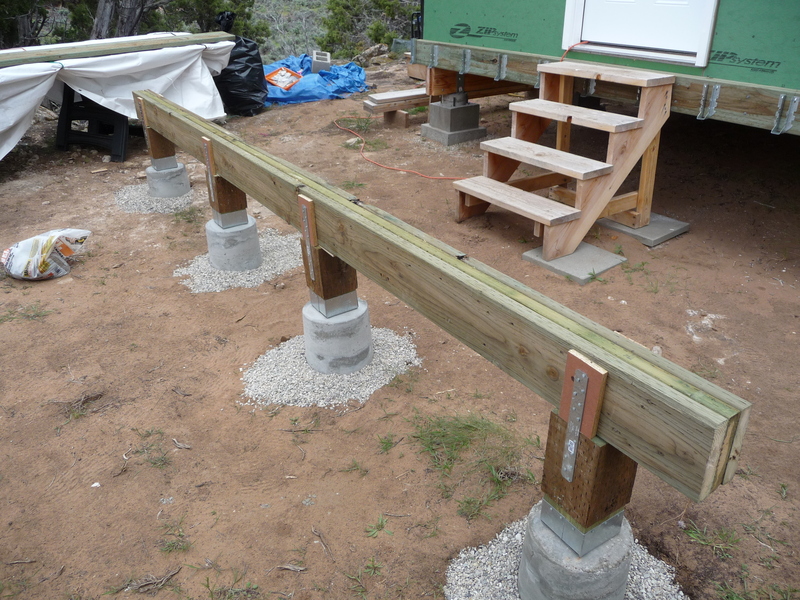
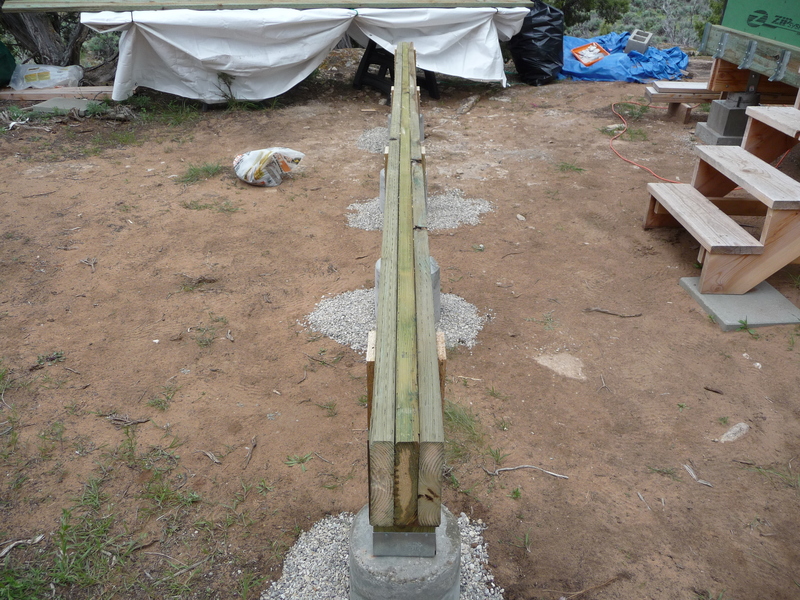
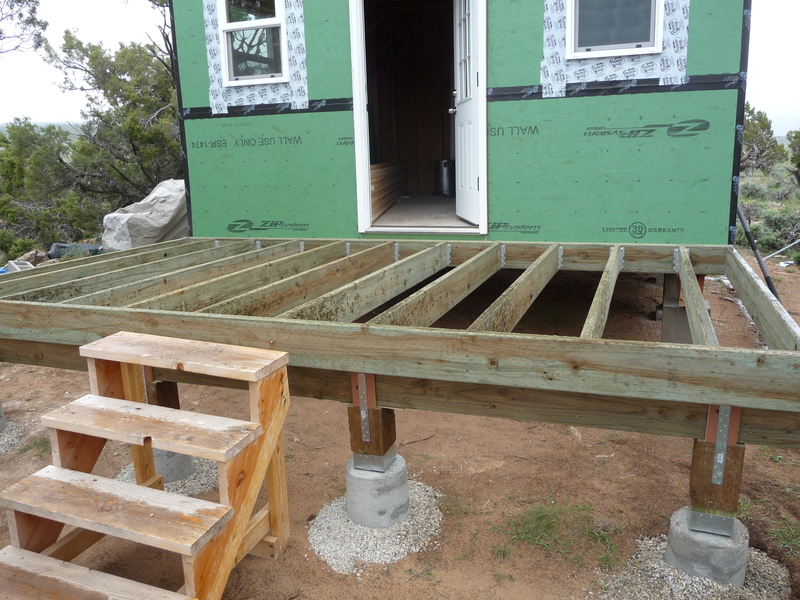
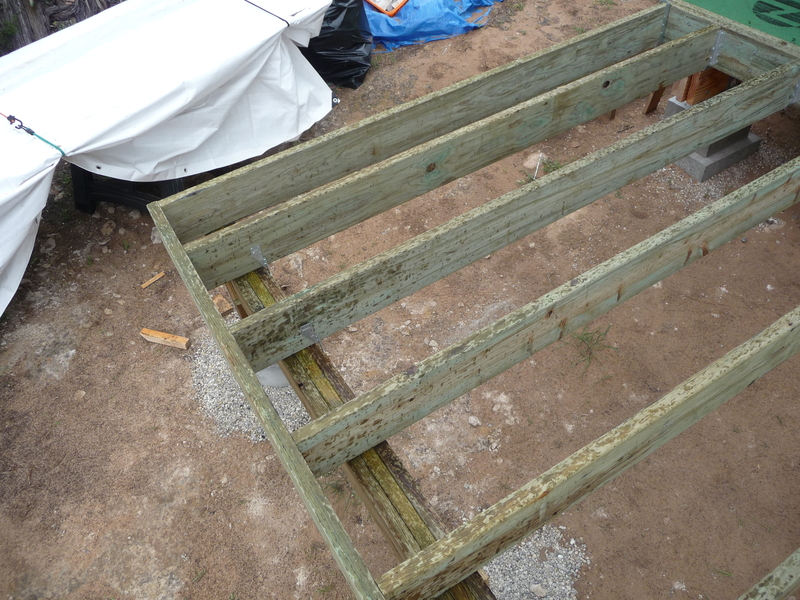
The foundation for the utility building consists of two treated 6x6 beams each supported by three gravel and stone pads. The beams are placed two feet apart and the floor is cantilevered six inches for a total of four feet. This should provide adequate support for the 1600 lbs. the water tank will weigh when full. There were some areas of protruding rock where I needed to place the pads so I used a jackhammer to remove the rock.
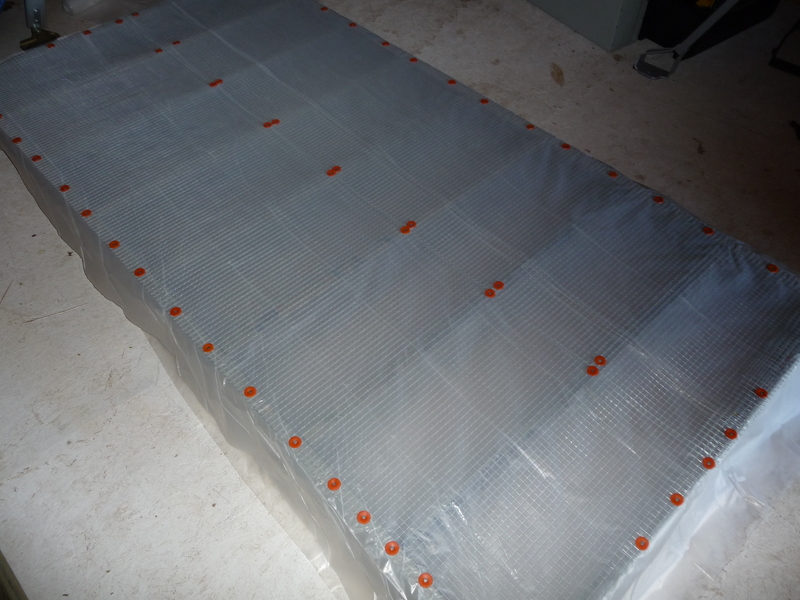
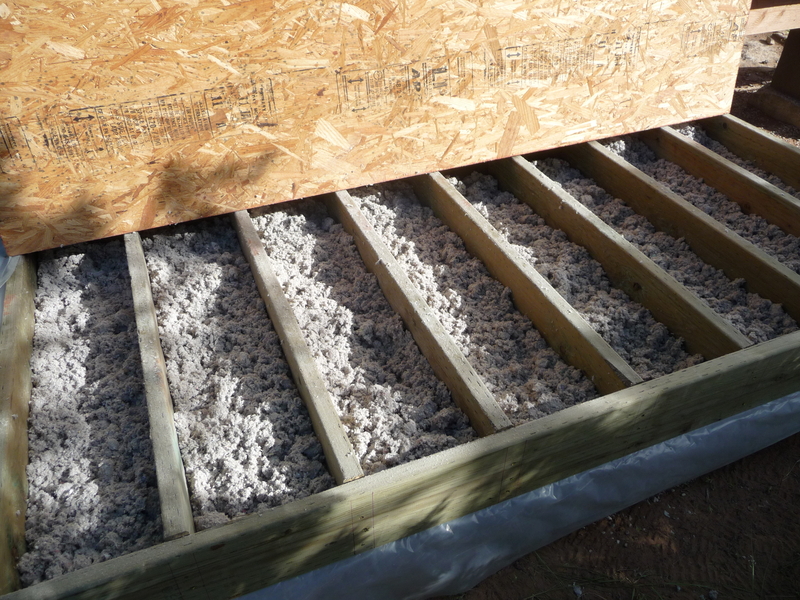
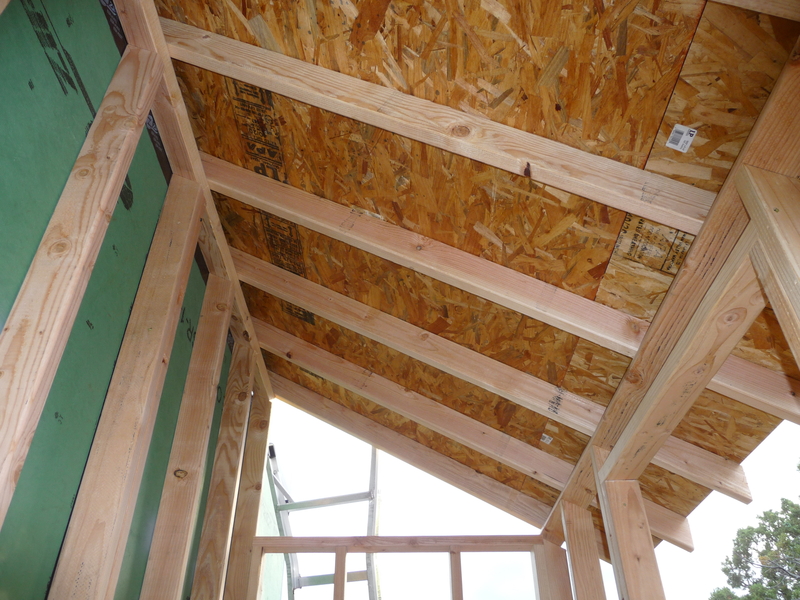
The floor is made up of 2x8 treated joists placed 12” O.C. The closer spacing is designed to support the weight of the water tank. The bottom of the floor is covered in a plastic vapor barrier and then a layer of hardware cloth to keep any critters out. I added a bundle of “blown-in” type insulation to the floor. Despite the labeling on the package indicating more than enough insulation to fill the floor, I found that trying to “de-compact” the compacted insulation by hand was difficult and in the end did not result in the volume I was hoping for. The top layer of the floor is standard 3/4” osb.
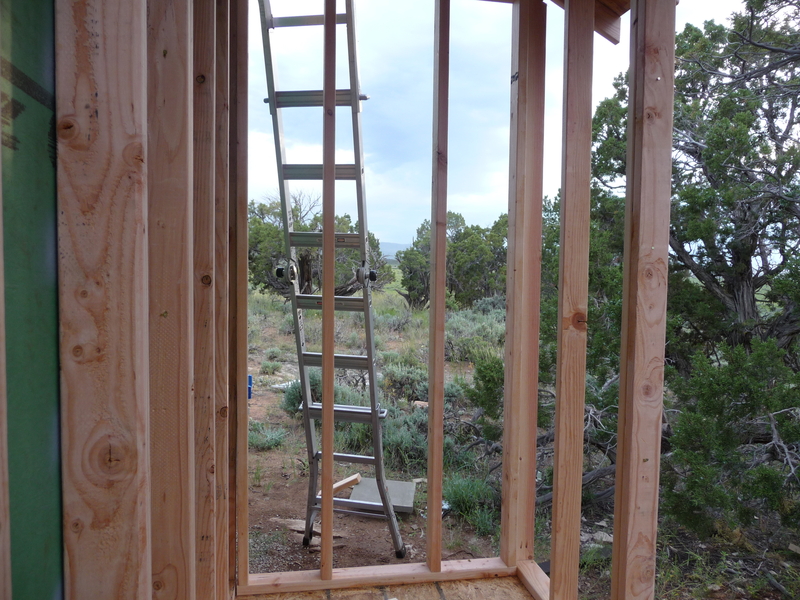
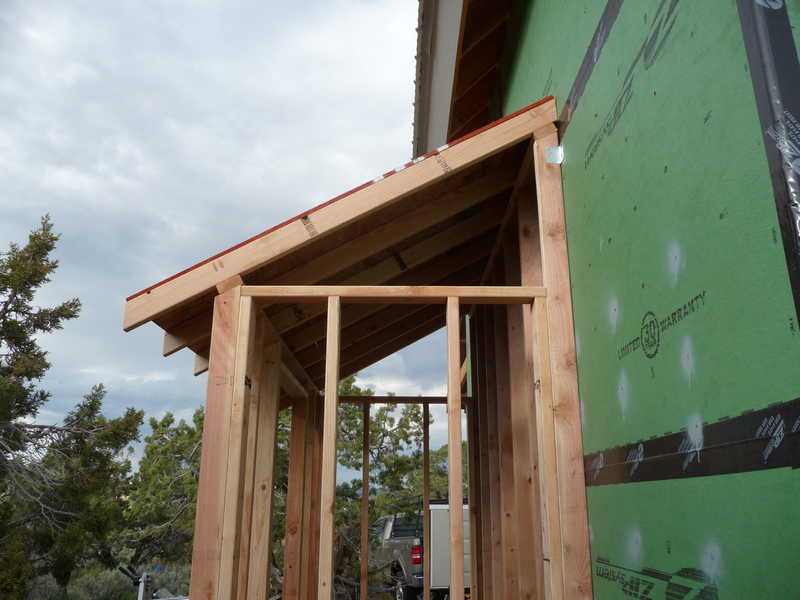
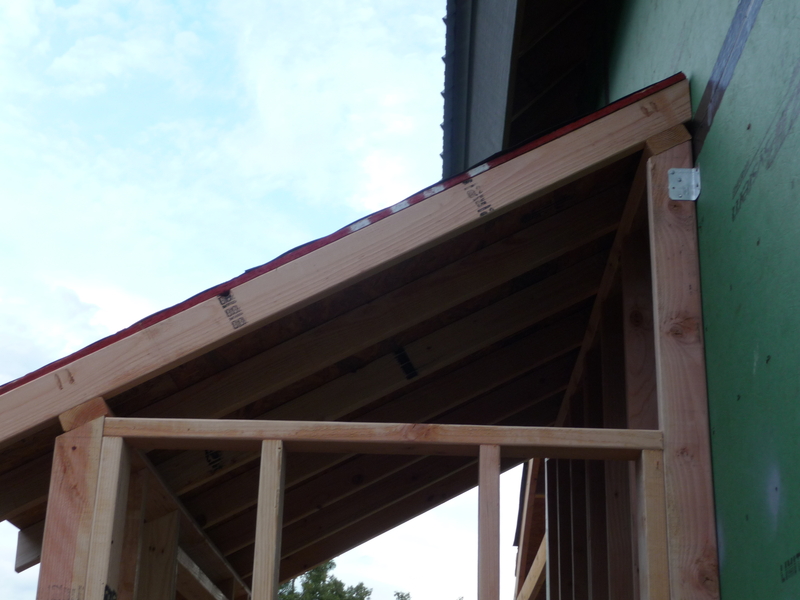
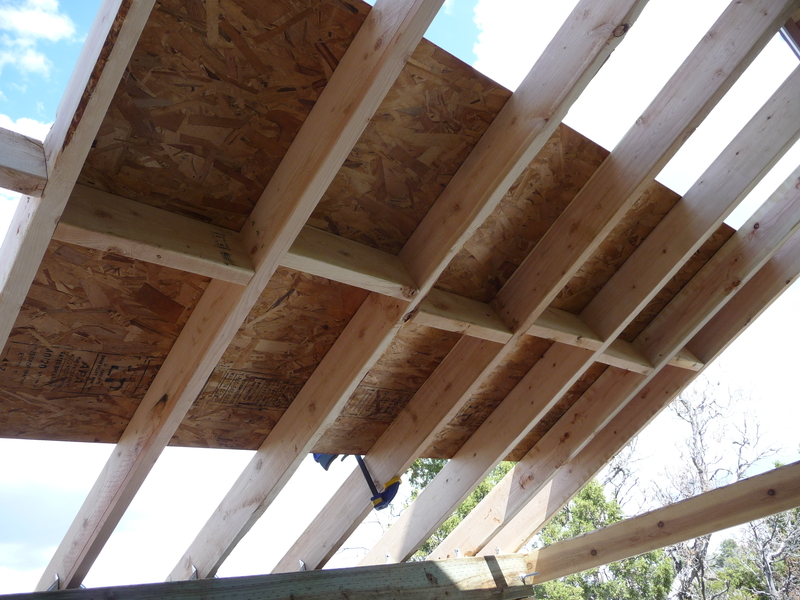
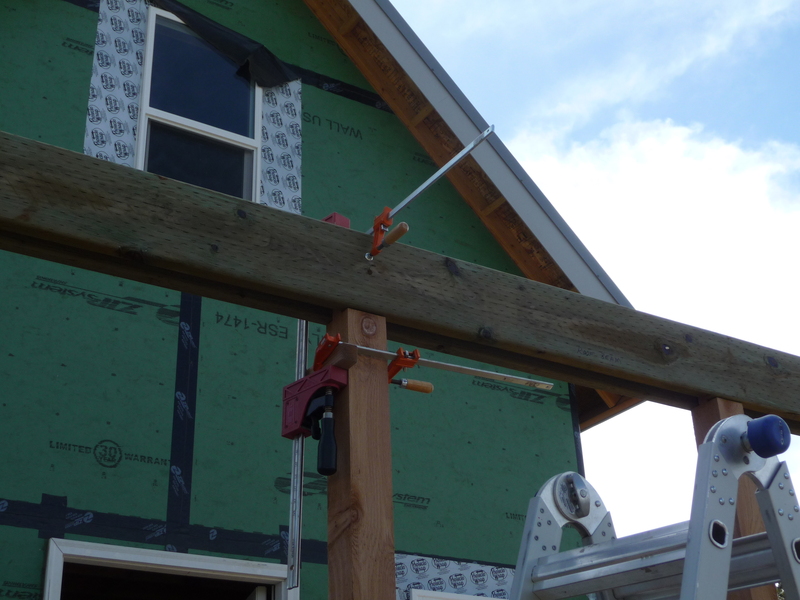
Framing was fairly standard 2x4, 16” OC with the exception of the rear wall being 2’ taller to support the shed style roof. The top plates on the front and back walls are angled 26.5 degrees so the rafters will rest directly on the plates rather than notching them.
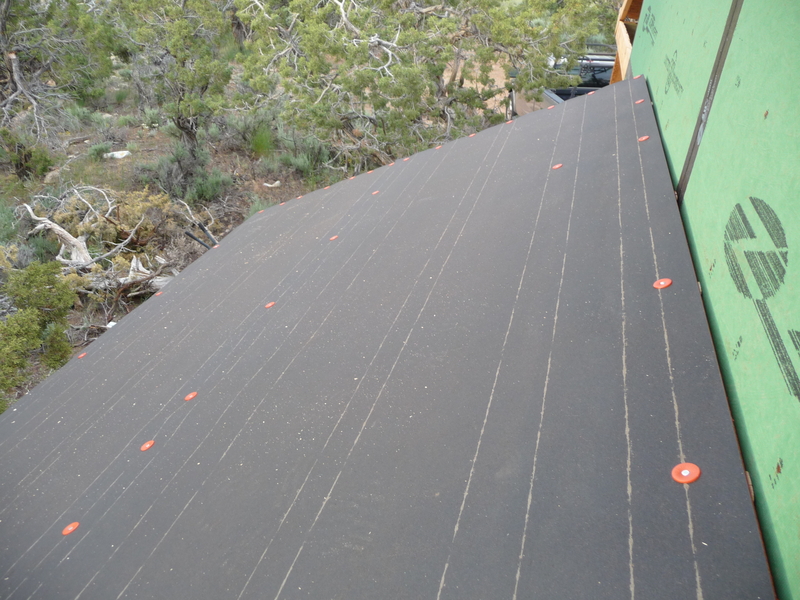
Finally, the roof was added using 2x4 rafters (well under maximum span) and sheathed with OSB and a layer of 30lb tar paper.

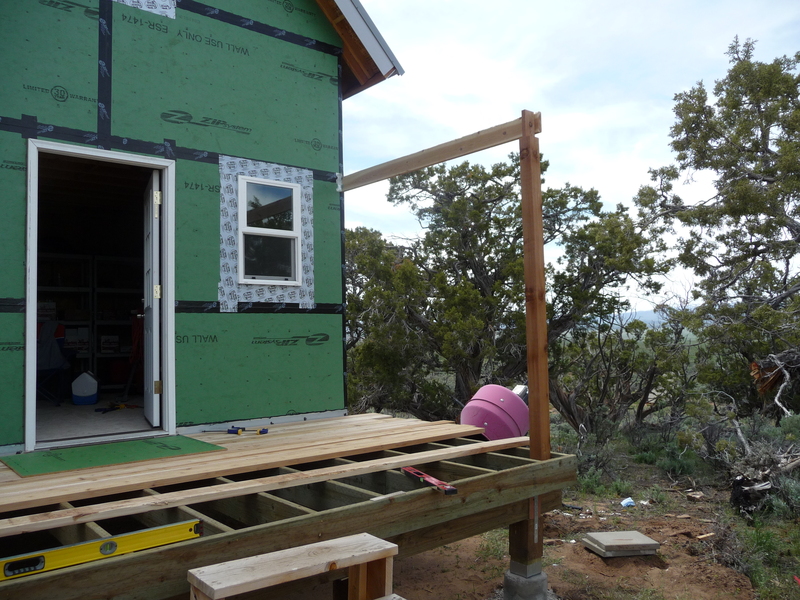
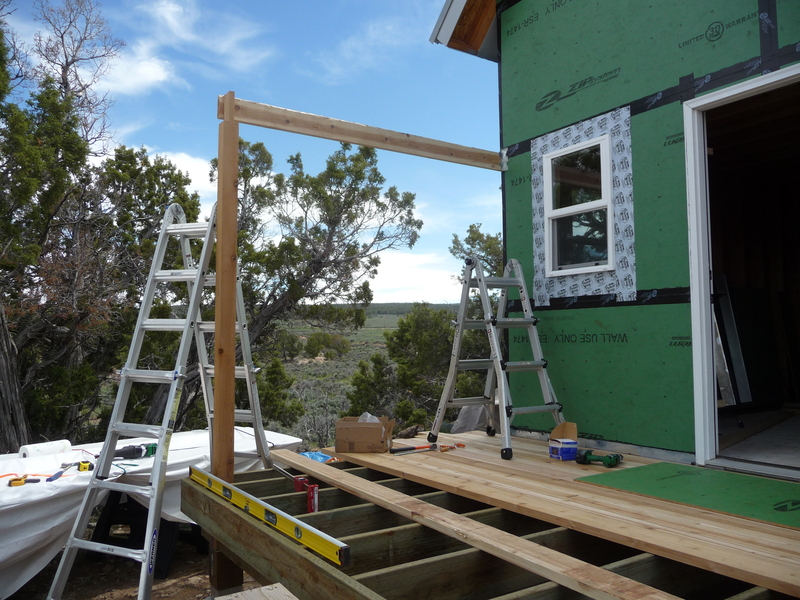
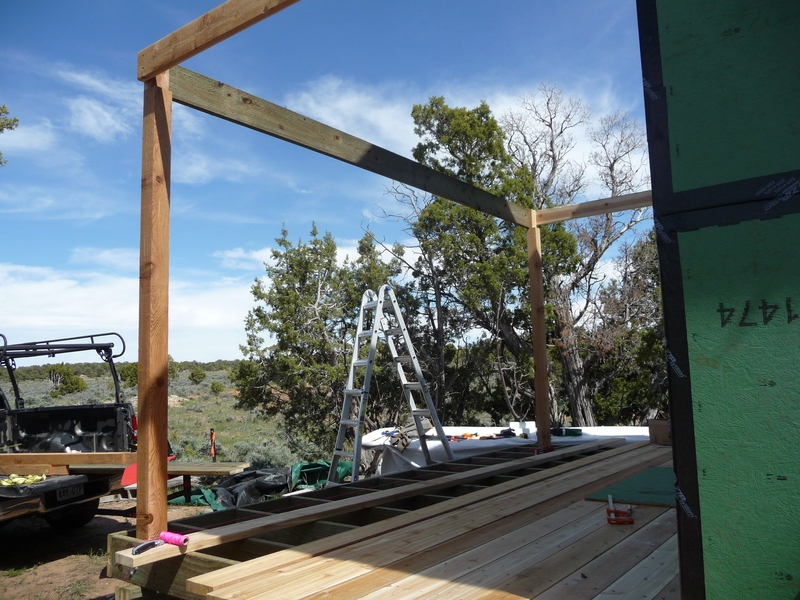
Cabin: Porch
Tuesday, Jun 14, 2011
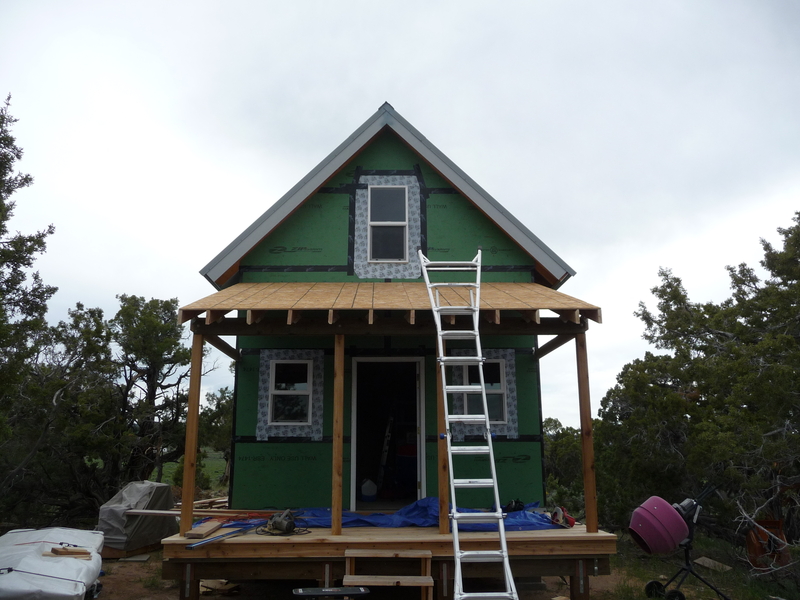
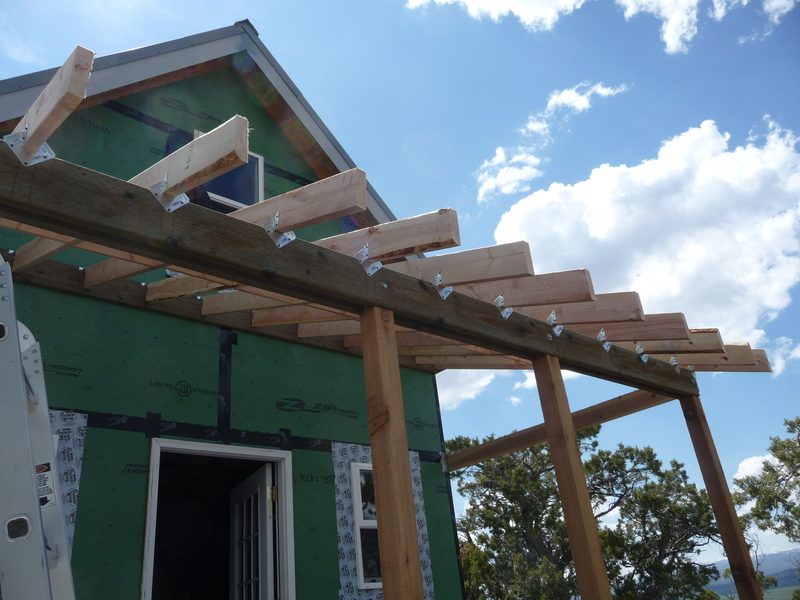
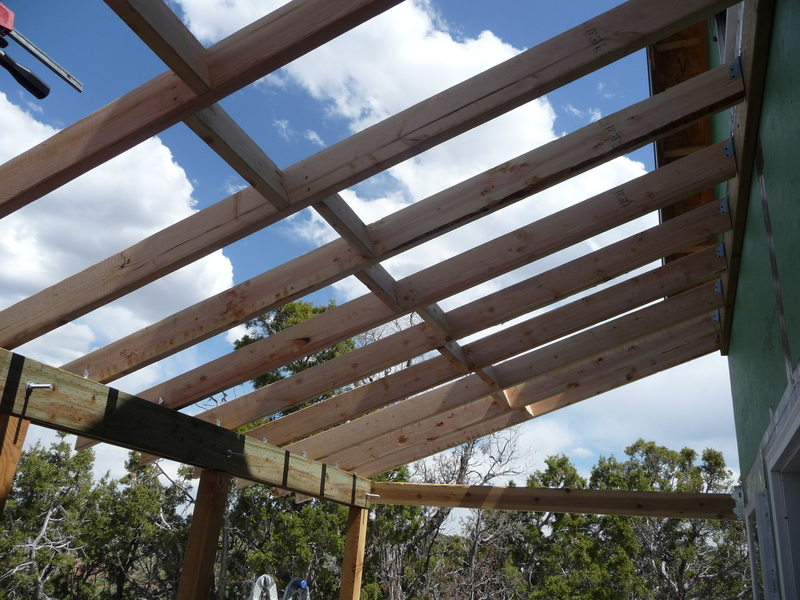
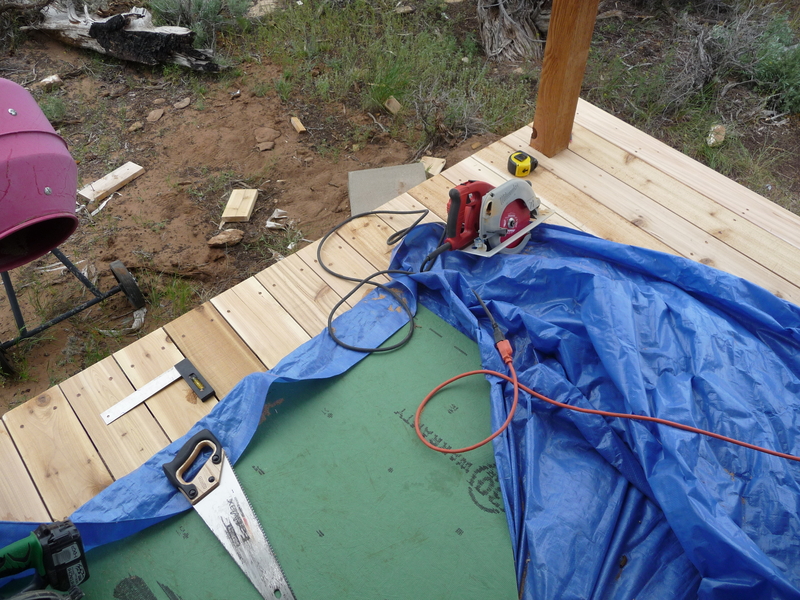
This past weekend I finished framing the porch roof. Initially I was going to leave the roof off until the siding was installed on the gable end because I would need to be able to rest a ladder on the roof to install the siding and that would be impossible with a metal roof. I changed my mind and decided to finish framing the roof and add a layer of sheathing, a layer of water and ice shield underlayment, and the 2x4 purlins. The sheathing and underlayment will protect the decking from the weather and the purlins will provide a good support for a ladder. One the gable siding is installed I’ll just need to add the metal roofing.
By the time I was done with the sheathing it was too windy to install the water and ice shield so I finished installing the deck boards on the porch floor now that I had more screws. I trimmed the boards even on the sides of the porch so all I have left to do is roundover some of the edges, sand the rough boards, and apply a finish.

Cabin: Porch
Monday, Jun 06, 2011
Finally had some good weather this weekend. Sunny and warm. The temperature reached 80 on Sunday an I was wishing it were cooler.
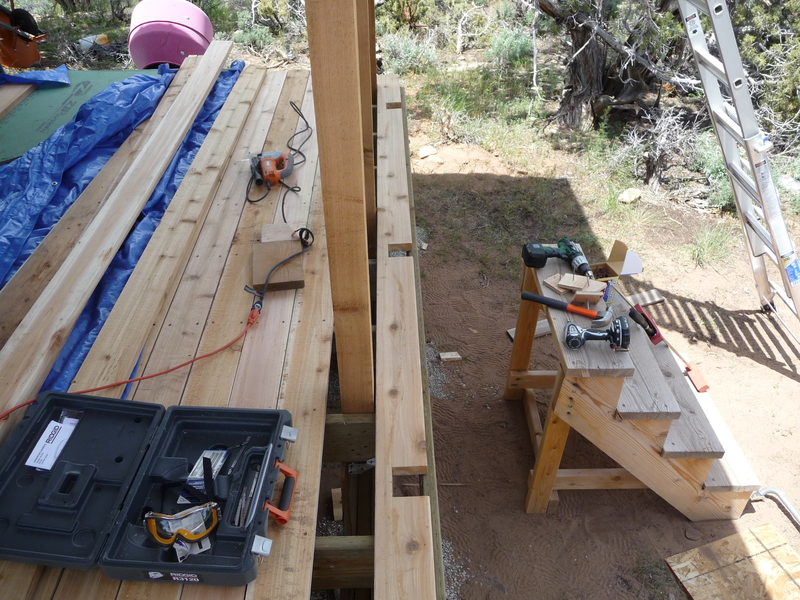
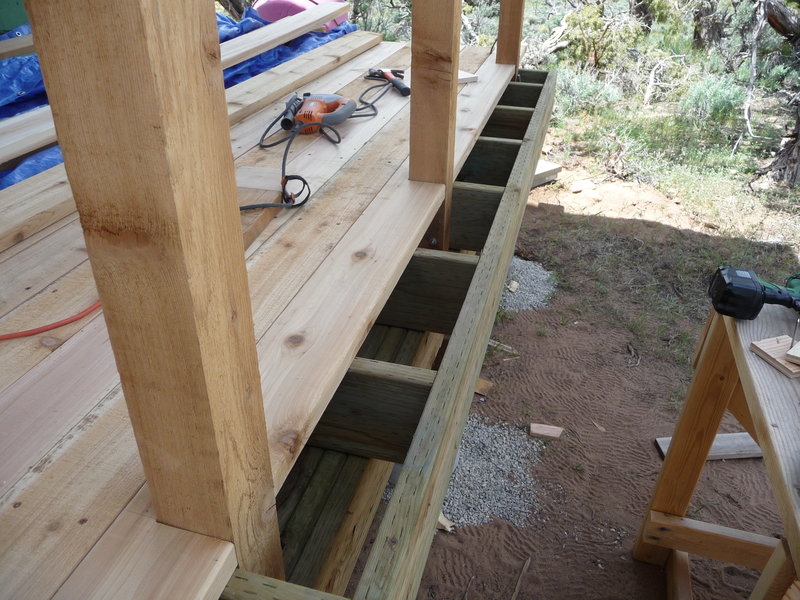
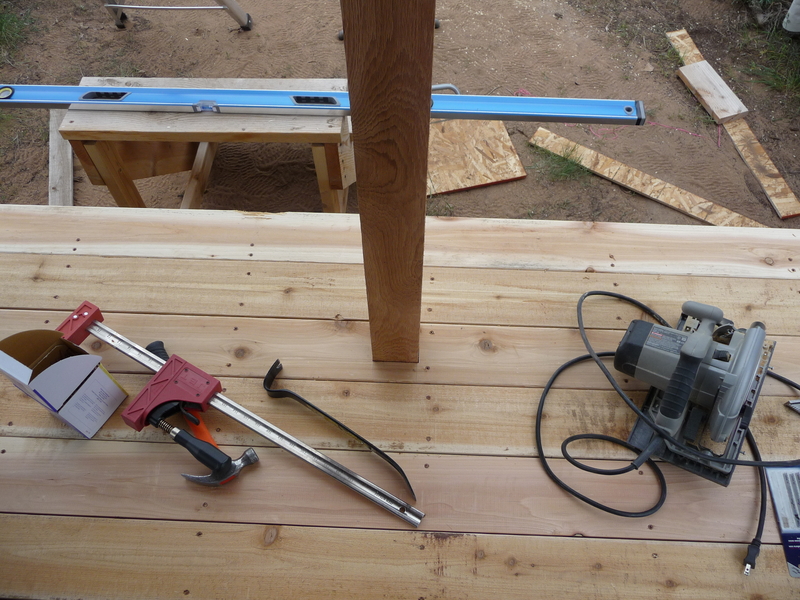
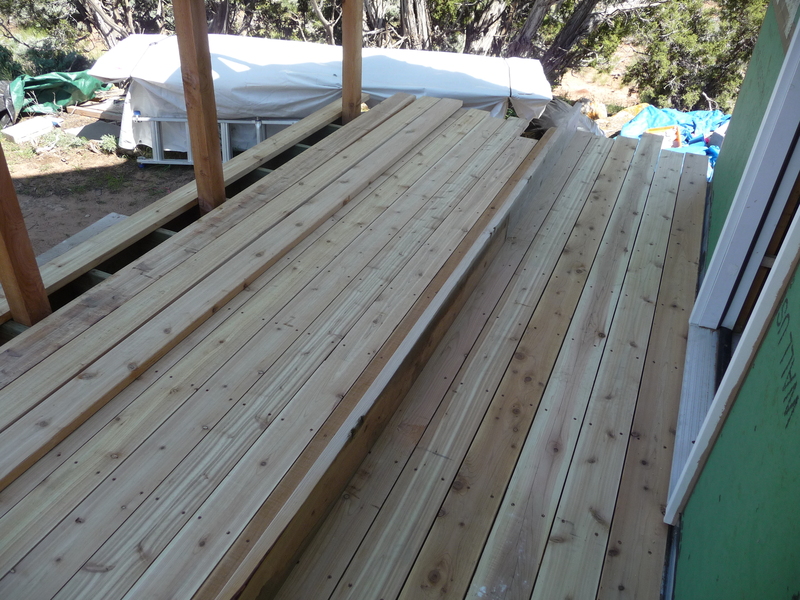
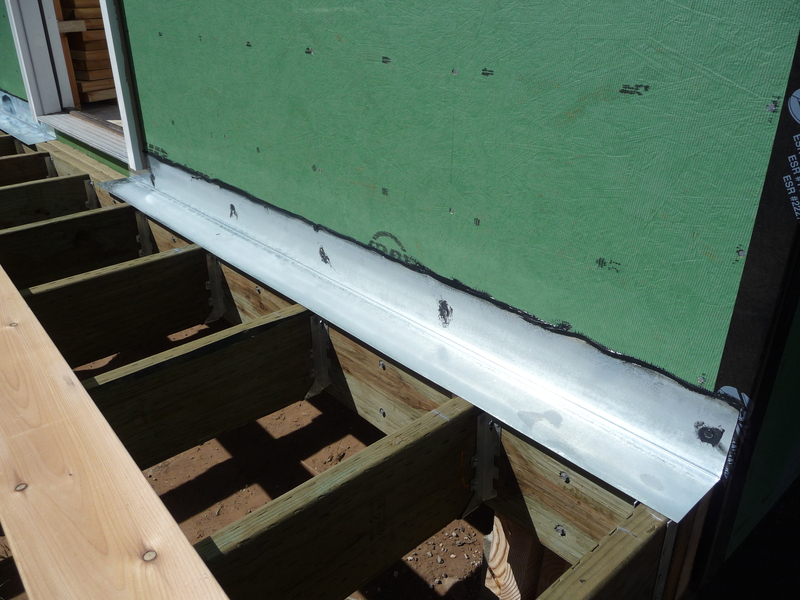
After installing a flashing where the ledger attaches to the cabin I laid about 2/3 of the 2x6 cedar decking at which point I ran out of deck screws. The screws are sold by the pound so it was difficult to estimate how many were needed. The cedar decking comes with one rough side and one sanded side but because I didn’t hand pick the wood several of the boards had defects on the sanded side requiring me to install the rough side up. I’ll have to sand them down later. Before leaving I covered the decking with a tarp to hopefully protect it from the sun until I’m able to apply a protective finish.
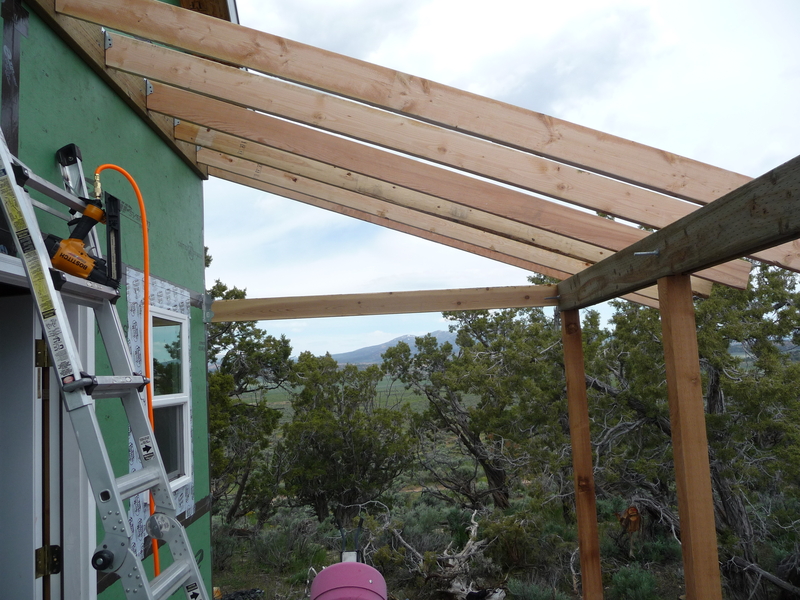
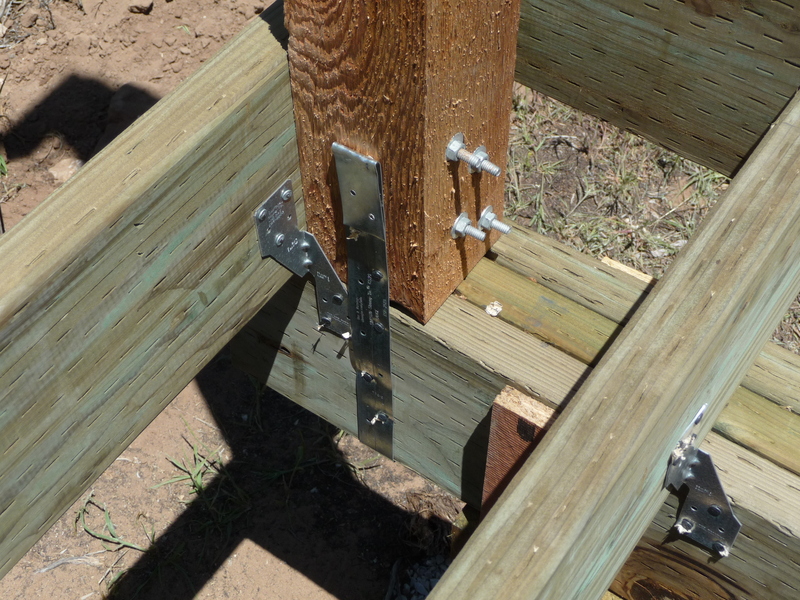
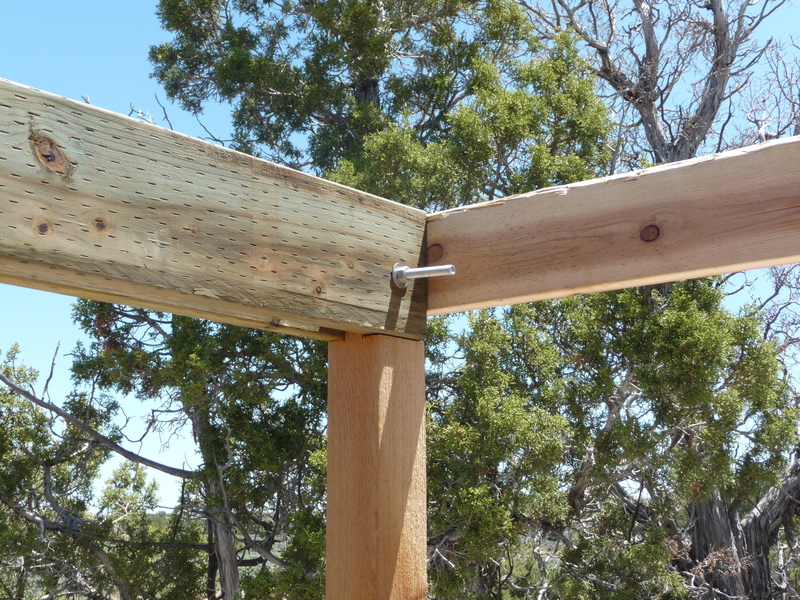
I started the framing for the porch roof which consists of four cedar 4x4 posts supporting a double 2x8 beam. The roof rafters will attach to a ledger I attached to the cabin and the beam supported by the posts. The horizontal cedar supports hold the posts in place until the rafters are attached. I also secured the floor joists and the post bases to the support beam using metal fasteners. The posts are attached to the floor joists with 4 1/4” bolts and the beam they support is attached using a 1/2” bolt on the top of each post. The top of the posts are rabbited so the the two boards creating the beam are supported by the posts.


Cabin: Porch Framing
Tuesday, May 31, 2011
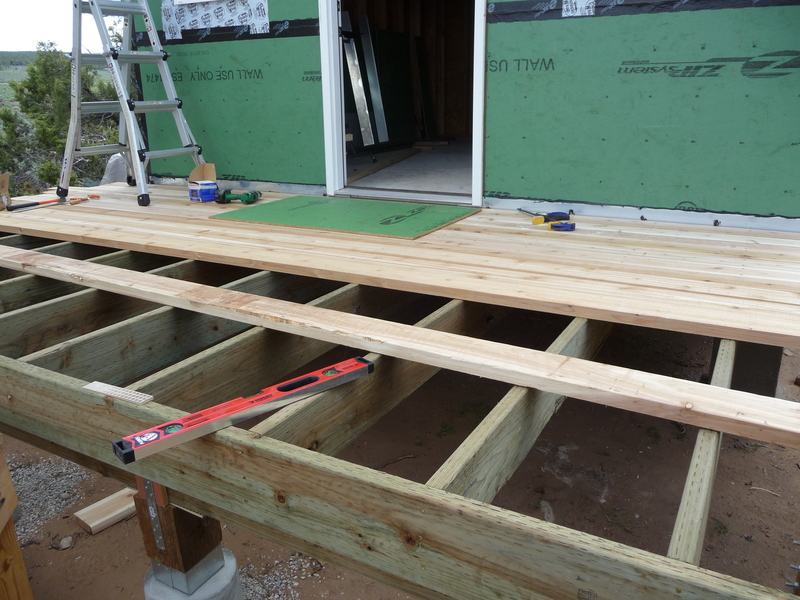
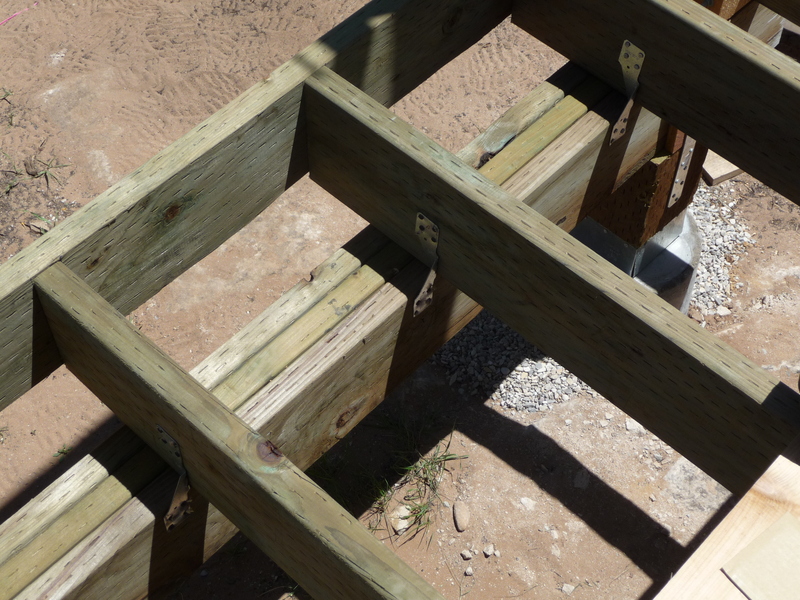
Continuing work on the cabin’s porch over Memorial Day weekend turned out to be a frustrating experience. Persistent rain all weekend combined with temperatures in the 40’s and windy conditions managed to thwart any consistent construction effort. I was able to try out a new propane heater I bought in January which kept the inside of the cabin a comfortable temperature. On Saturday I built and installed the beam and attached the ledger to the cabin. The beam was built up from three 2x8’s and the ledger is a double 2x8. I doubled up the ledger and used “LedgerLok” screws to attach it to the front of the cabin, screwing into the cabin’s 2x10 floor joist, resulting in a triple 2x ledger which just needs to carry the load of less than half the porch (the beam carries a bit more than half due to the front cantilever). The ends of all three ledger boards rest on the main beams supporting the cabin itself.
On Sunday the rain was almost constant but I was able to get the 2x8 floor joists cut and installed. On Monday the cold, wind, and rain continued so I postponed the installation of the decking until next weekend,

Cabin: Spring 2011 - Porch
Monday, May 23, 2011
I finally got started on the cabin again this spring after a long delay due to bad weather, vacation, and illness. I feel like I’m getting a really late start this year but looking back at last year, I didn’t finish the foundation until July 7th and I was able to get a staggering amount finished before winter. So I’m really ahead of schedule compared to last year.
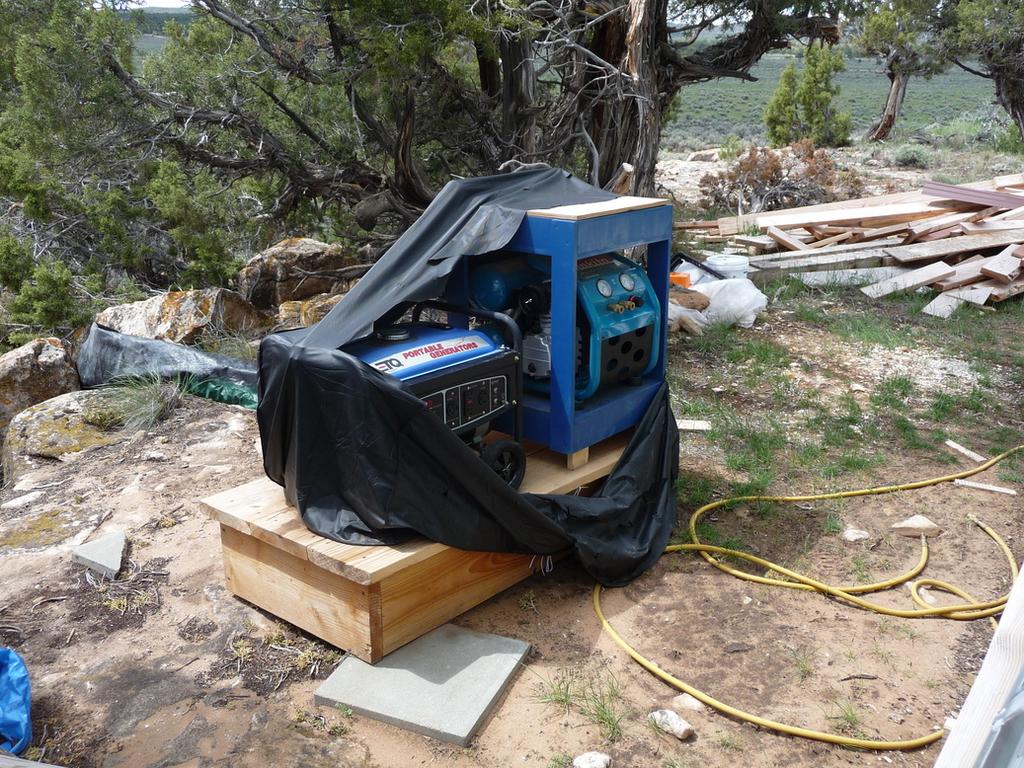
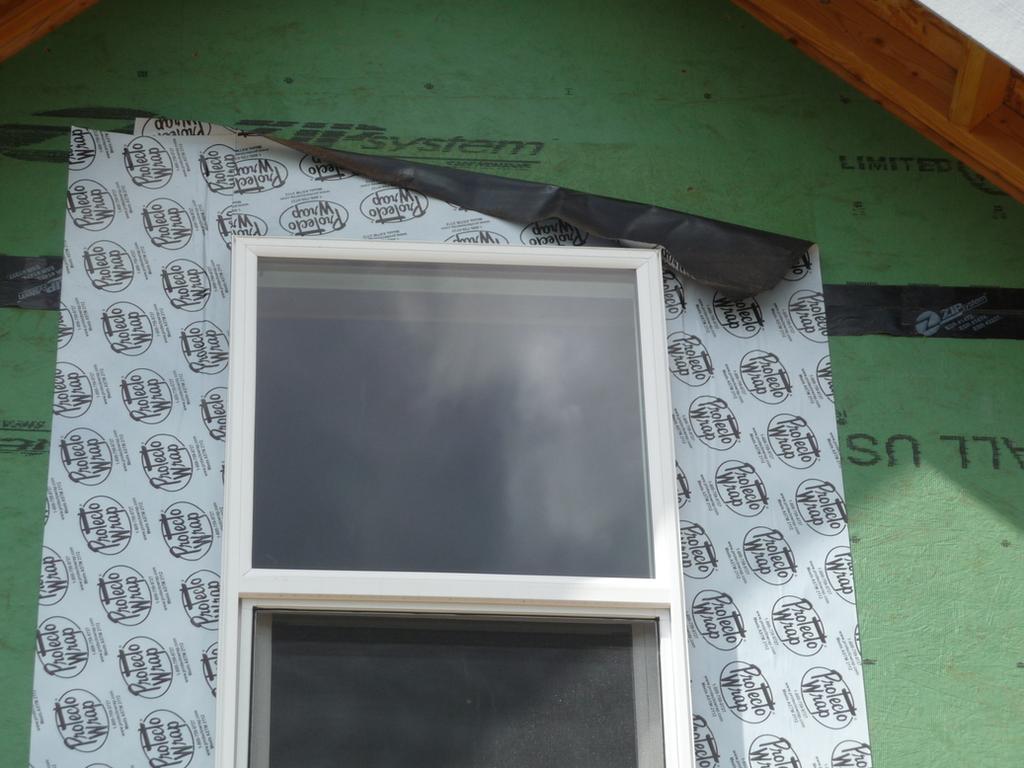
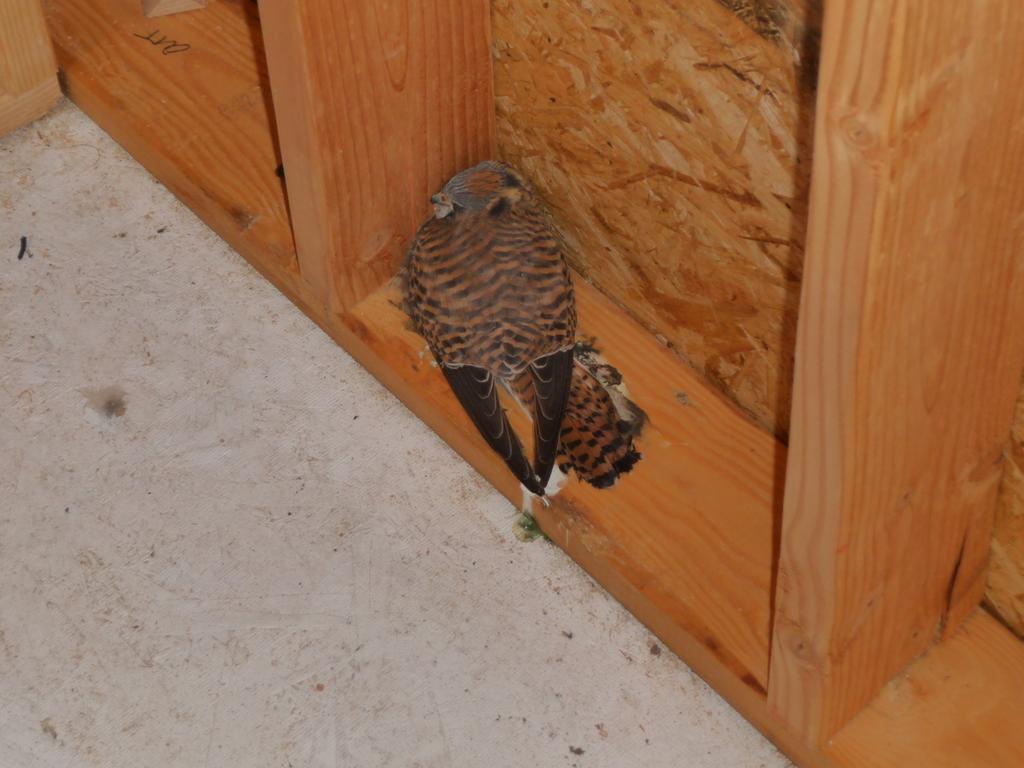
I hadn’t visited the cabin since January and was concerned about the condition it might be in after the harsh winter but everything was fine with the exception of a few minor issues. A bit of the sealing tape had blown loose from one of the windows, the cover over the generator and compressors had been blown to shreds, and there was a dead bird inside. The generator started on the third pull in spite of being exposed to the weather for several months. I’m continually amazed at how well a $300 generator has operated over the last three years.
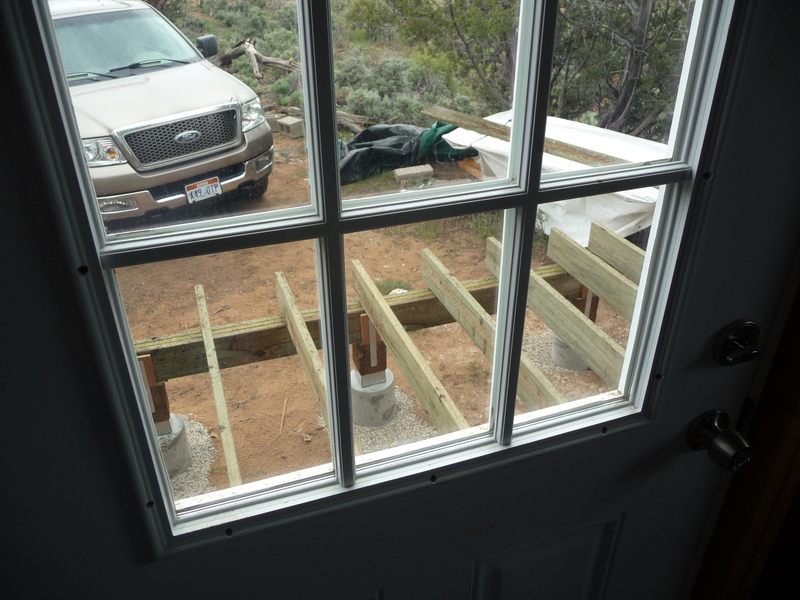
This spring I started working on the front porch. I decided to build the porch before installing siding reasoning that it would be easier to install the siding around the porch rather that cutting siding out later or trying to calculate where the porch was going to be installed.
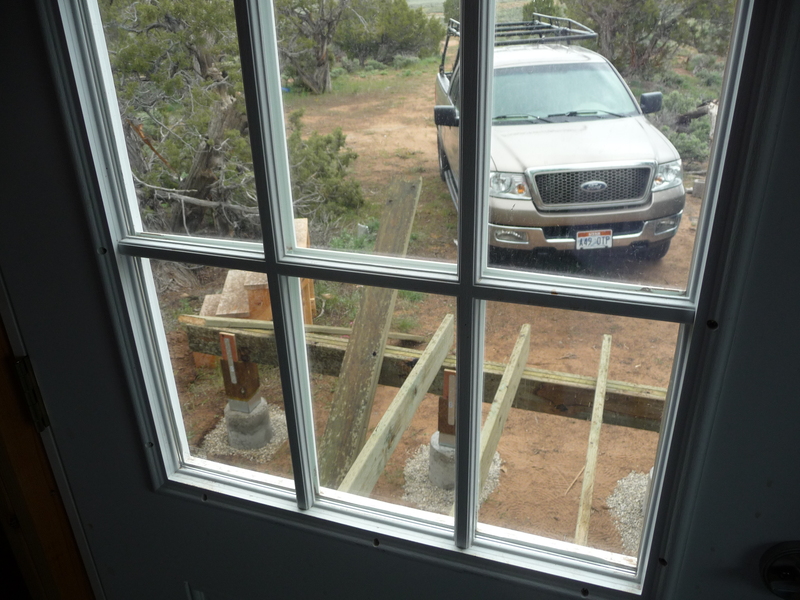
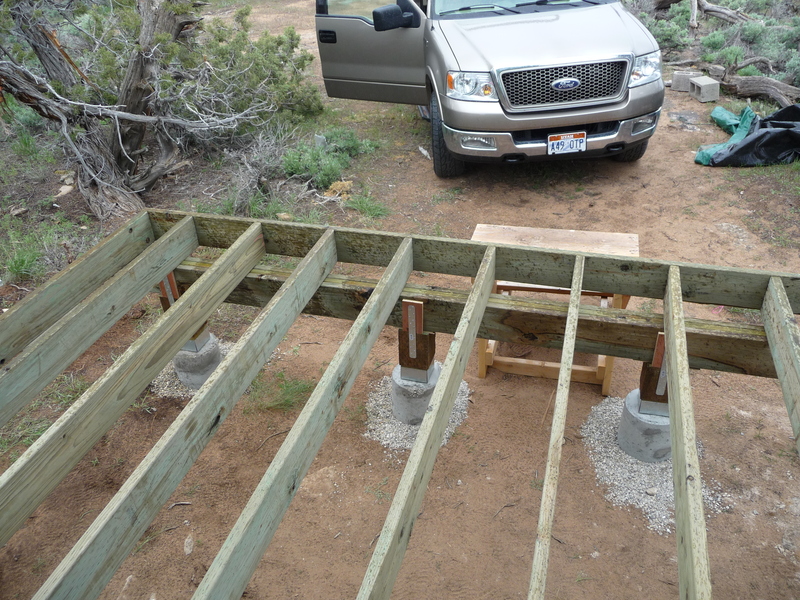
The porch will be a covered “deck” extending 8 feet from the front of the cabin and the full width (14 ft.). It will be attached on the cabin side via a double 2x8 ledger and the front will be supported by a triple 2x8 beam supported by 6x6 posts resting on 4 concrete piers.
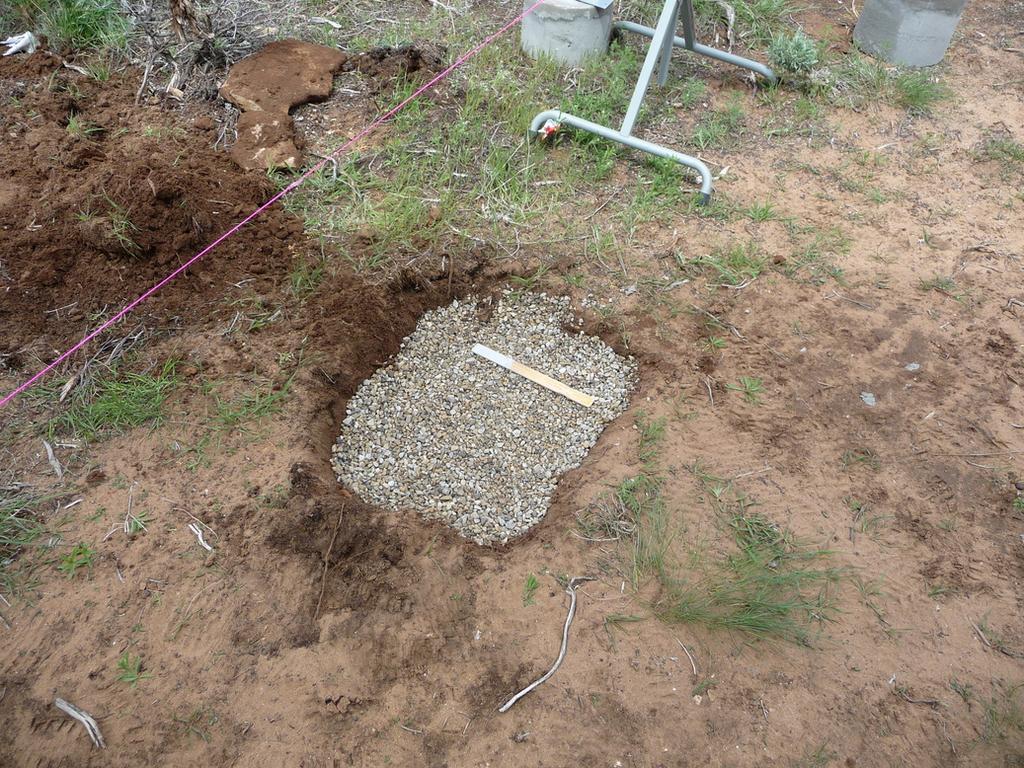
The only precast deck piers available locally are designed for 4x4 posts and are of dubious quality so I created my own piers by mixing concrete and filling 5 gallon buckets. I then cut the buckets off (they wouldn’t slide off in spite of greasing the sides w/ motor oil before pouring) and attached 6x6 post bases with 1/2” wedge anchors.
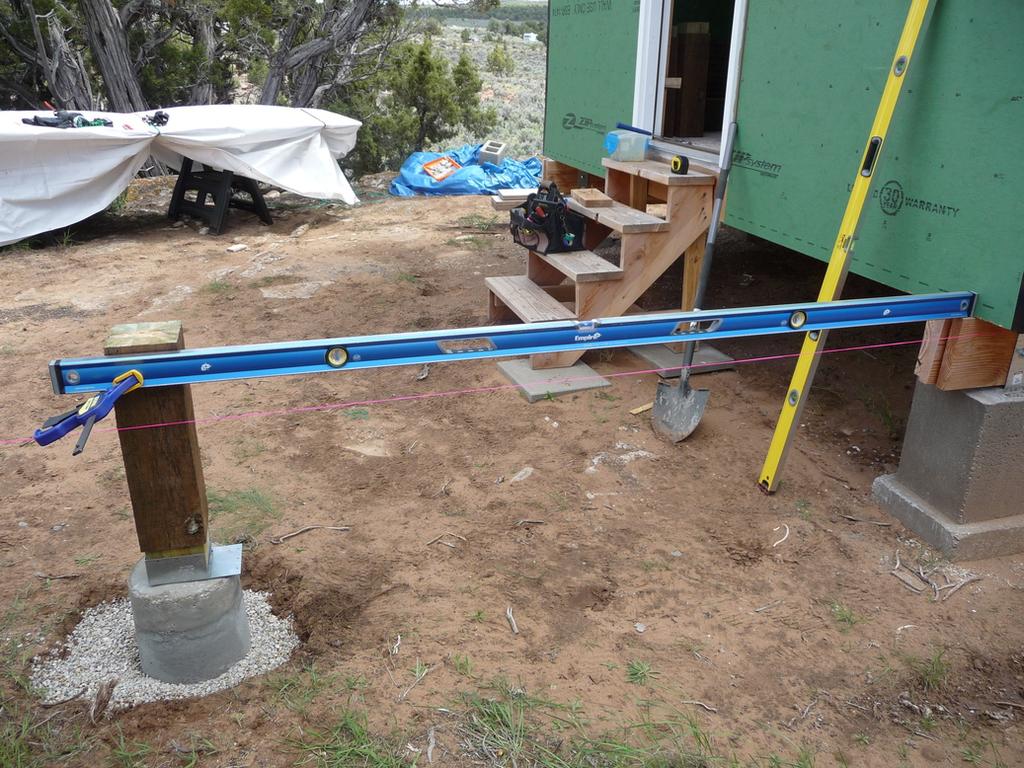
Installing the piers wasn’t difficult and involved digging a few inches down to solid rock and leveling the holes with gravel. There was one protruding piece of jagged rock in one of the pier locations which I had to remove with a pick axe and sledge hammer. The most difficult part of setting the piers was getting them lined up correctly but since they support a beam which will then support the deck joists, positioning wasn’t absolutely critical.
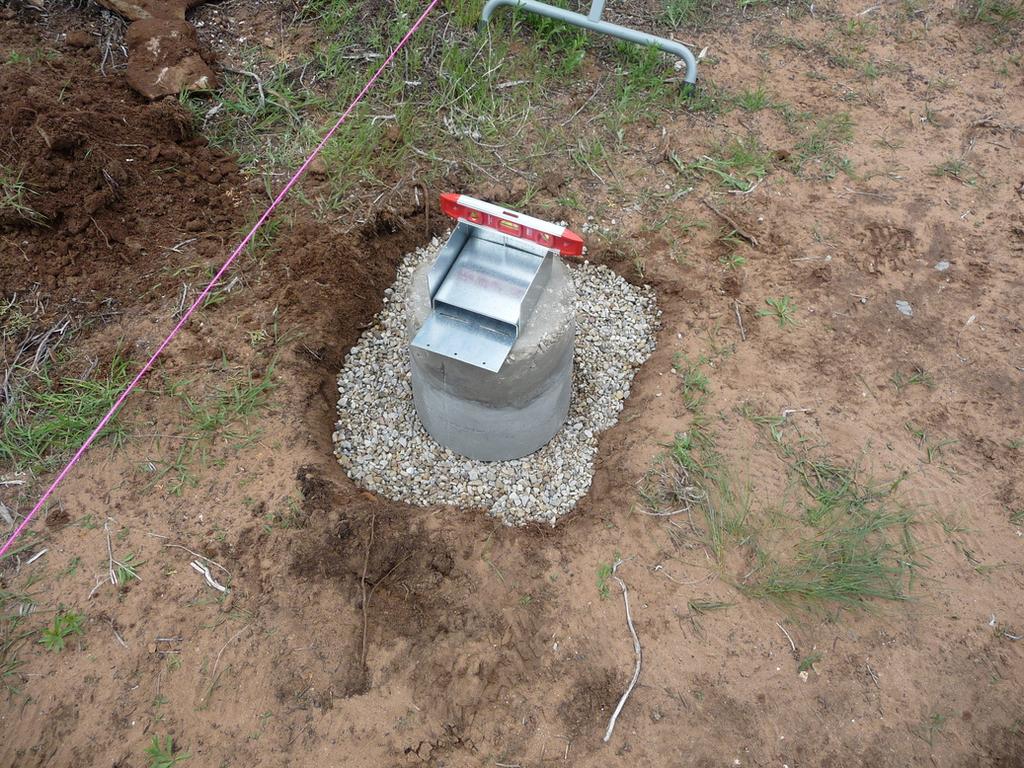
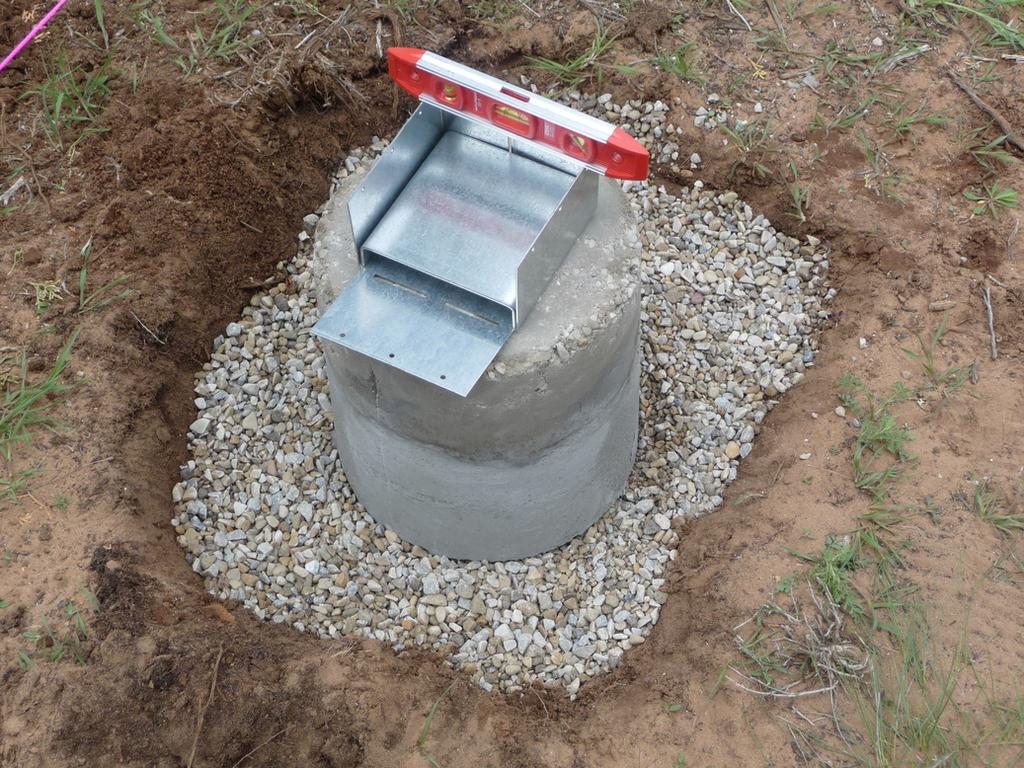
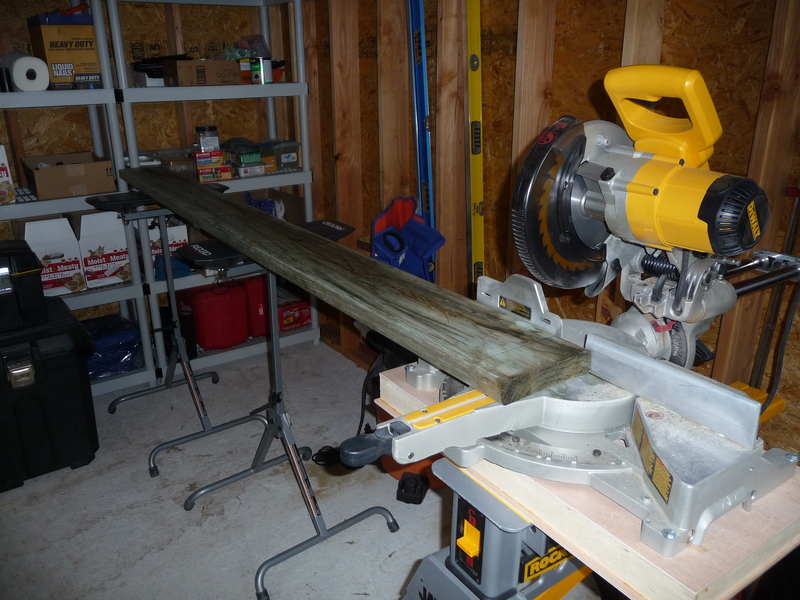
The concrete piers support treated 6x6 posts which will then support the beam. An issue arose when I discovered that the 6x6 posts I ordered were actually a full 6 inches square instead of a nominal 5-1/2 inches. The metal post bases were sanely designed for a “standard” 6x6 and the posts were 1/2” too big to fit in the bases. I ended up cutting a giant tenon on the end of each post using the table saw and a dado blade. This worked fine but required many extra cuts as I had to cut down the 8 ft 6x6 into 2 ft pieces in the shop so I could cut the tenons on the table saw prior to taking them to the cabin site. Cutting a 6x6 post requires cutting each side to the full depth of the circular saw and finishing the uncut center portion with a sawzall so making the tenons involved 15 extra cuts.
Once the piers were in position, I was able to mark and cut the corner posts using a new 96” level to line them up with the bottom of the cabin and cut the inner posts to size based on the height of the outer posts.
Weather permitting, this weekend I’ll be working on the beam, ledger, joists, and decking.