One man's struggle to take it easy
Category: Mini-Cabin
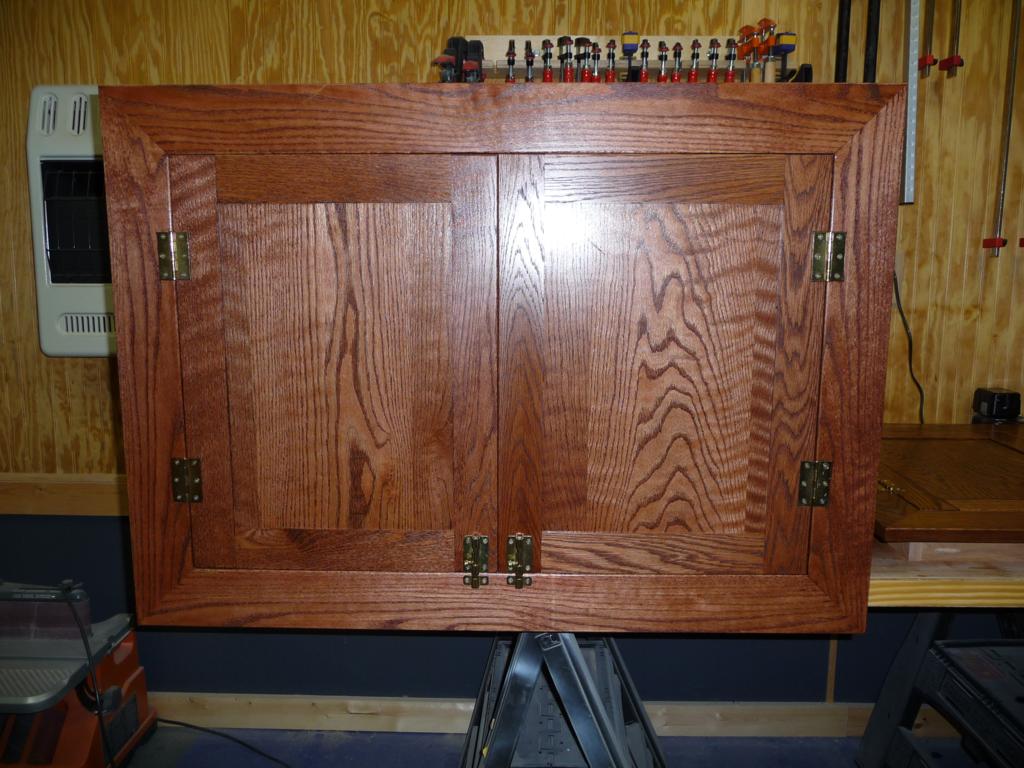
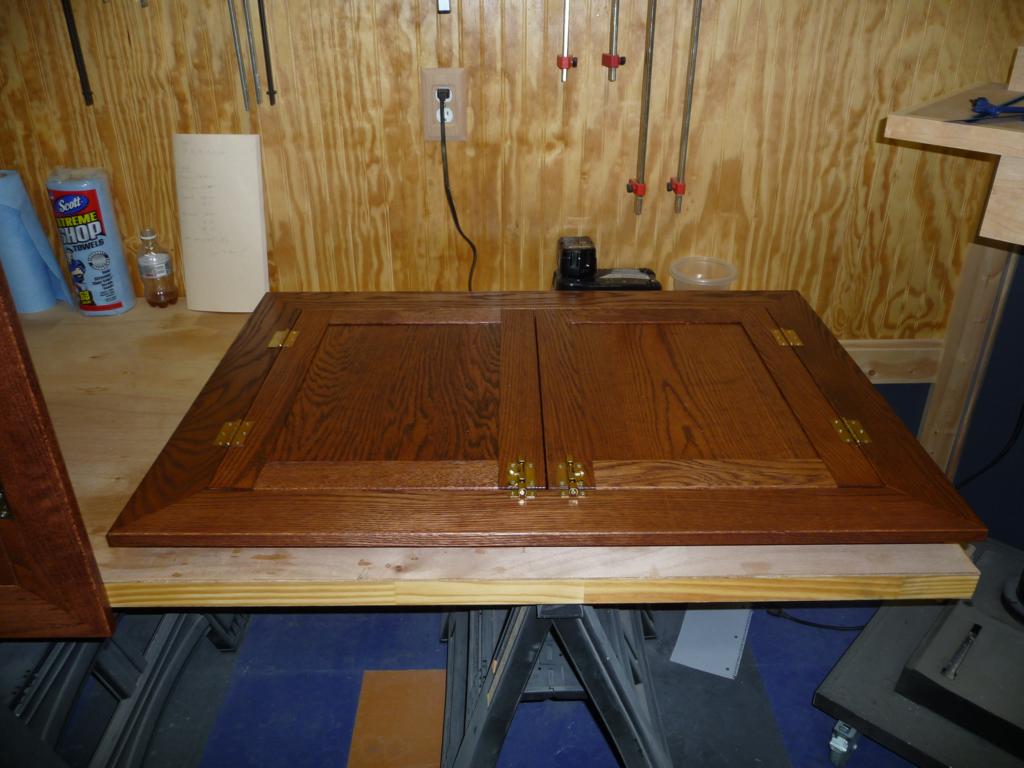
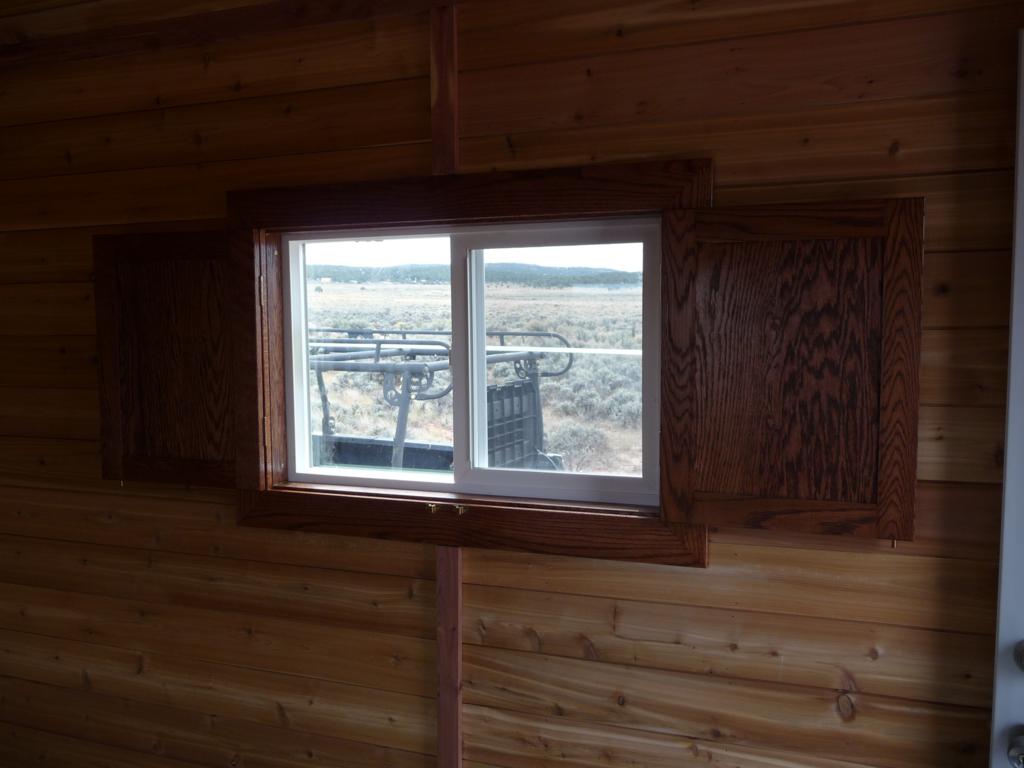
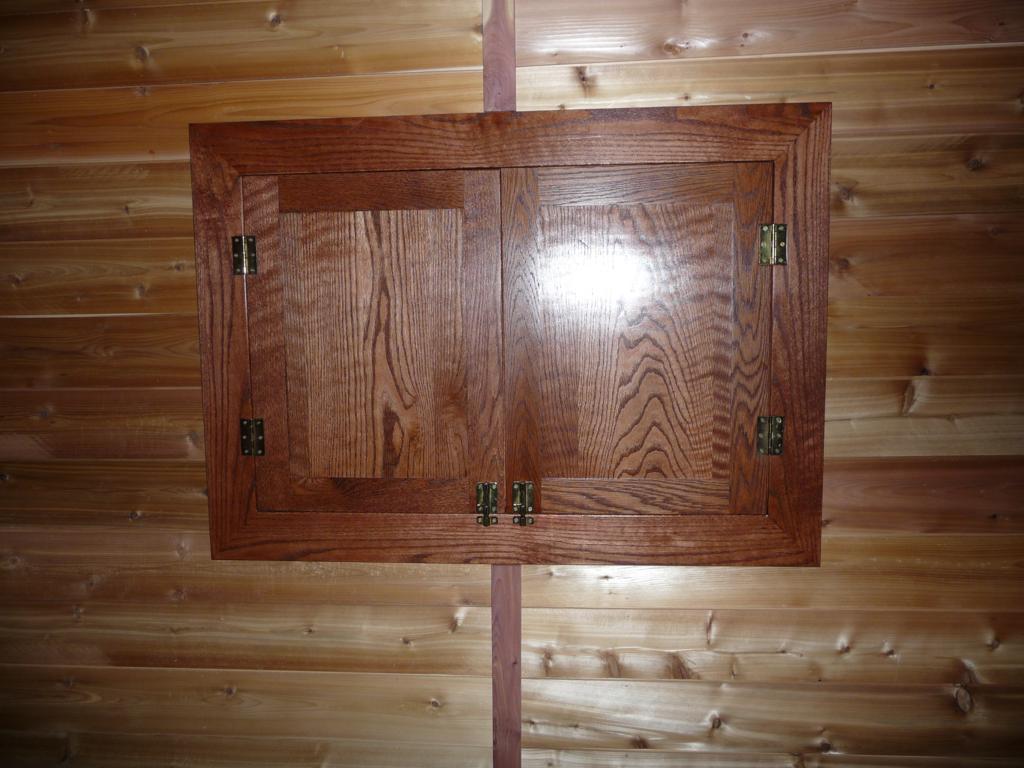
Building a Mini-Cabin: Part 9 Shutters
Sunday, Jan 03, 2010
I wanted to make the mini-cabin as impervious to the casual thief or trespasser as possible so I built some wooden shutters for the interior windows. The shutters are fairly solid so will make gaining entry through the windows difficult as well as preventing inspection of the contents of the cabin by any would-be pilferers.
I made the shutters out of white oak just because that’s what I had laying around. They don’t really match the cedar but I just won’t tell my interior designer.
You may be saying “those are some mighty fancy shutters for a glorified shed” and you’d be making a valid assessment.
Building a Mini-Cabin: Part 1 - Introduction
Saturday, Jan 02, 2010
After purchasing 60 acres of land upon which to build my eventual retirement cabin, I was anxious to start working toward the goal of turning it into a place to live. The longer term goal is to build a cabin which I would eventually live in but that was still in the early planning stages. But I wanted to start something right away so I decided to build a small mini-cabin would would serve the following purposes:
- Provide a place to store building supplies so I wouldn’t have to haul them back and forth while building the larger cabin.
- Provide a place to sleep overnight while building the main cabin.
- Provide me with a little more experience in building methods and design.
- Allow me to evaluate the challenges of building in a location with no electricity or water.
- Provide a place to “camp-out” recreationally on the land.
Honestly, my original intention was to build a “shed” to provide storage and overnight camping but as the project progressed I got a little carried away with adding features and amenities and ended up with what I consider to be a true “mini-cabin.” But since the project started out as just a shed, I did cut a few corners in its construction, notably in the foundation and some areas of framing. I’ll try to point those out in the construction details in later posts.
General Description of the Mini-Cabin
The mini-cabin is exactly 8’ by 12’ providing an interior space of roughly 90 square feet. The walls are 7‘3” high and the roof uses a ridge beam and rafters rather than trusses for an open ceiling. There is one door and two 36”x24” windows.
In the following posts I’ll describe the building of the mini-cabin.
Building a Mini-Cabin: Part 2 - Preparation
Saturday, Jan 02, 2010
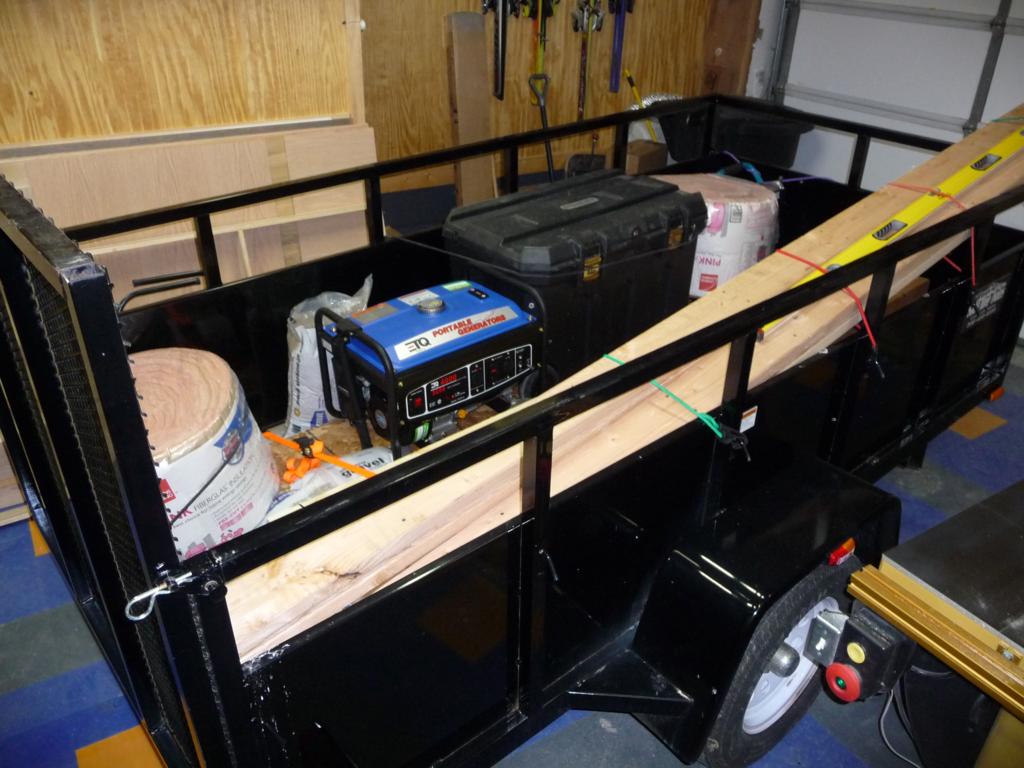
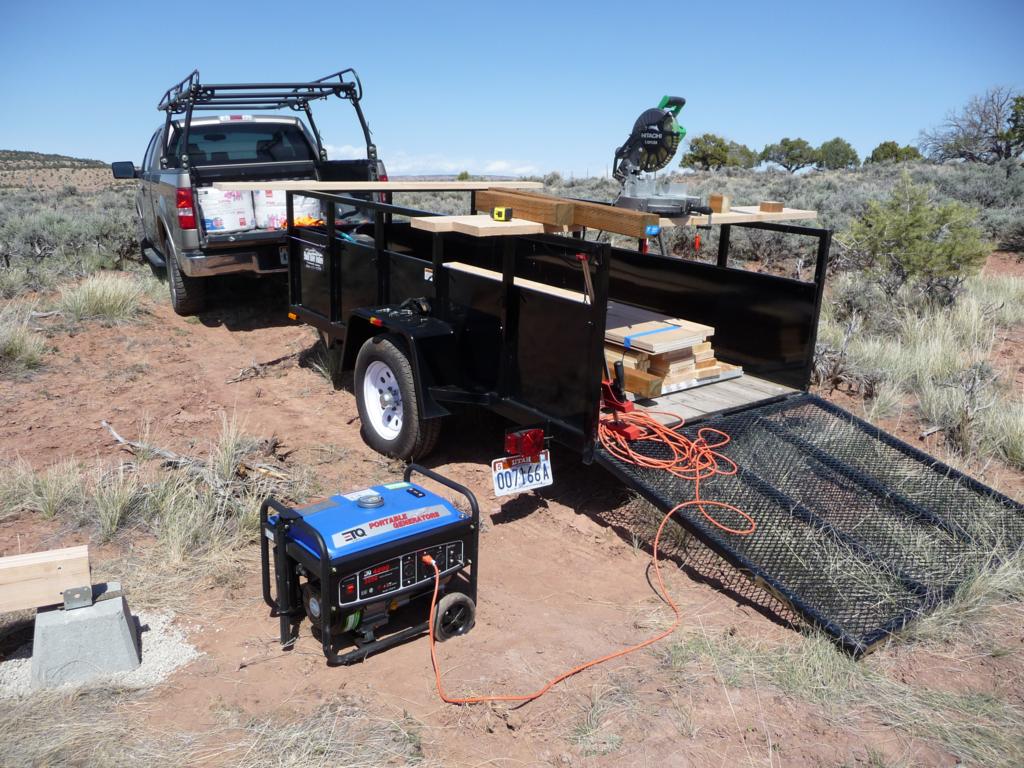
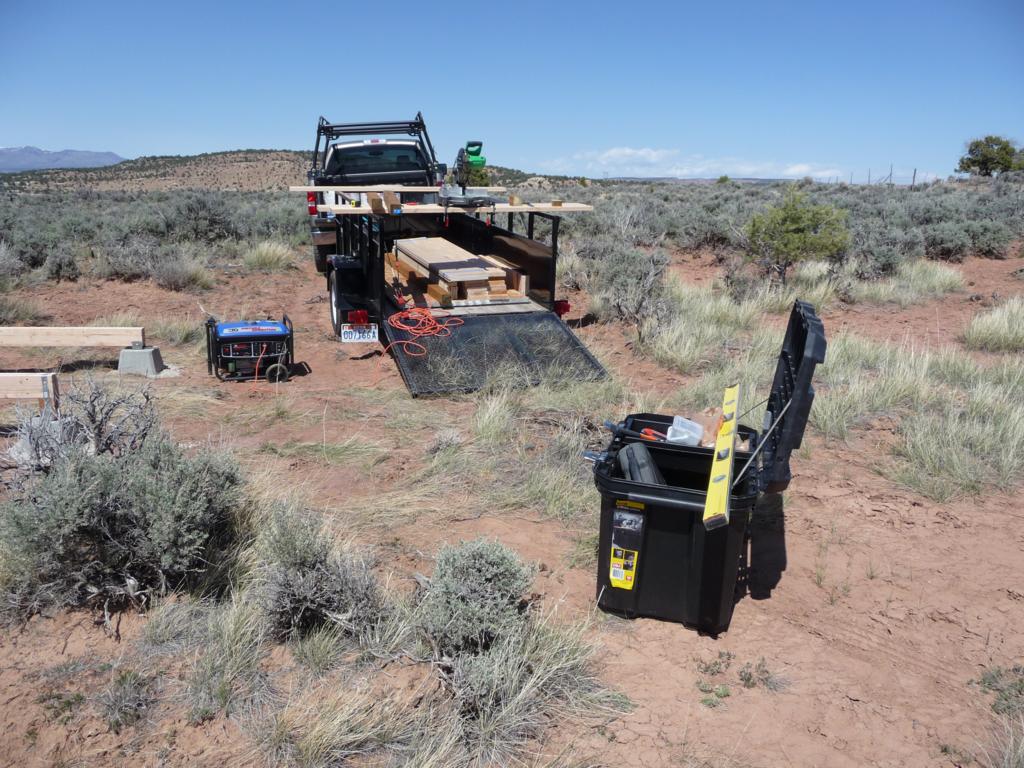
Building on land with no water, electricity, or existing structures entails certain challenges. The primary challenge is lack of electricity to operate power tools. To address this, I purchased a 3500W gas generator for about $300. The generator will run about 11 hours on a tank of gas (4 gallons) at half load. It’s a cheap generator but has worked really well so far and starts easily. For $300 I think it’s a bargain. the specific generator I purchased is an ETQ TG28P41 3,500 Watt 7 HP 208cc 4-Cycle OHV Gas Powered Portable Generator. I purchased it from Amazon.
Not too long ago I purchased a 5’x10’ utility trailer. This is generally what I used to transport tools and supplies back and forth from the build site. It has a ramp on the back which makes loading and unloading easy and sidewalls which sometimes served as makeshift sawhorses.
Tools
Most of the tools I used I already owned but I did buy a few new ones for the project:
I bought a cheap Hitachi 10” chop saw because I didn’t want to haul my Makita slider with its stand out every time. I did end up using the slider once or twice but the Hitachi worked great for 95% of what I was doing.
I bought a Milwaukee roofing nailer which worked very well.
I sold my MAC700 compressor because it didn’t drive my framing nailer very well and bought a MAC2400 to replace it. It was better with the framing nailer but I still wasn’t that satisfied. These compressors have a fixed pressure at which they kick on which apparently isn’t high enough to fully drive my framing nailers so when the tank pressure gets low, the nails aren’t driven fully. I can’t find any information on the internets about this problem on this compressor so maybe it’s just me. I would have bought a different compressor but I wanted one with a low enough amp draw to run off my generator, which the MAC2400 did fine.
Later in the project, I bought a cheap Ryobi portable table saw, primarily to cut interior siding and trim. It actually worked okay but using it after using a cabinet saw was a difficult adjustment. It just sounds and feels wrong somehow. When I build the main cabin, I may get a nicer portable like the Bosch or Jet or at least build a better stand for the Ryobi.
I bought one of those big tool carriers on wheels to haul hand tools and supplies back and forth. It’s just a plastic box on wheels with a handle and worked okay. It has a single tray but mostly the tools are just piled up in there. I spent time before every trip filling it with only the tools I thought I would need to keep the weight down and as uncluttered as possible.
Preparation
I think building the mini-cabin went well for two main reasons:
- I did everything I could back at the shop. This included building the beams of the foundation, cutting all the framing members to size, cutting the holes in the siding for the windows, etc. Obviously, this required a much greater degree of advance planning but it was so much easier to work in the shop than on-site that I believe it probably cut construction time in half.
- I made sure I had everything I needed before driving to the property. I’m actually really surprised I never got to the building site and discovered I had forgotten some critical tool or supply for that day’s task but I didn’t. I think I usually spent the week leading up to a weekend’s work making a mental list of what I would need. Driving two hours round trip to get something I’d forgotten would have seriously impacted the timeline.
Here are some pictures of my trailer loaded for a trip out to the site and using the trailer as a support for the chop saw: