One man's struggle to take it easy
Category: Mini-Cabin
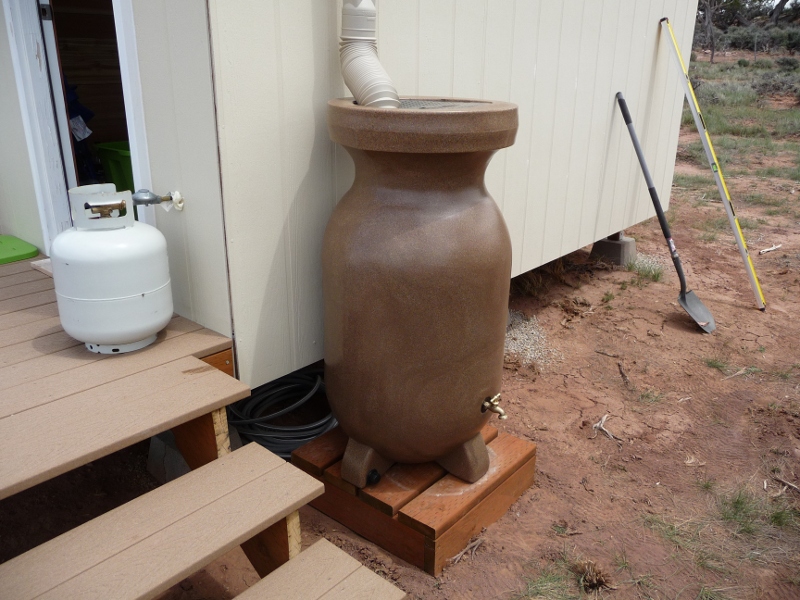
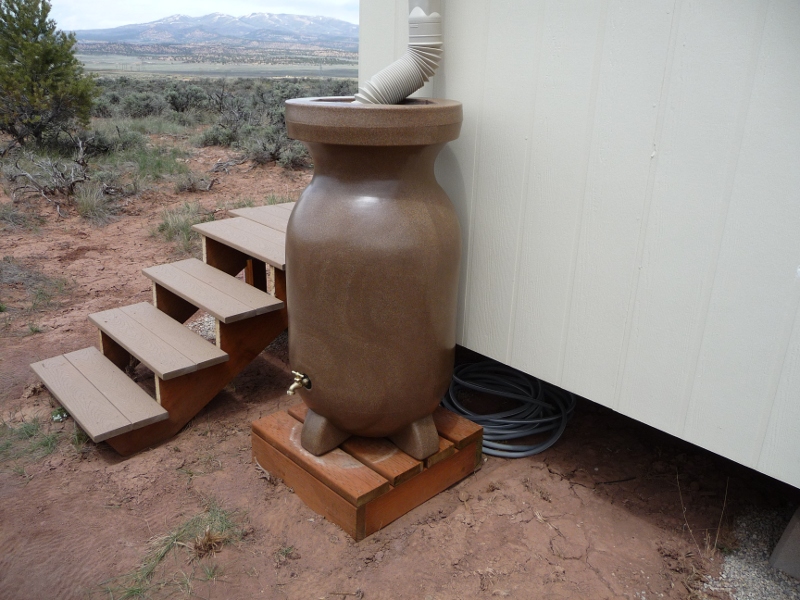
Mini-Cabin: New Water Collection Container
Monday, May 10, 2010
In a previous post I mentioned that the plastic garbage can I was using to collect roof runoff had developed cracks on the bottom due to freezing during the winter. This past weekend I replaced it with a new container I purchased from Amazon. It seems to be more heavy duty than the garbage can but I probably won’t know until next winter if it will crack also.
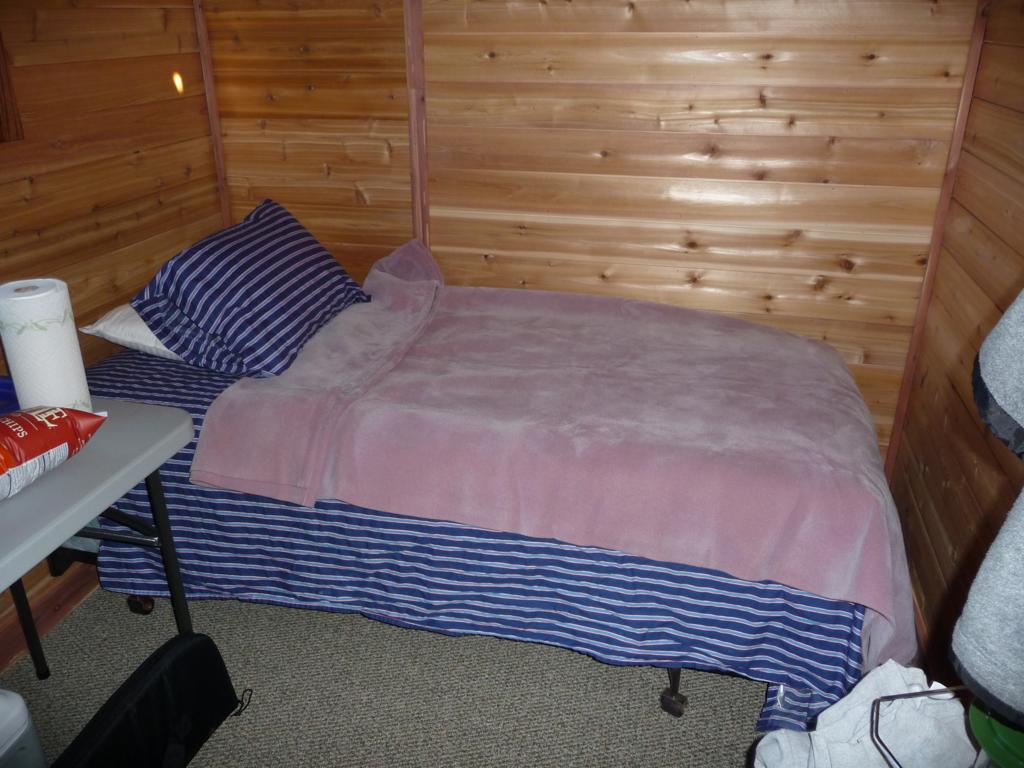
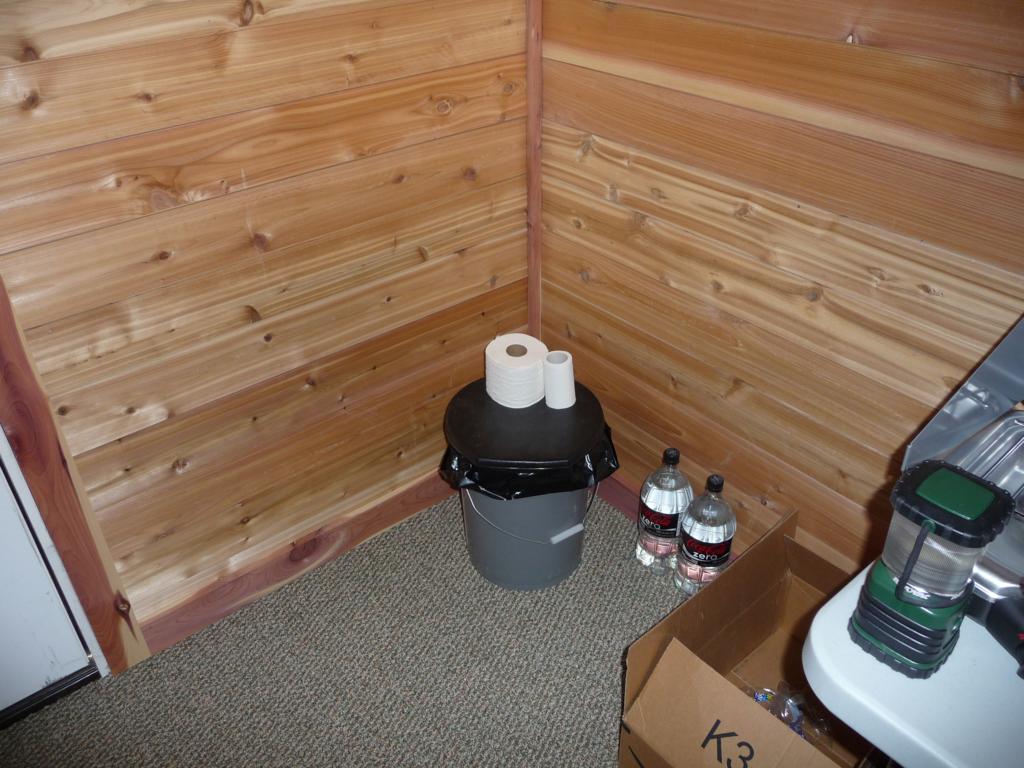
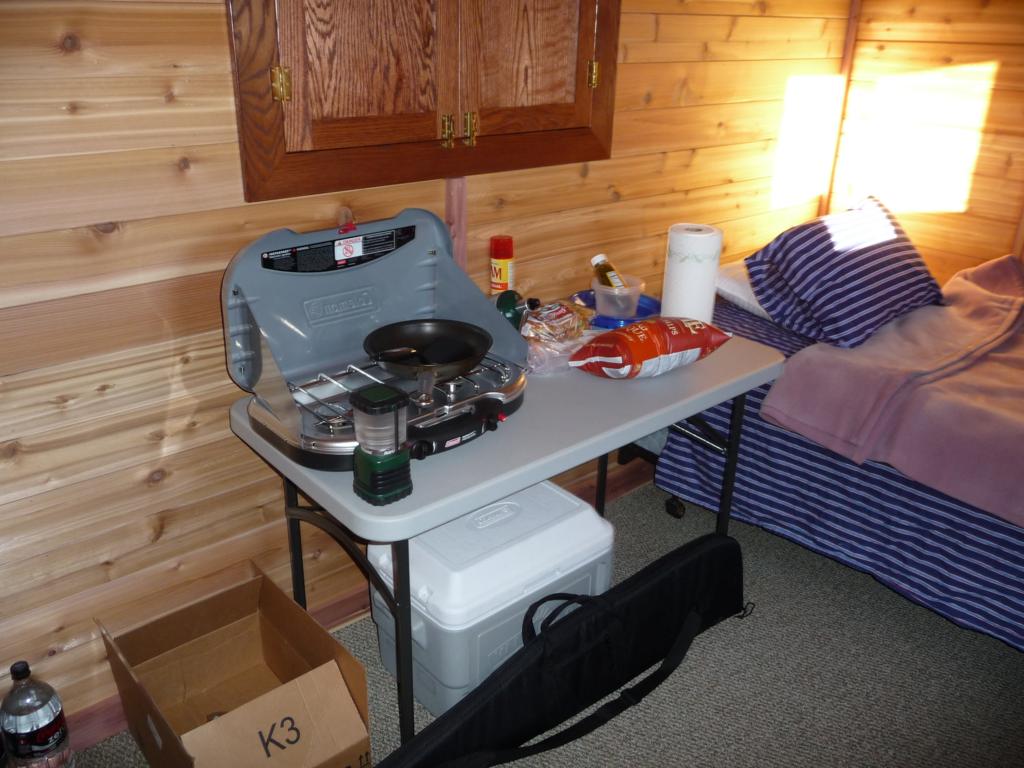
Building a Mini-Cabin: Part 10 Furnishing
Tuesday, Jan 05, 2010
With the construction more or less complete, I stayed overnight in the mini-cabin for the first time.
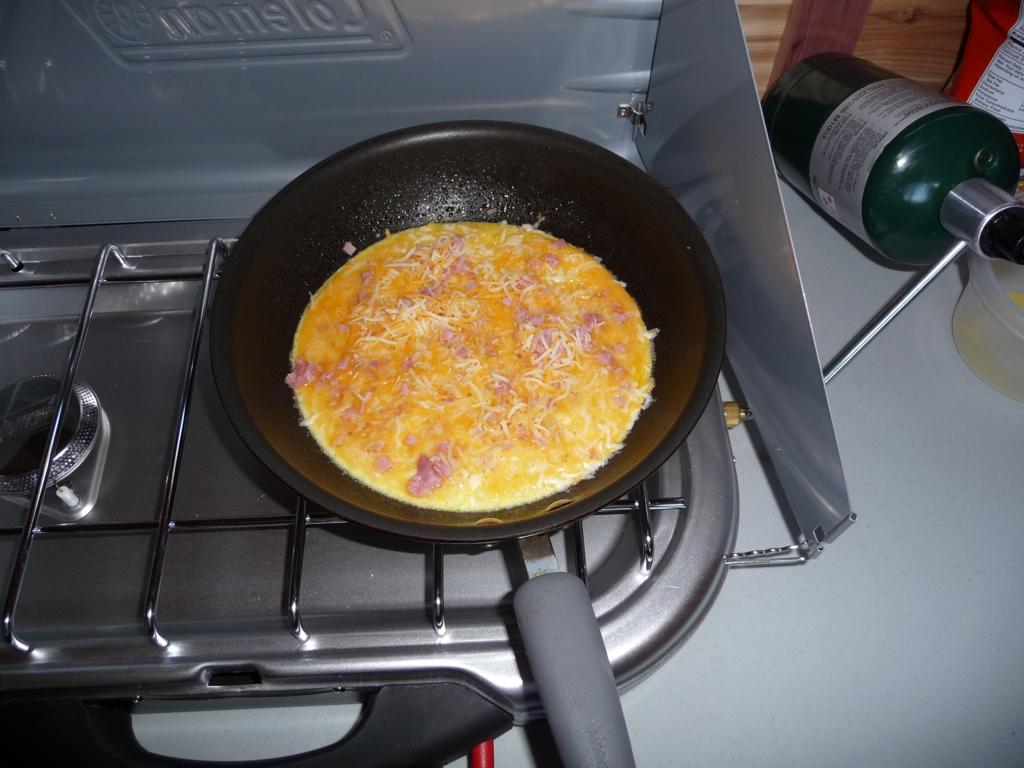
I added a bed, a “bathroom”, and a “kitchen.” Pictures follow:
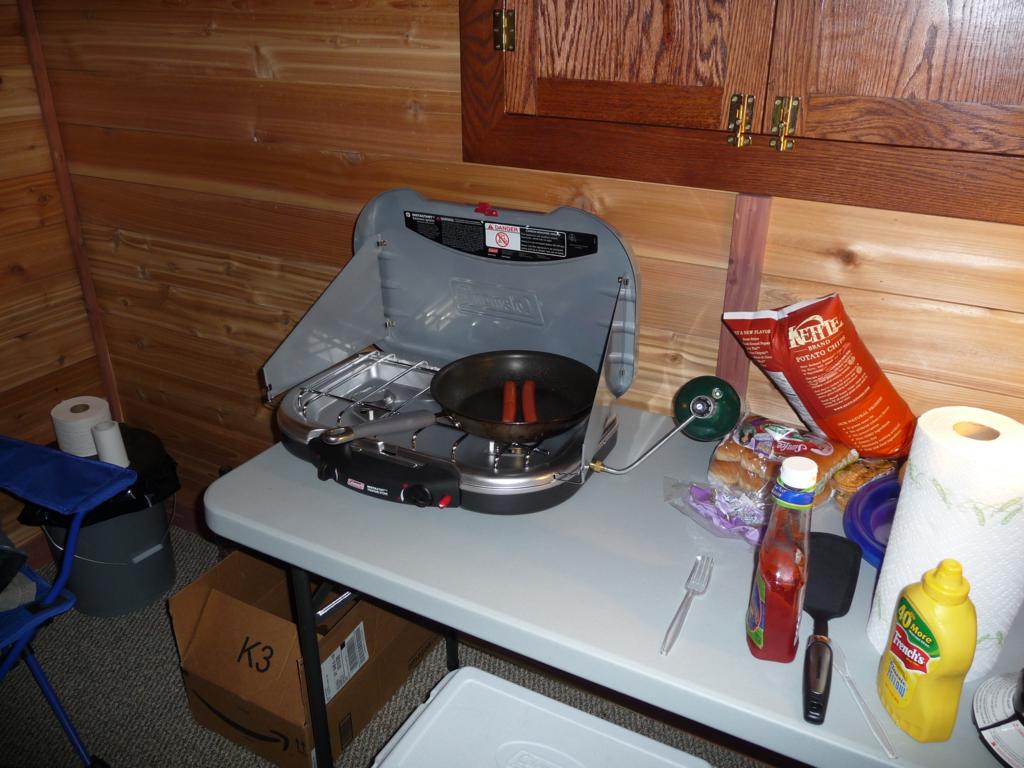
Building a Mini-Cabin: Part 11 Power and Heat
Tuesday, Jan 05, 2010
For my second overnight stay at the mini-cabin I added some amenities.
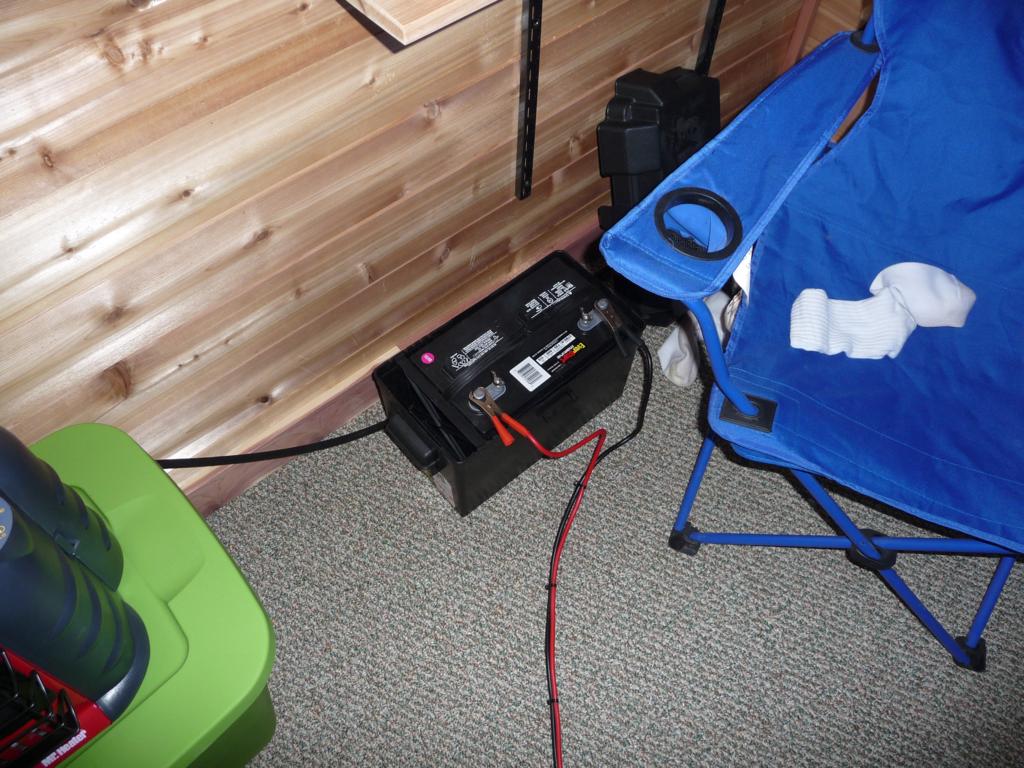
I bought a deep-cycle battery and inverter for power. I charge the battery at home and transport it to the mini-cabin when I go. The battery provides plenty of power to run my laptop for many hours.
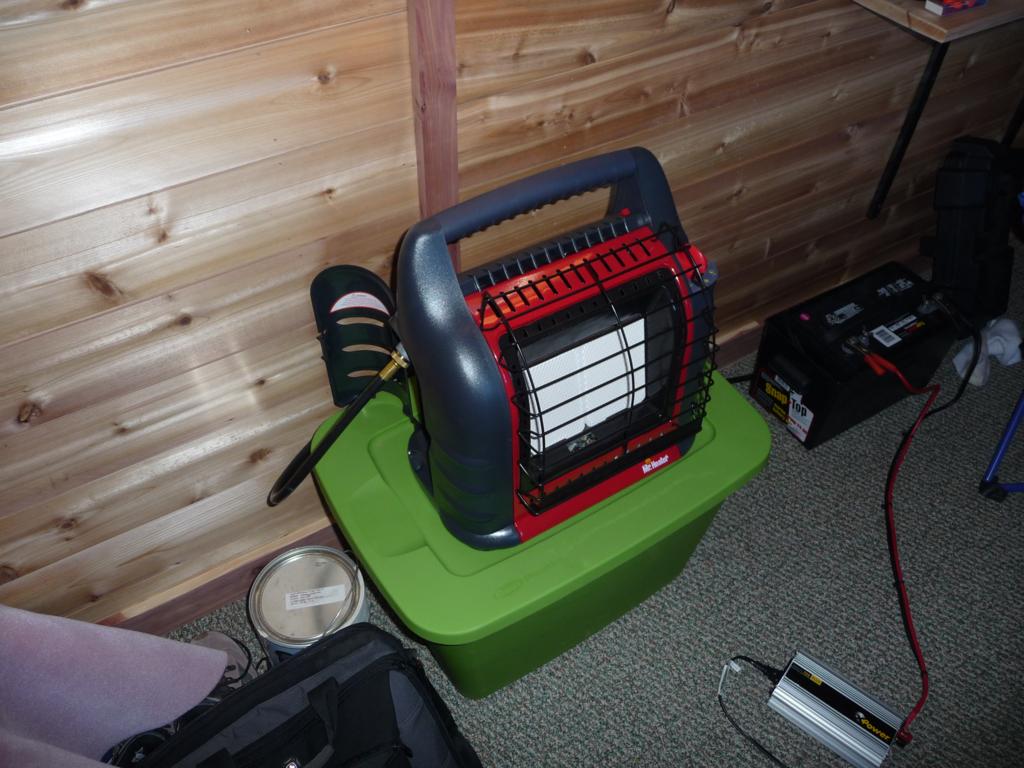
I added a Big Buddy heater which will take two 1 lb. propane canisters. Rather than use the canisters, I hooked the heater up to a 20lb. propane “grill” tank. The tank sits outside on the porch and a hose runs through a hole in the wall to the heater. The cabin is insulated well and is small enough that the heater keeps it warm on the lowest setting, even when it’s below 0 F outside.
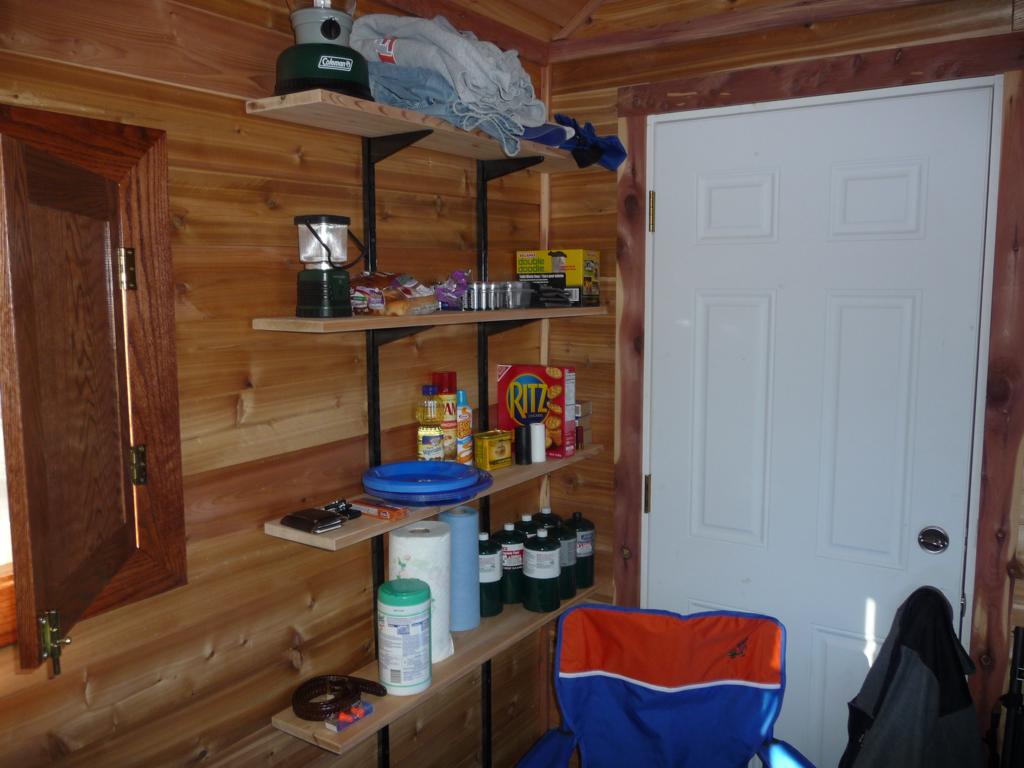
I also built some shelves to store all the items that were previously cluttering up the floor.
Building a Mini-Cabin: Part 12 Winter
Tuesday, Jan 05, 2010
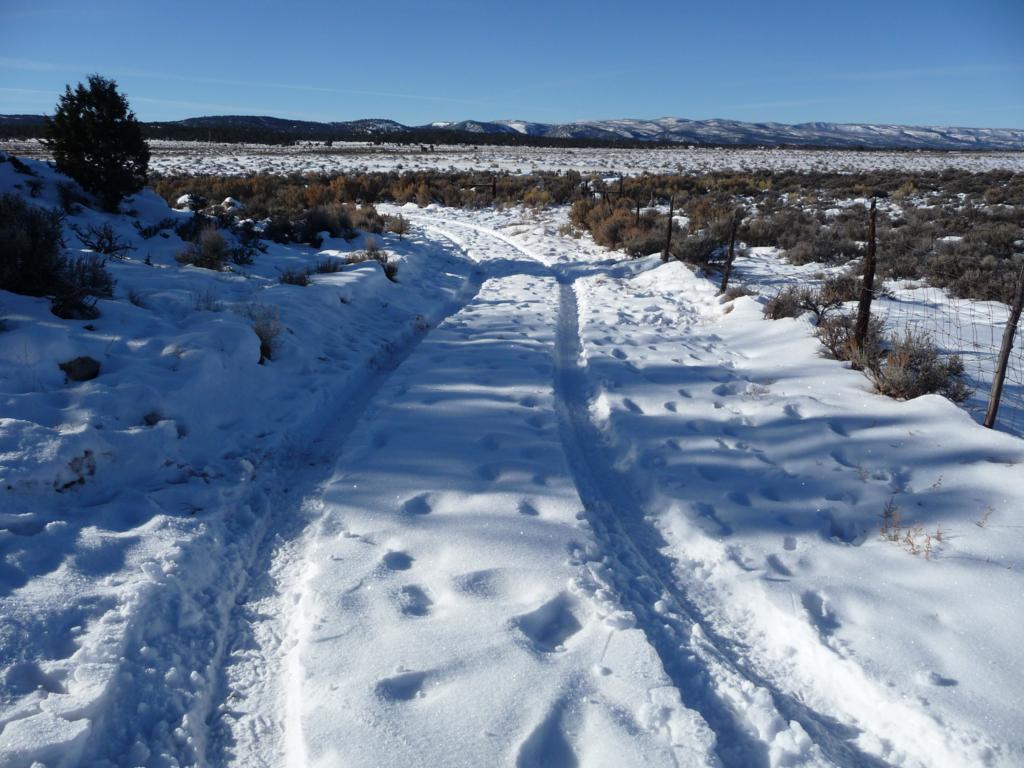
My third overnight stay in the mini-cabin took place in early January of 2010 after we had had a few significant snowfalls. The dirt road leading back to the cabin had a good amount of snow on it and getting in and out was difficult but not impossible. I added a couple of new features to the cabin, one successfully and one not so much.
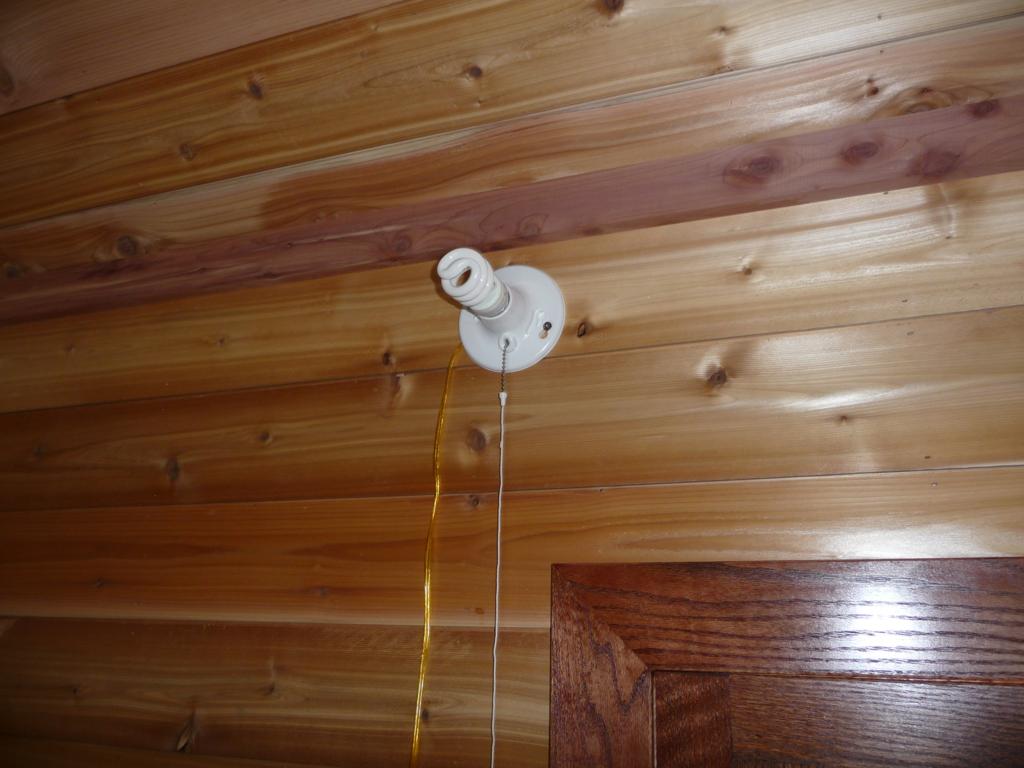
One of the issued I’d been struggling with was lighting the interior of the cabin at night. I have a propane lantern that puts out decent light but it is very noisy and propane canisters are expensive. I purchased a Rayovac LED lantern which reviews said was very bright. The reviews lied. It works well as a “nightlight” to keep from wandering around and bumping into things but hardly makes the cabin seem “lighted.” So I purchased another lantern, this time a fluorescent lantern which takes 8 D batteries. It puts out marginally more light than the LED lantern but not nearly as much as I desired. Finally, I installed a standard light socket and tried a 60W fluorescent bulb running off the inverter/battery. The worked perfectly and easily lights up the whole cabin.
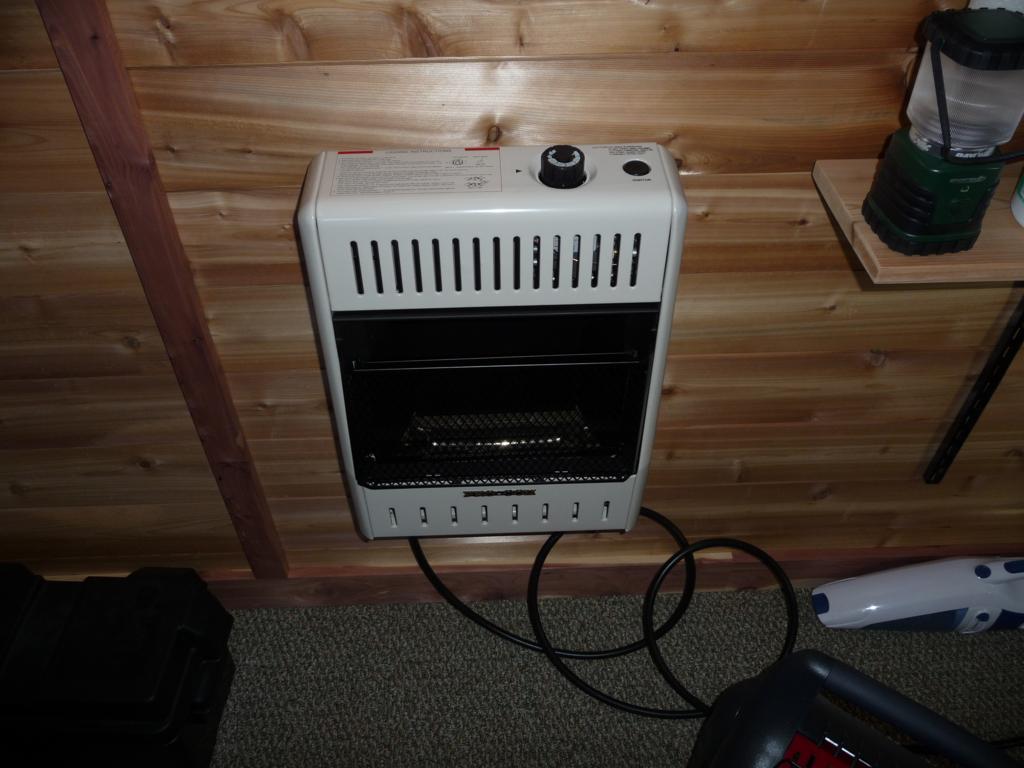
Secondly, I installed a new propane heater from Pro Com. The problem with the Big Buddy heater I had been using was that it makes the cabin too hot, even on the lowest setting and on the coldest nights. I wanted a heater with a thermostat so I bought a 10K BTU blue flame heater with a thermostat. After installing the heater and hooking up the propane tank, I got the pilot lit and turned the thermostat to the “1” setting. The main burner kicked in and stayed lit for about five seconds followed by a “click” and the burner and pilot shutting off. Repeated attempts produced the same results. At this point I don’t know if the problem is the oxygen sensor shutting down the heater due to the altitude (~6500 ft.) or a problem with the propane tank (they recommend using a 100lb. tank rather than a 20lb. tank). I’ll have to do some research to determine the issue.
Here are some pictures I took on this trip. In the last picture you can see a deer running across the property.


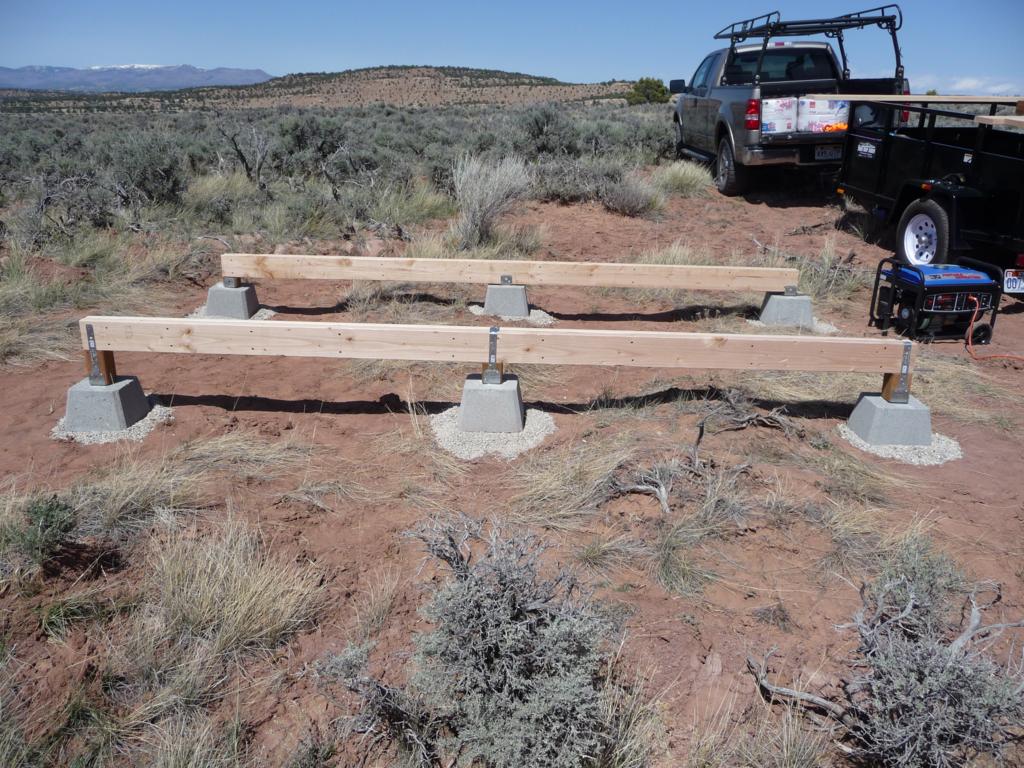
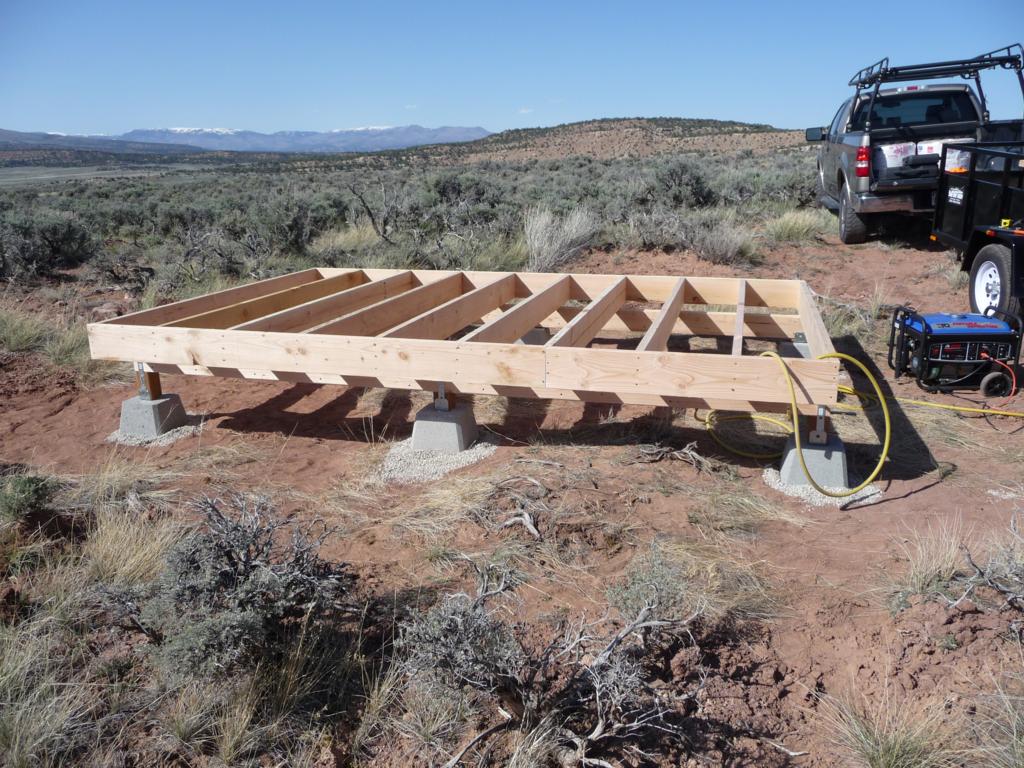
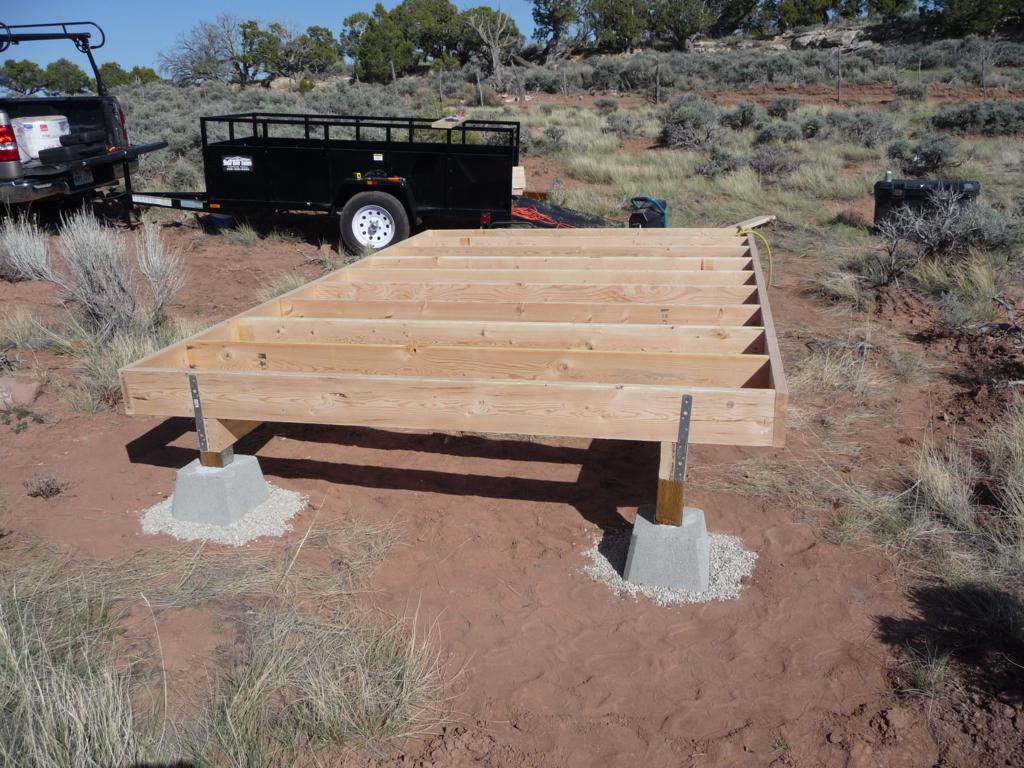
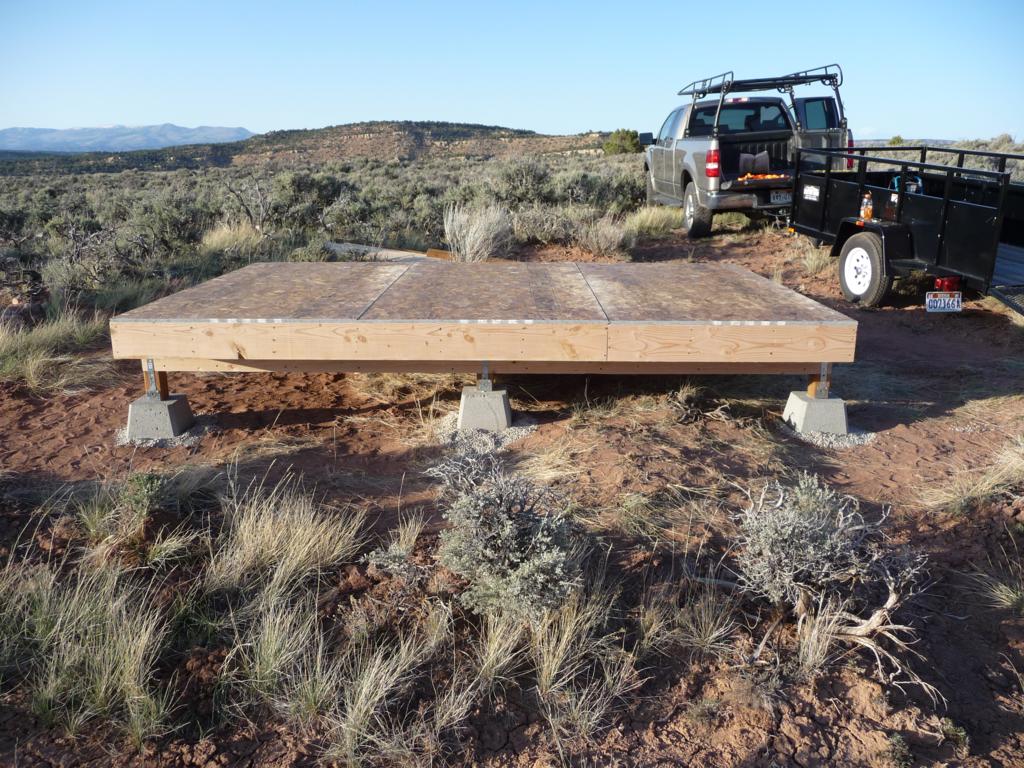
Building a Mini-Cabin: Part 3 - Foundation/Floor
Sunday, Jan 03, 2010
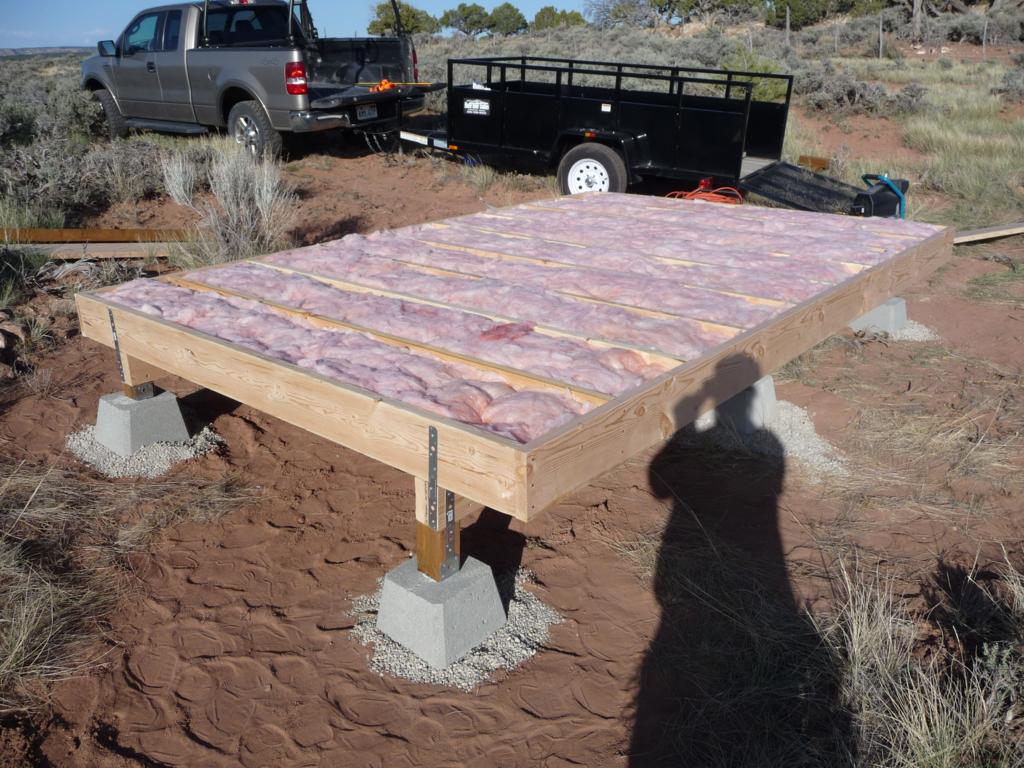
For the foundation of the mini-cabin, I used deck piers sitting on gravel filled holes. The holes are only about six inches deep. Six inches is well above the frost line so this was a big shortcut but if the structure starts to move due to frost heave I figured I could just jack it up and make it level again.
I built two 12’ beams, each beam consisting of two 2x6’s with a strip of 1/2” plywood sandwiched between the 2x6’s, screwed and glued together. The resulting beams are 3-1/2” wide allowing them to fit the brackets of the deck piers.
I used three deck piers per beam and the beams are placed six feet apart. To level the beams, I used treated 4x4 posts where necessary.
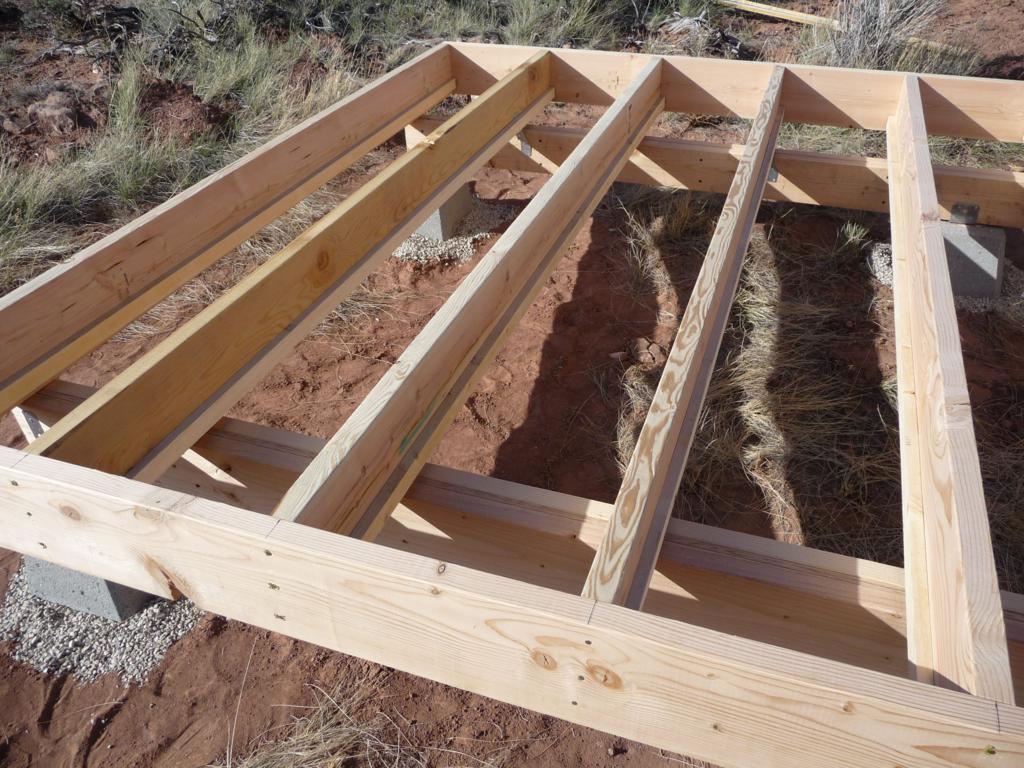
For the floor, I used 2x8 joists on 16” centers. The floor is 12’ by 8’ so the floor overhangs the beams by roughly a foot on each side.
I added insulation to the floor by first nailing 1x2’s along the bottom of each joist and then laying a piece of 1/4” hardboard in the joist spaces, resting on the 1x2 strips. This forms a bed for the insulation to rest on.
Adding the insulation was then as simple as laying it into the joist spaces. I used 5-1/2” thick fiberglass insulation.
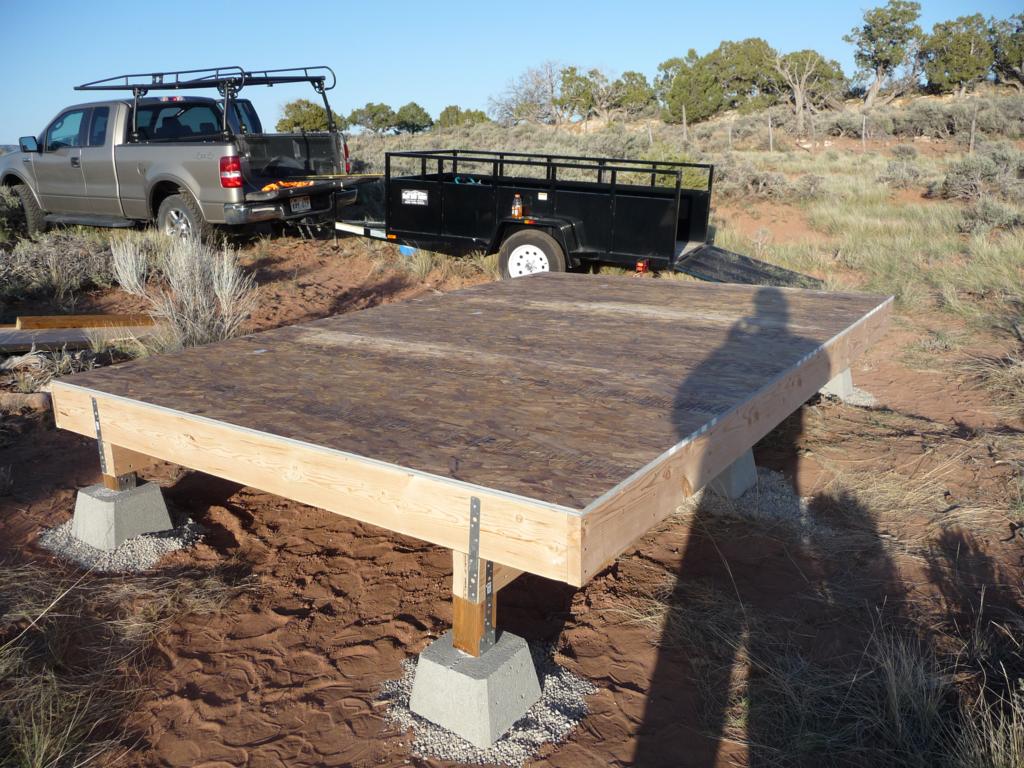
Finally, three sheets of 3/4” tongue and groove OSB are nailed onto the floor joists.
The resulting floor turned out perfectly flat and level and was very solid to walk around on.