One man's struggle to take it easy
Cold and Snow
Friday, Dec 21, 2012
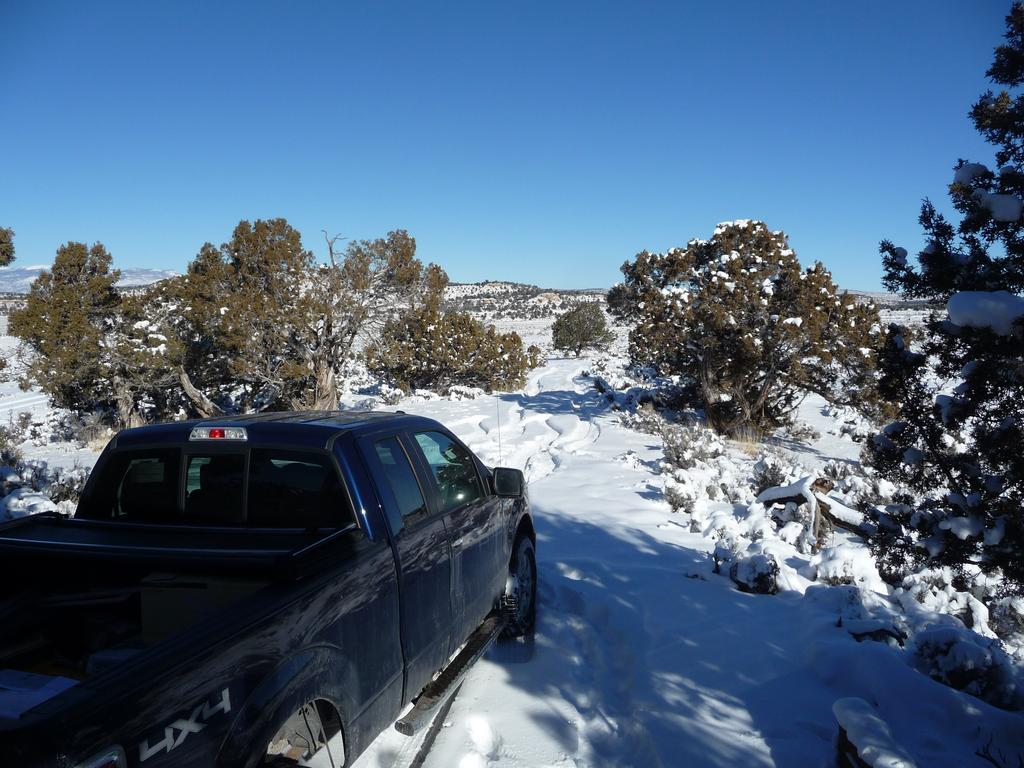
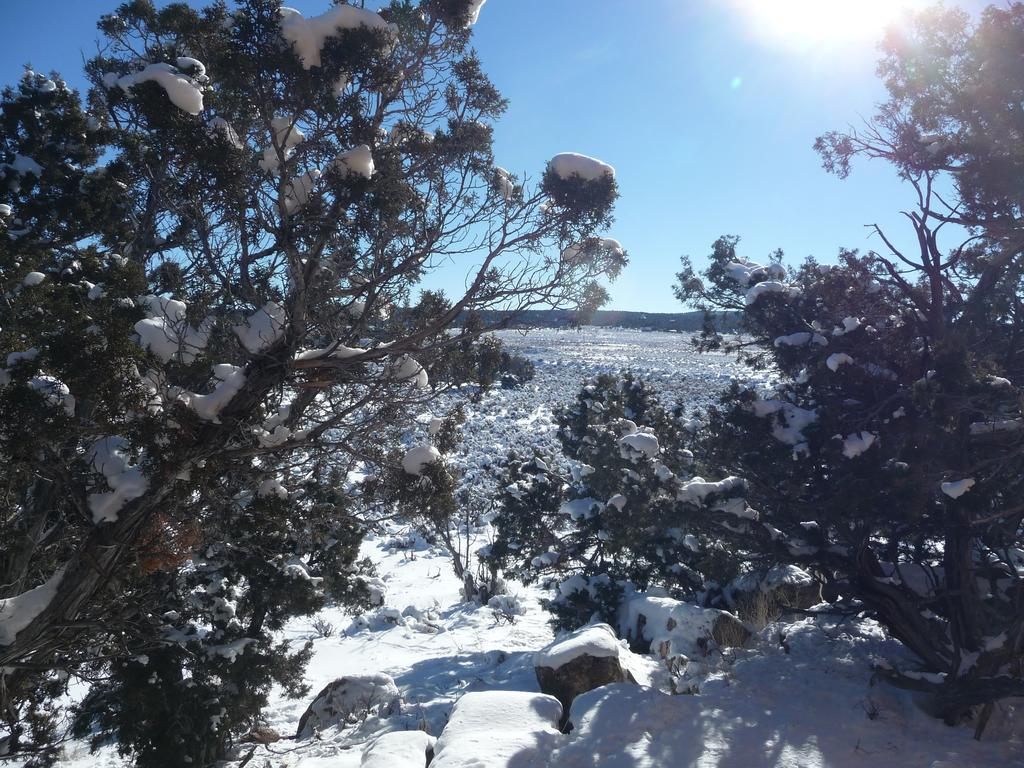
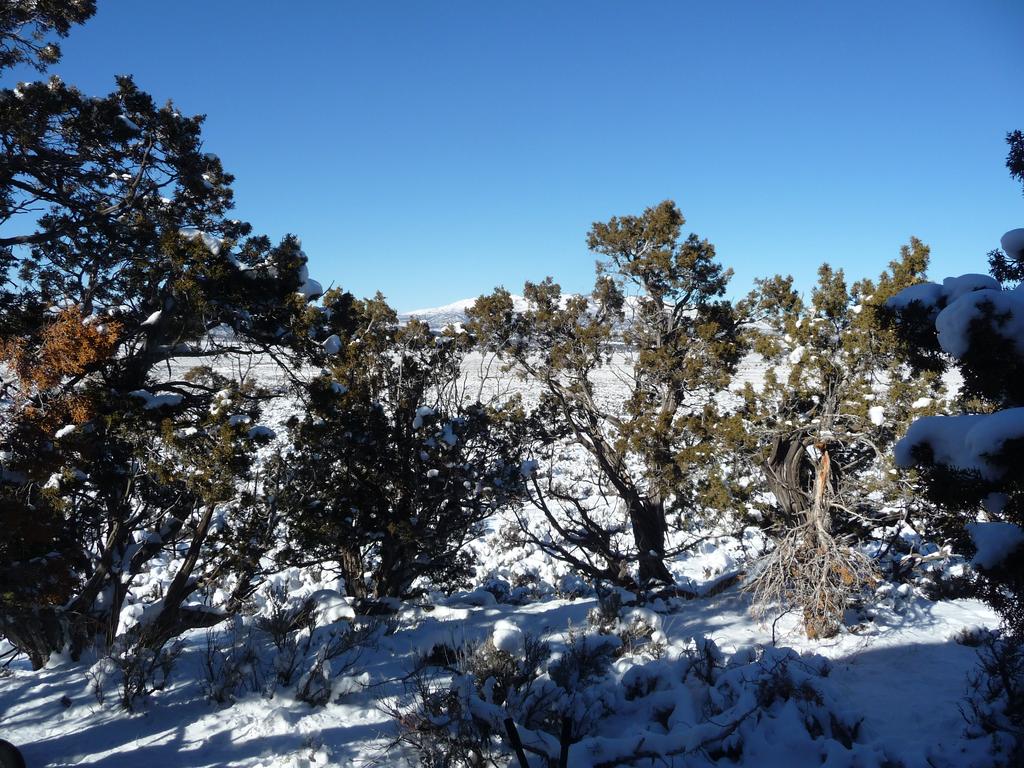
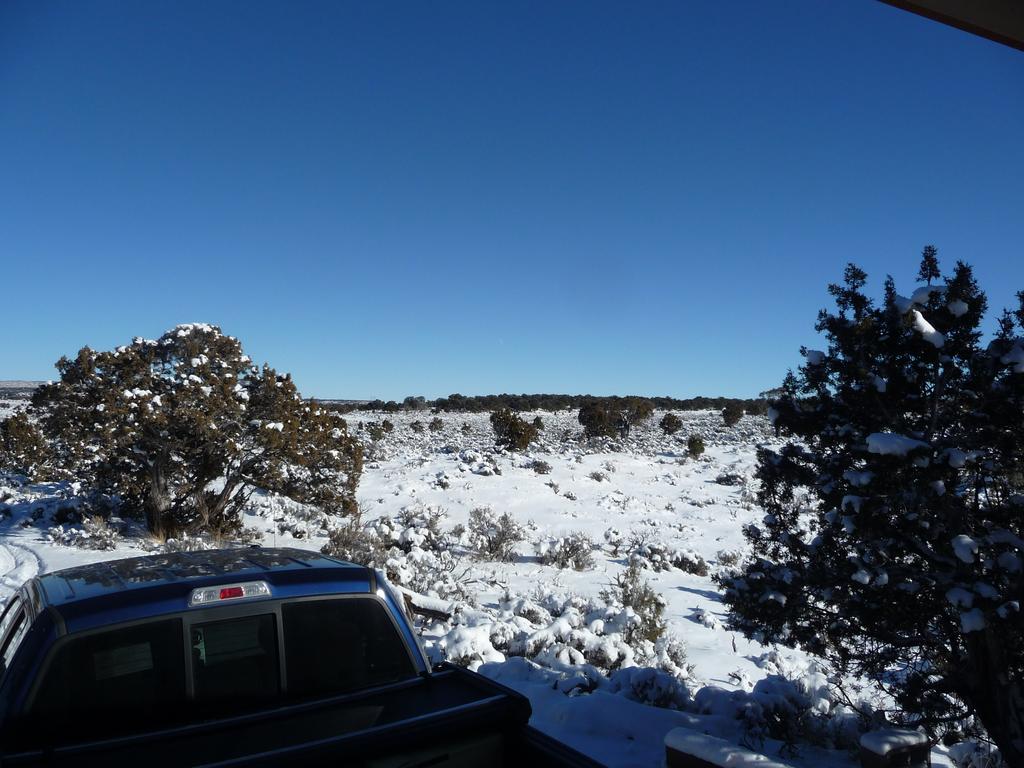
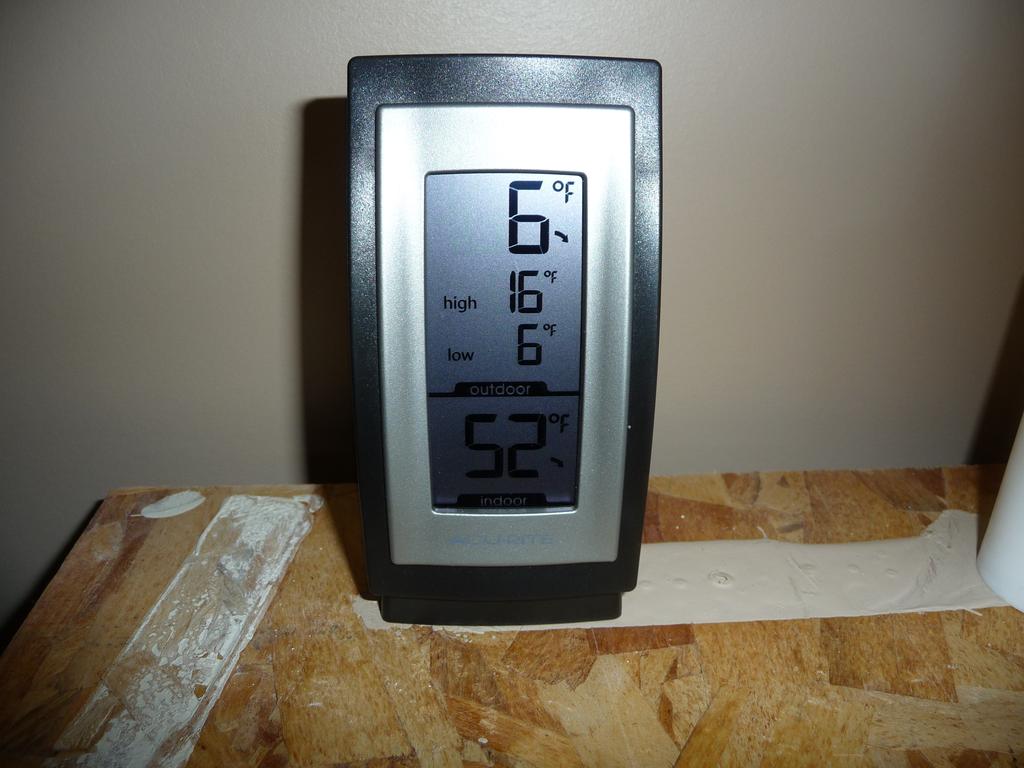
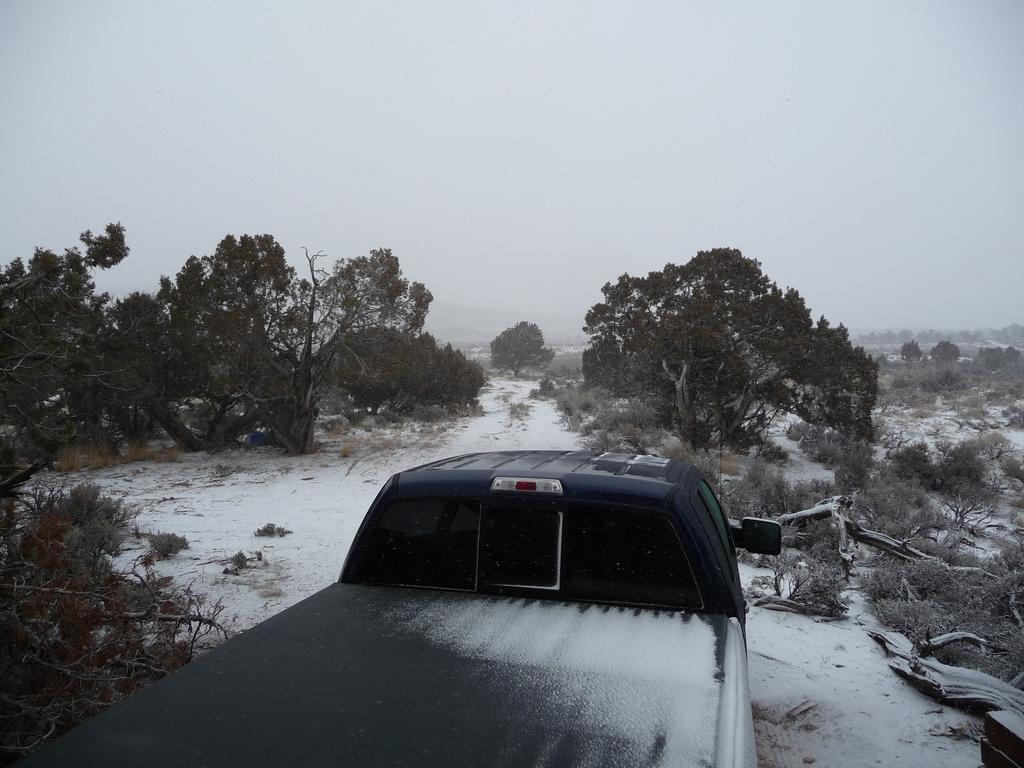
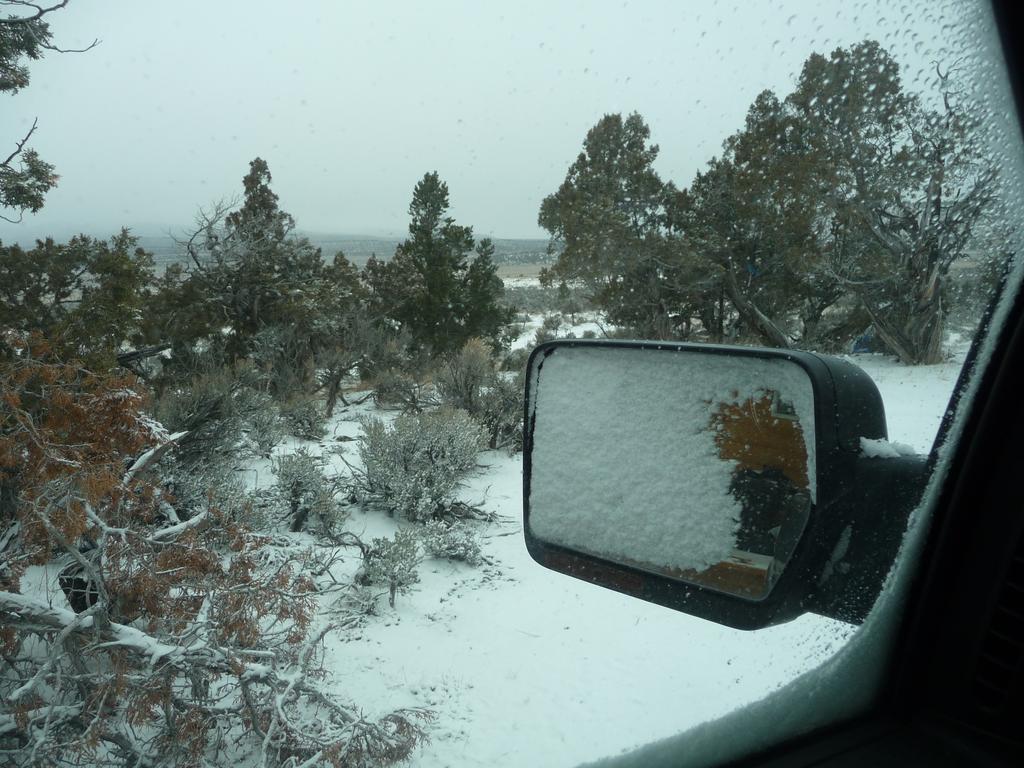
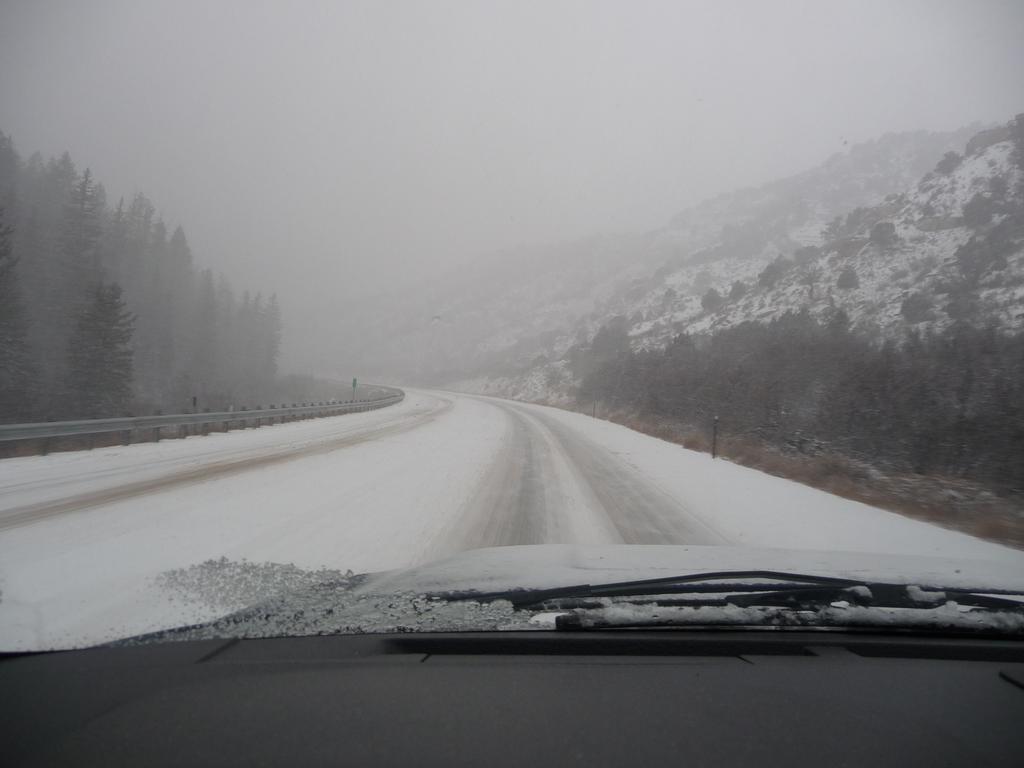
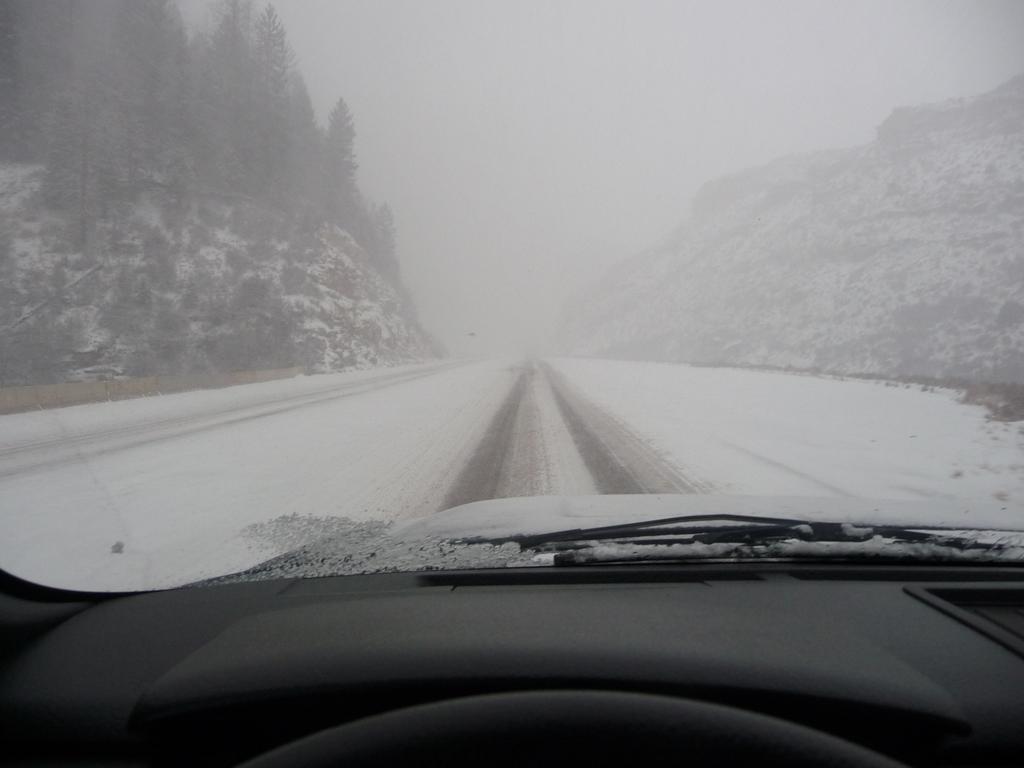
I took a last trip out to the cabin for 2012 just before Christmas. I packed up and brought home all the equipment I didn’t want to leave onsite all winter and cleaned the floors.
There was a good bit of snow on the ground but I made it in and out without trouble. It was a cold day, with a high in the single digits.
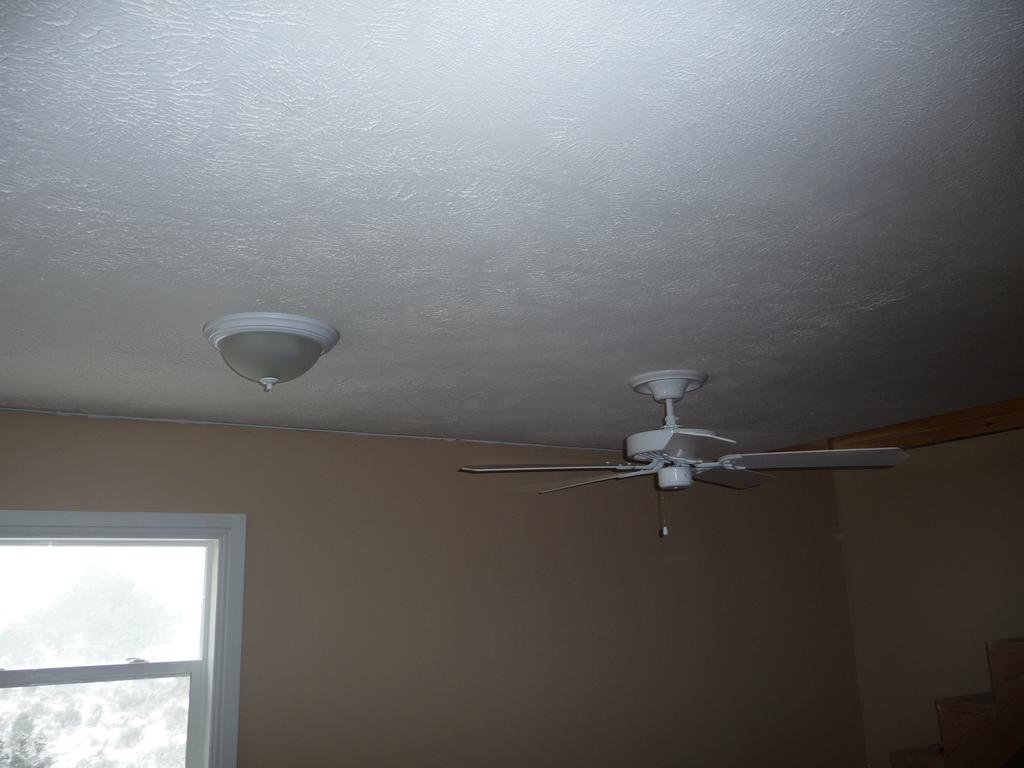
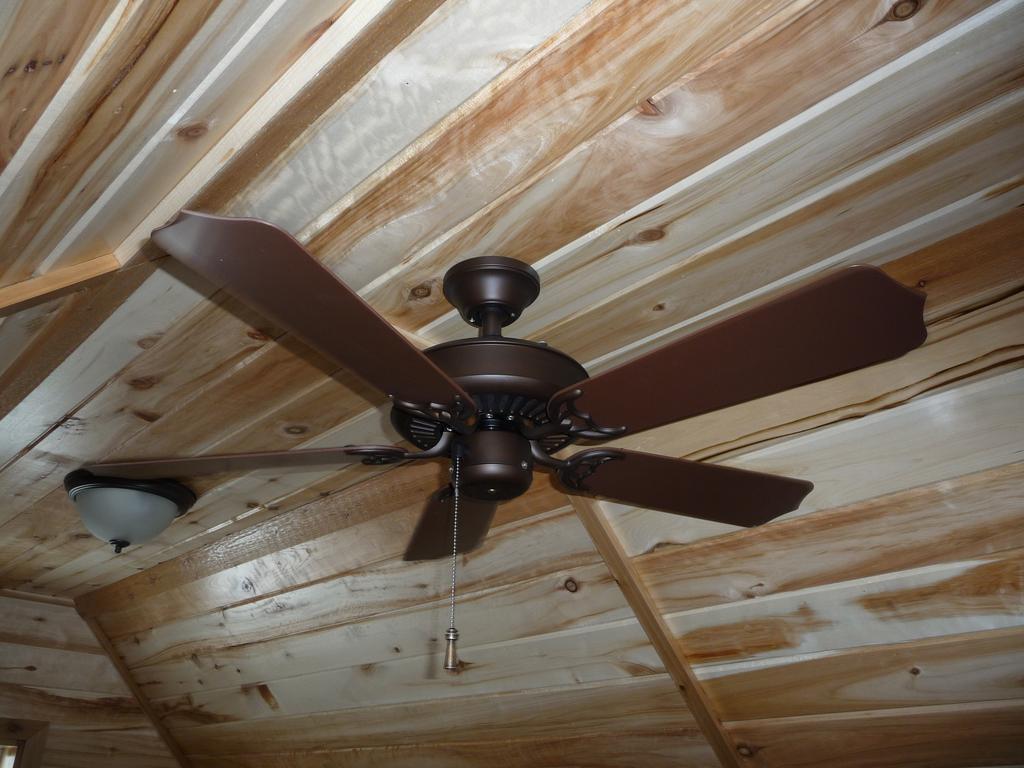
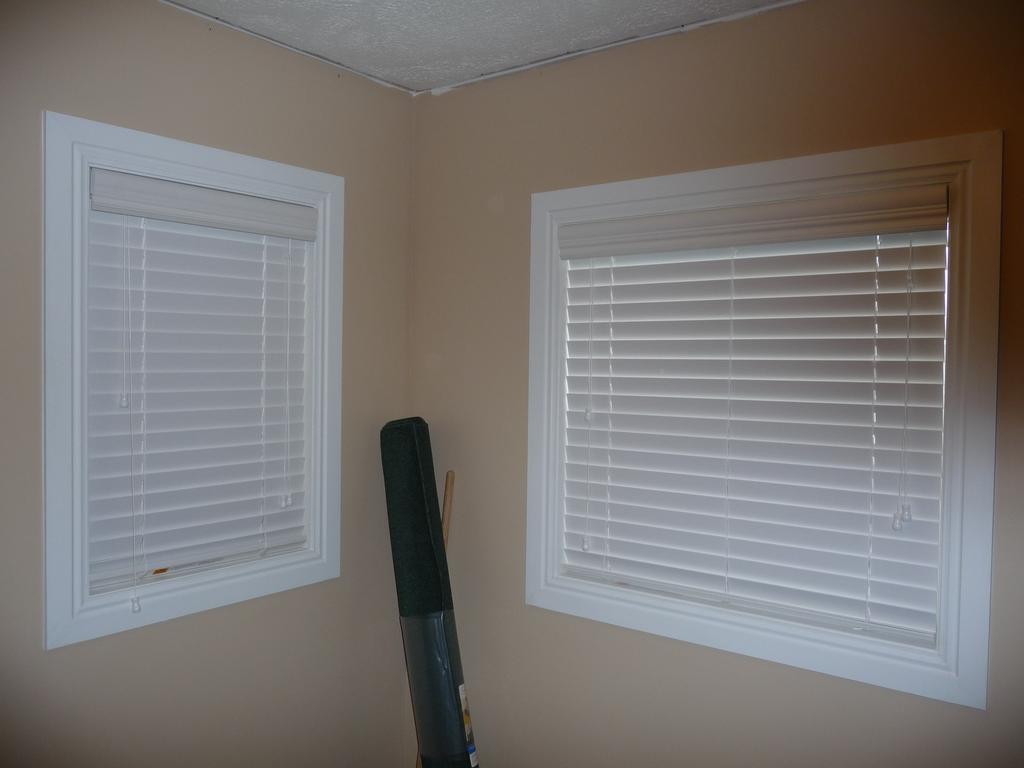
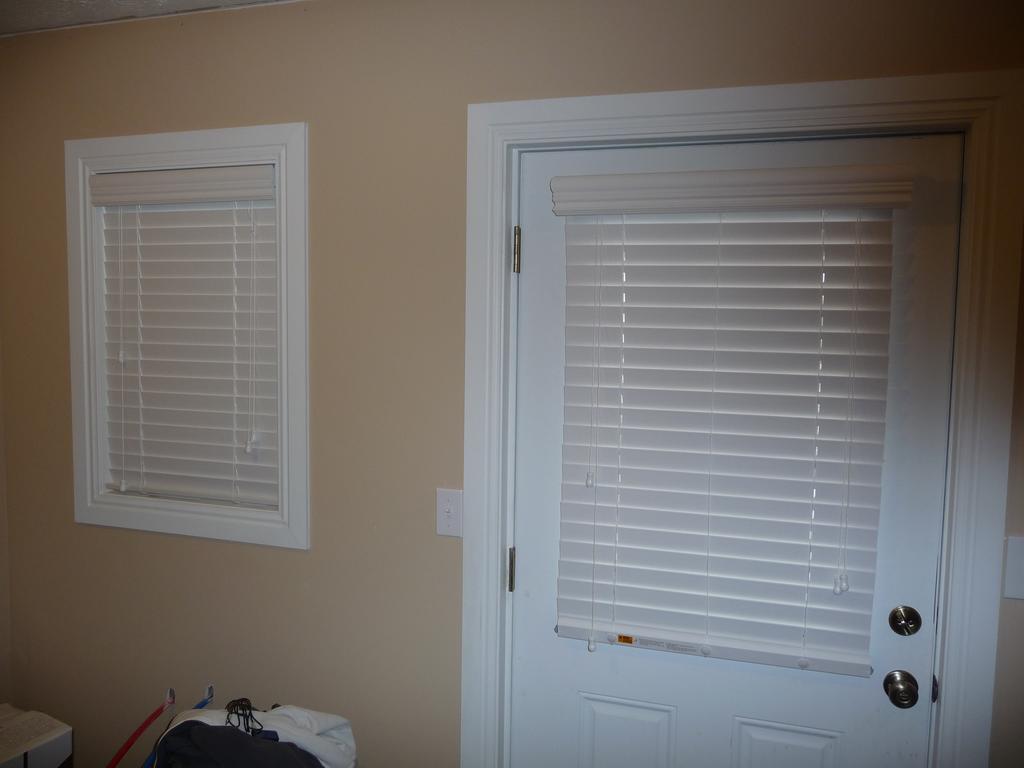
Fans and Blinds
Tuesday, Dec 11, 2012
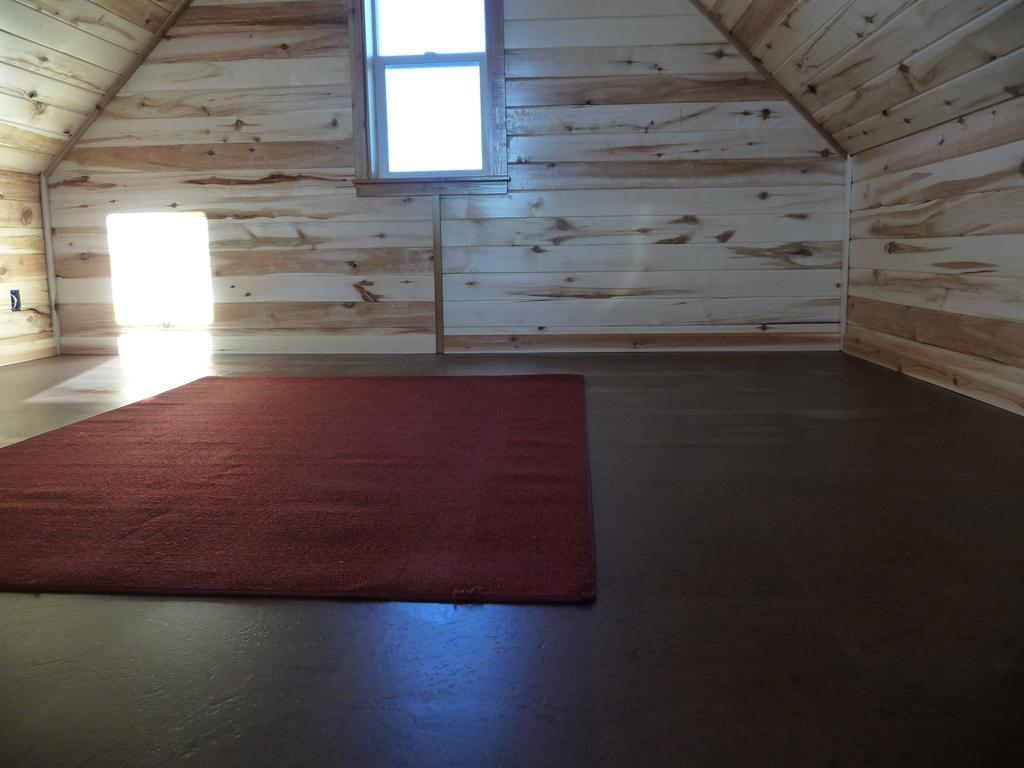
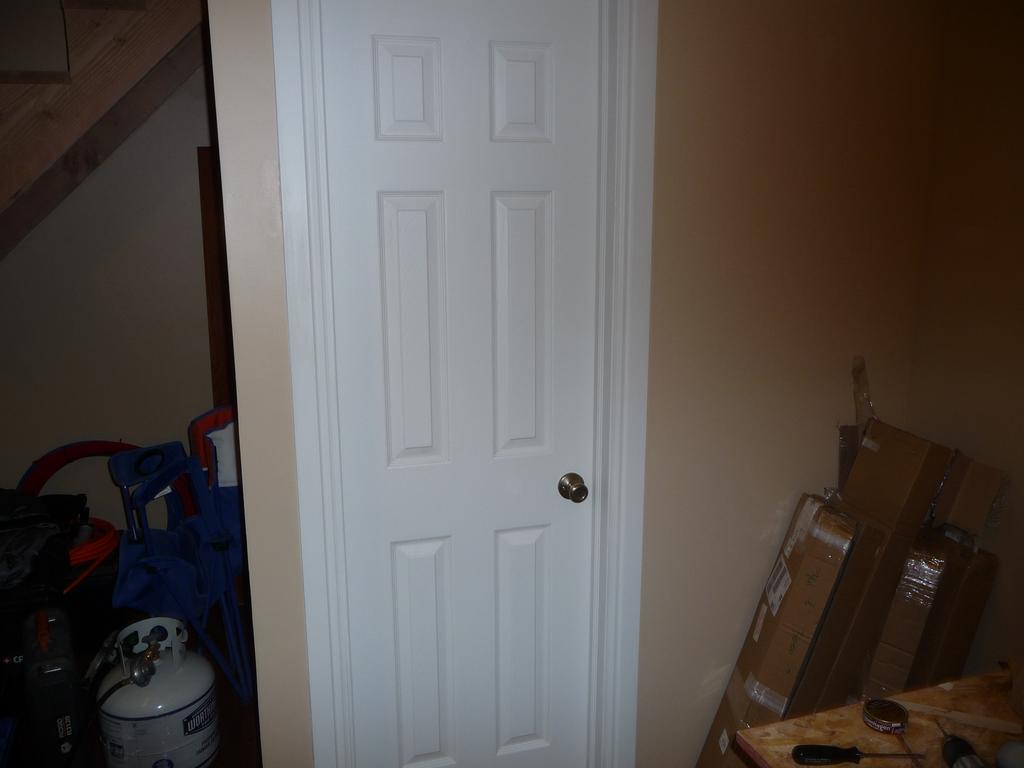
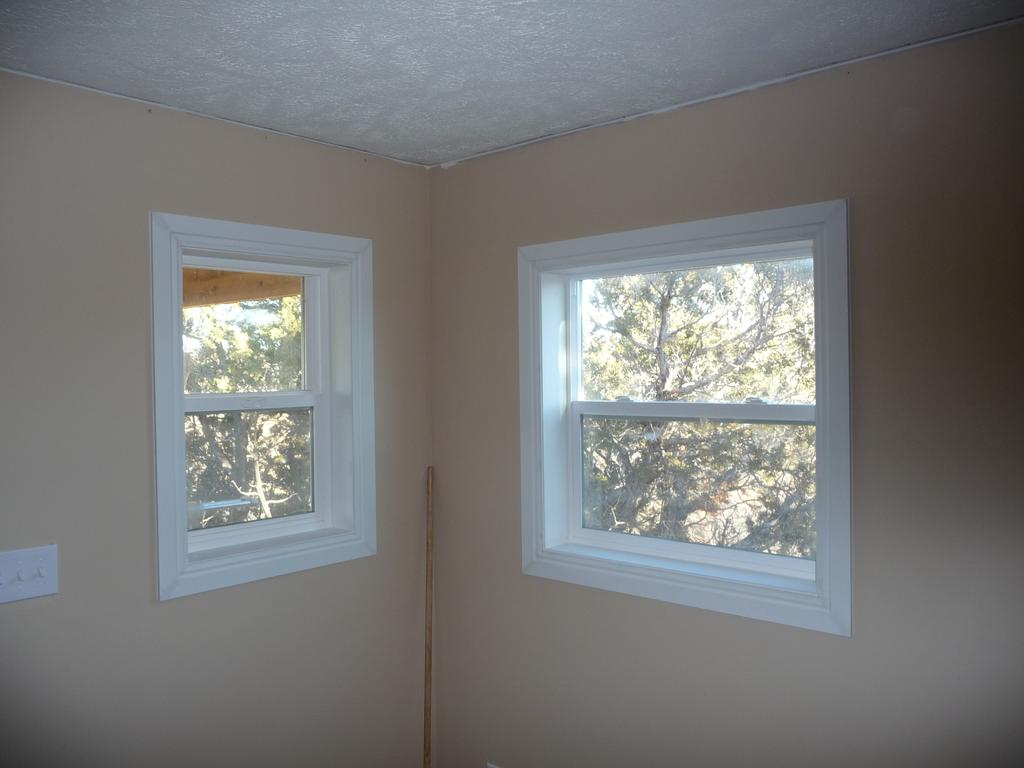
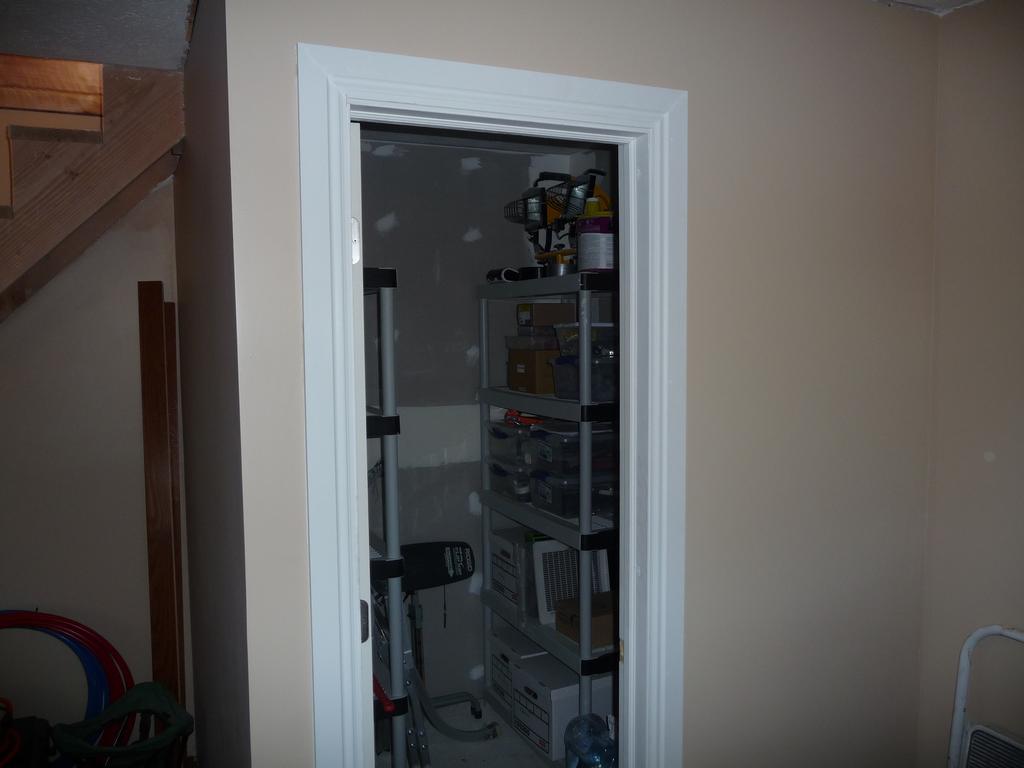
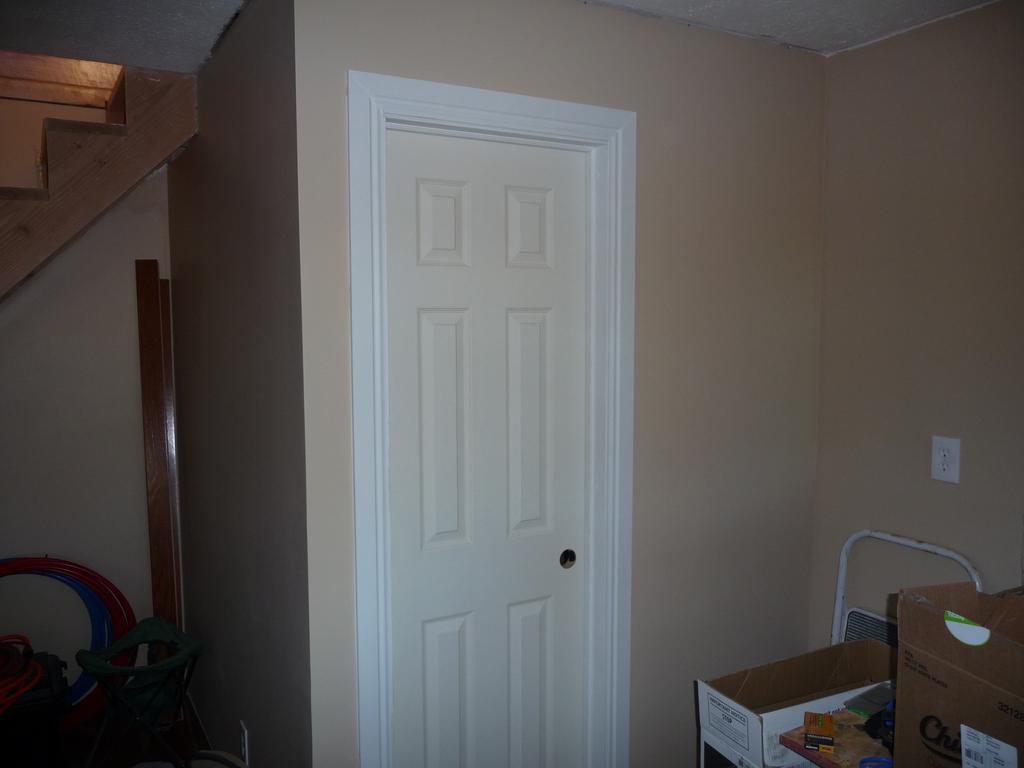
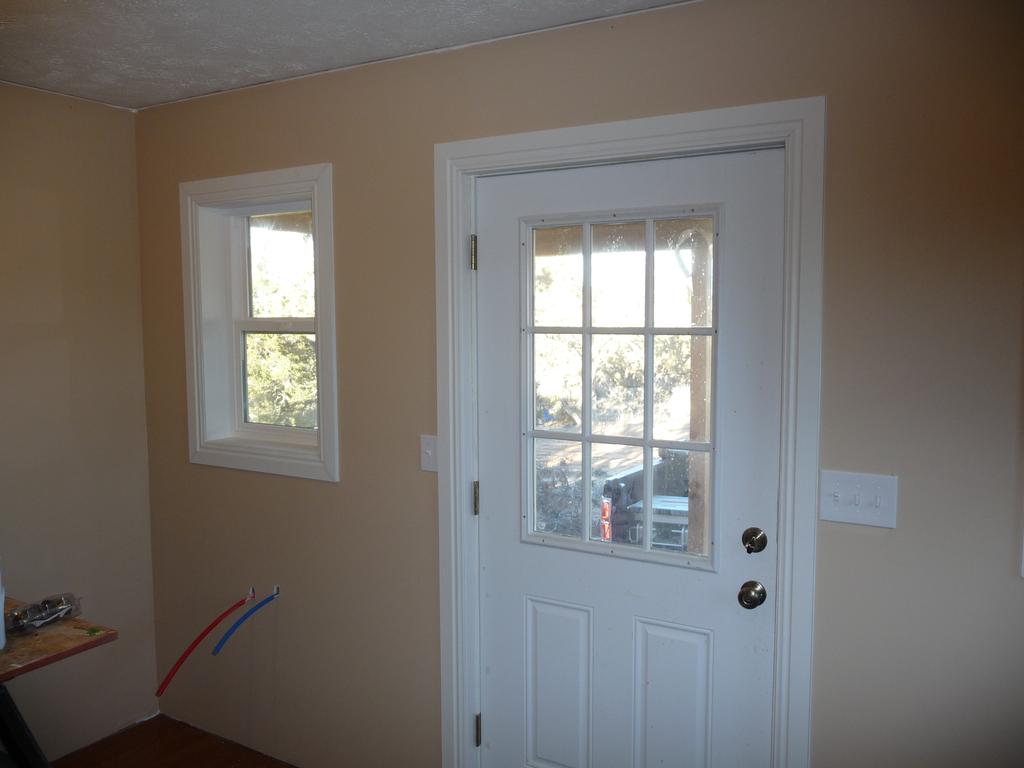
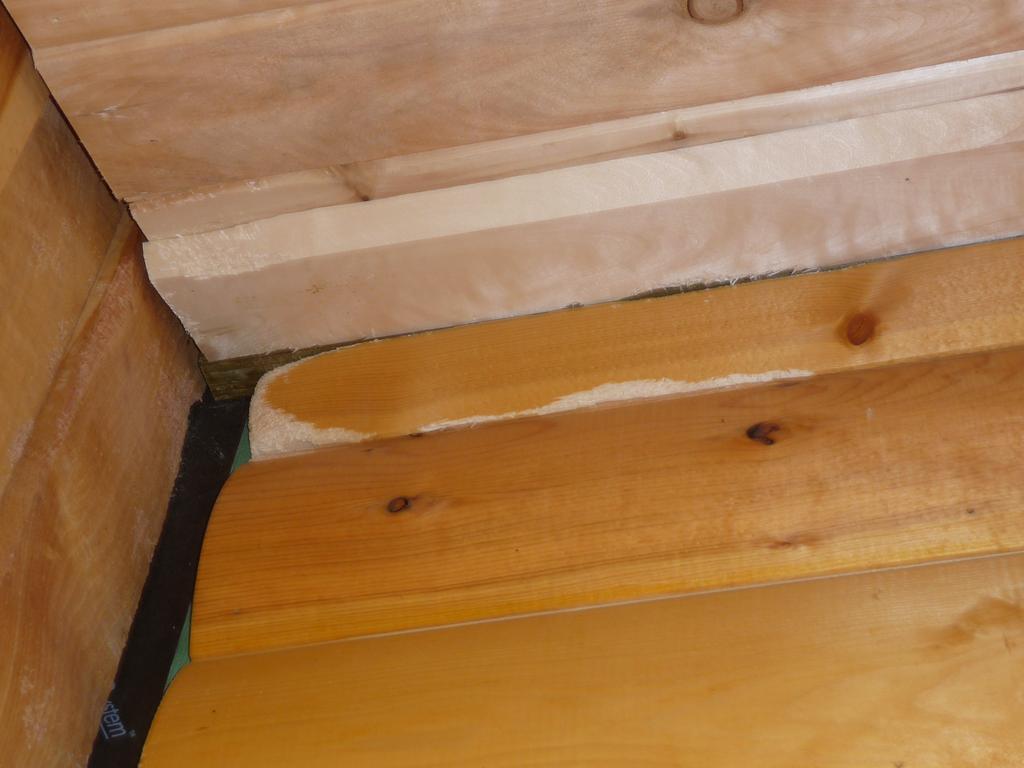
Last week I painted all the downstairs window and door trim but the pictures would have looked the same as the versions with just the primer so I didn’t post. I also installed some cedar baseboards in the loft. I just used 1x4 cedar planks that I planed down to about 5/8” and cut a chamfer on the top.
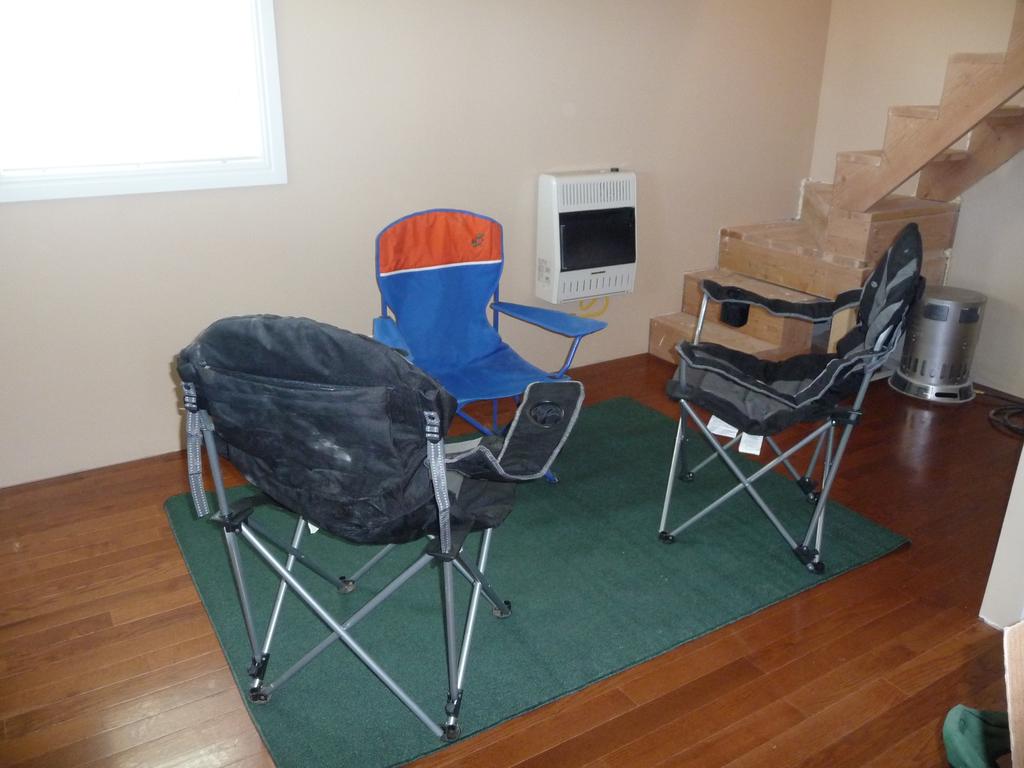
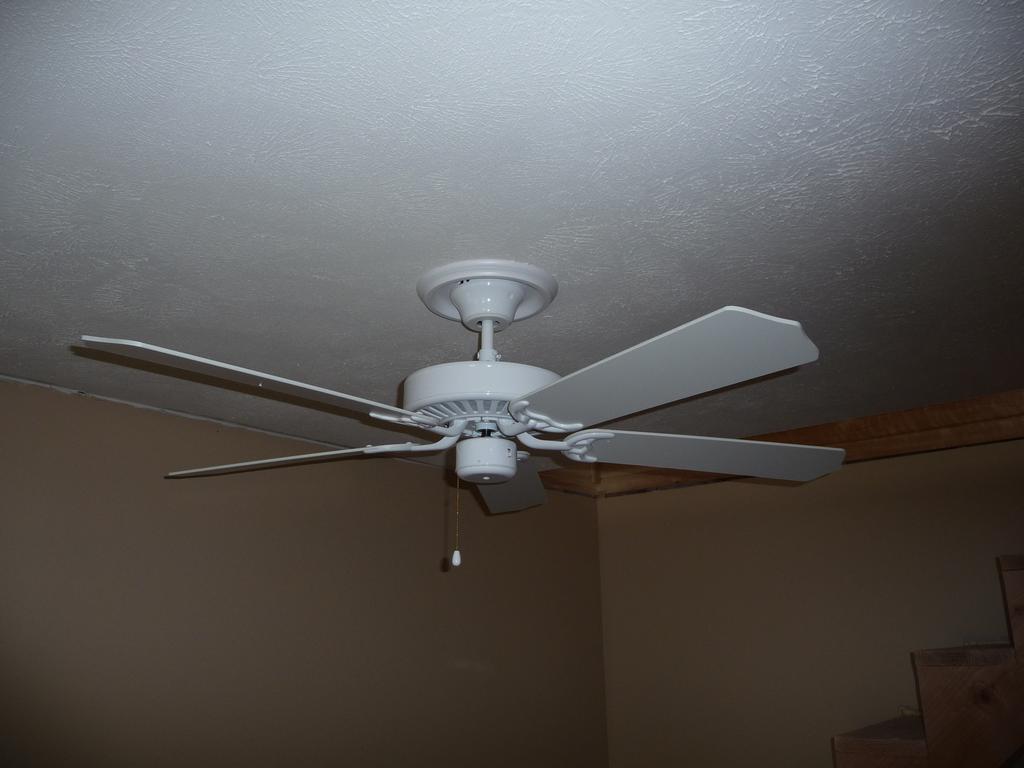
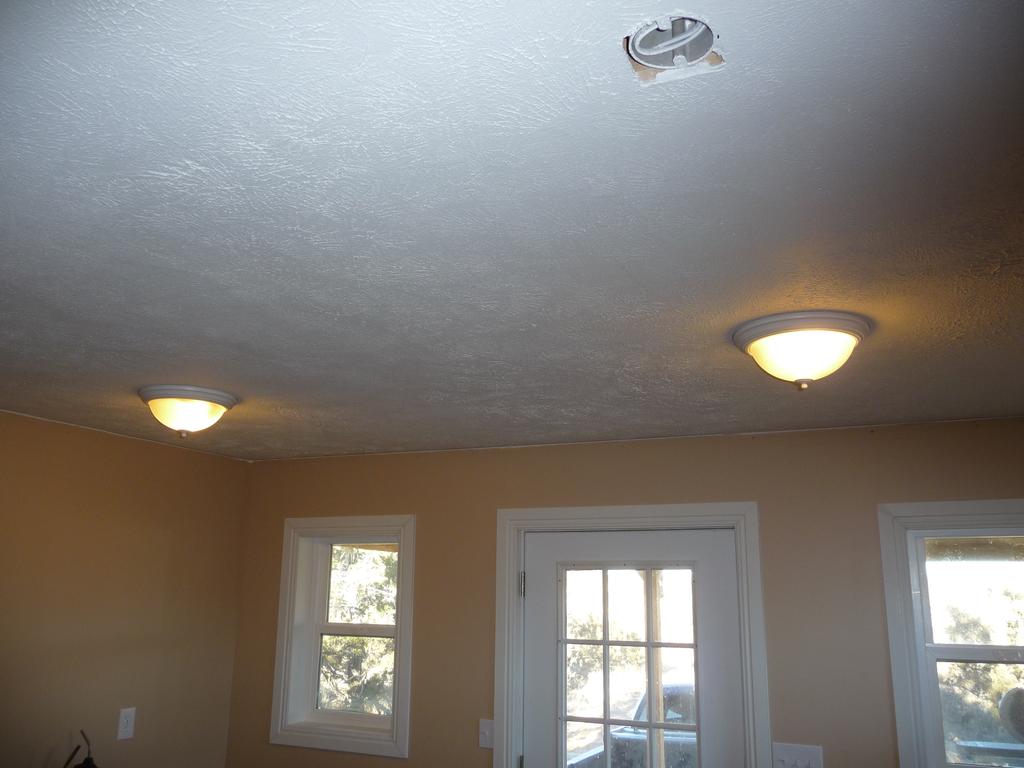
Last weekend I installed ceiling fans in the loft and first-floor. I also installed blinds on all the first-floor windows. I painted the bathroom door and installed a privacy lock.
It started to snow shortly after I arrived last Saturday and lasted all day. Working inside the heated cabin was nice but it did make the drive home unpleasant.

Heat, Lights, and Trim
Monday, Nov 26, 2012
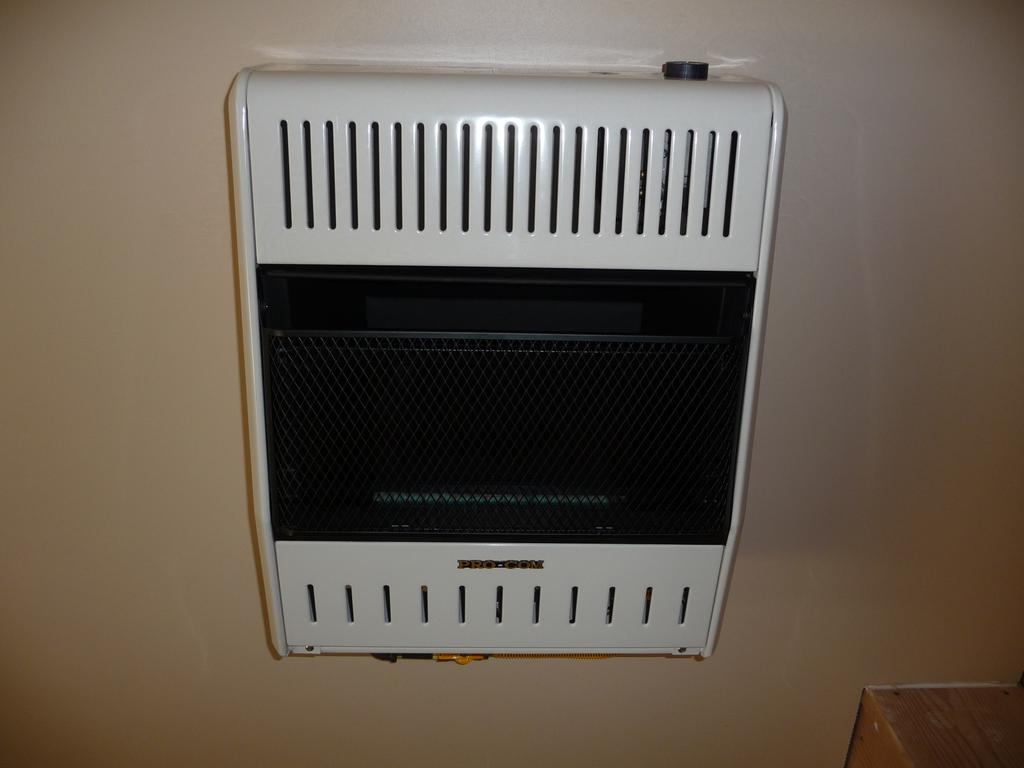
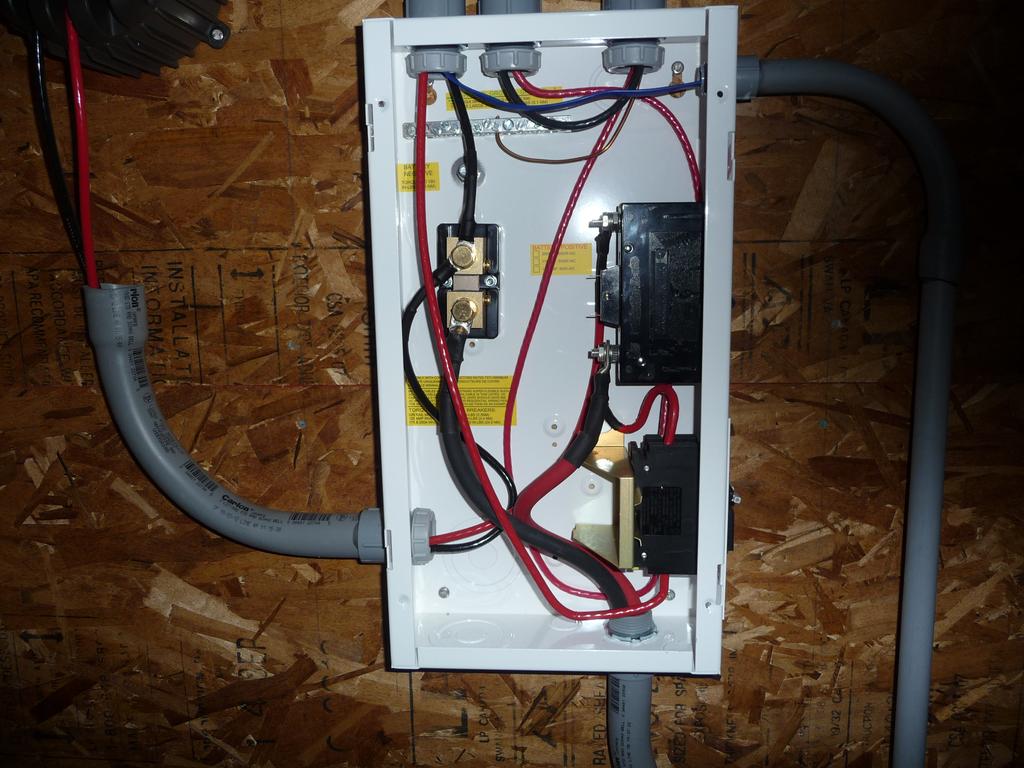
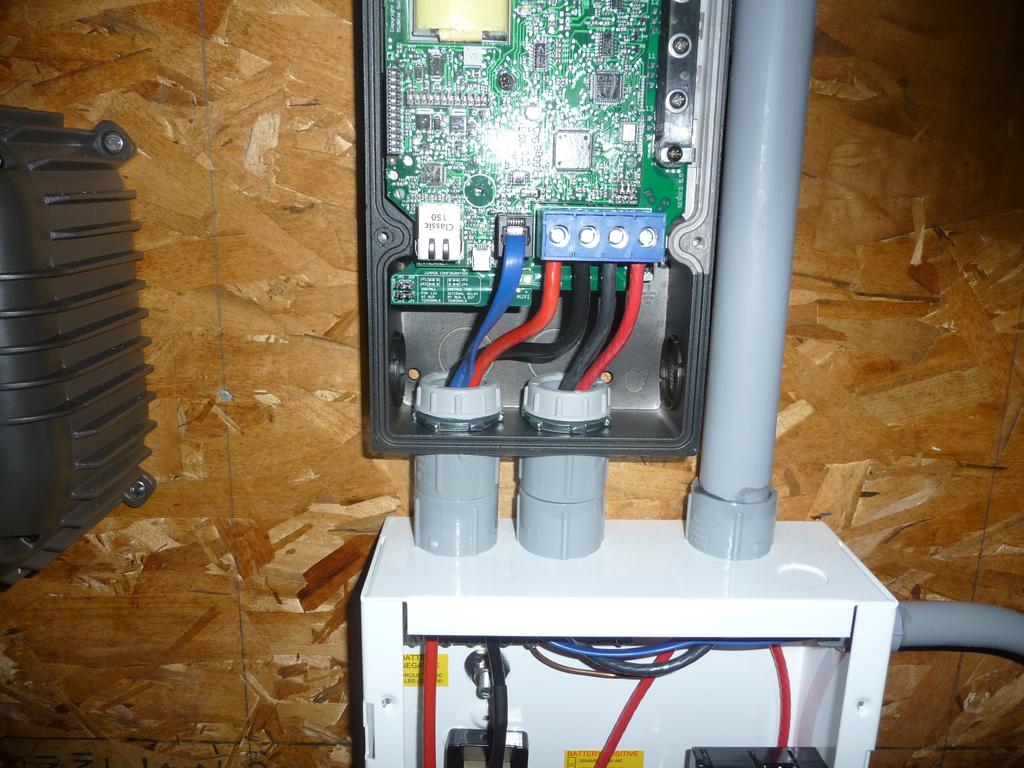
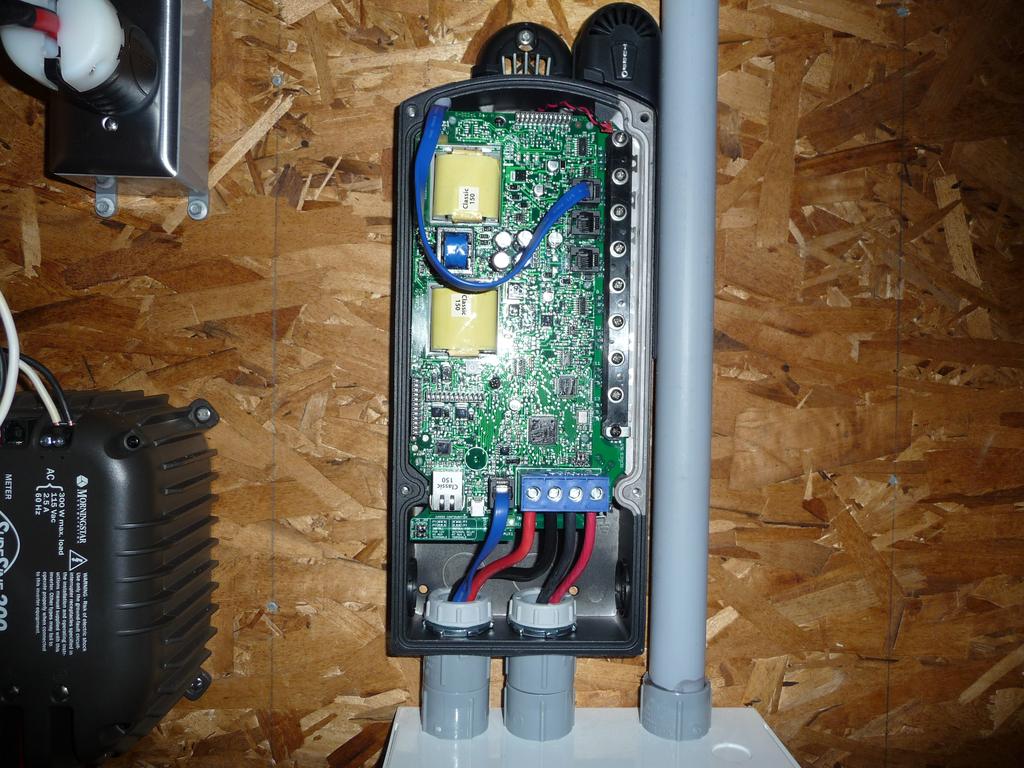
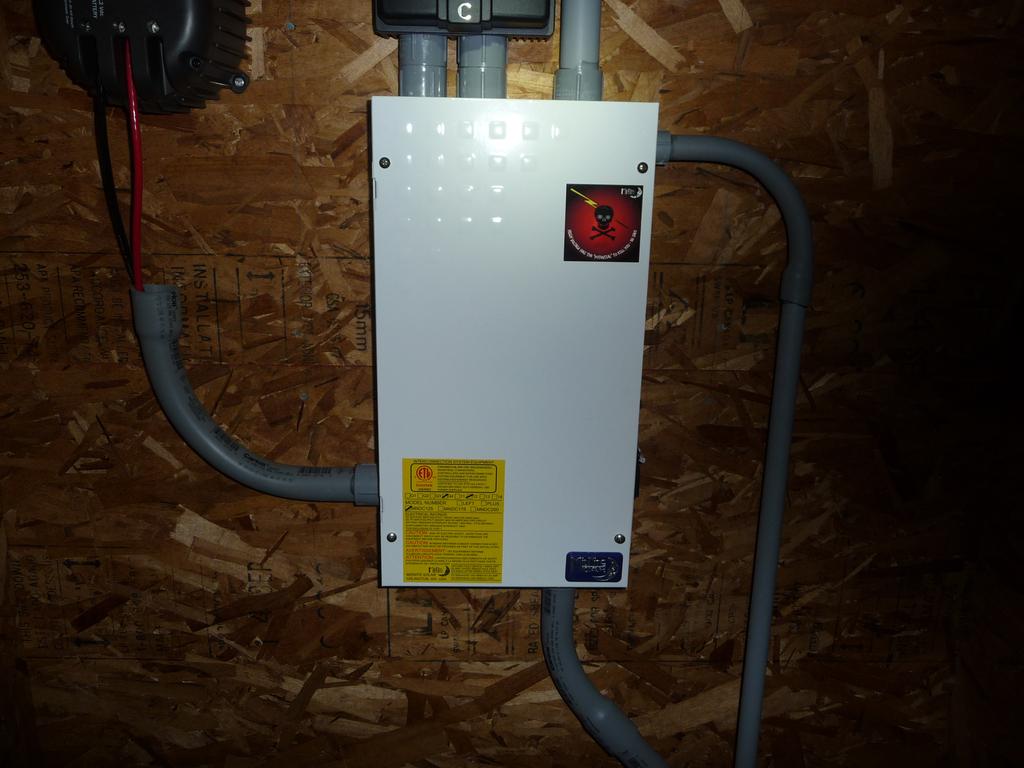
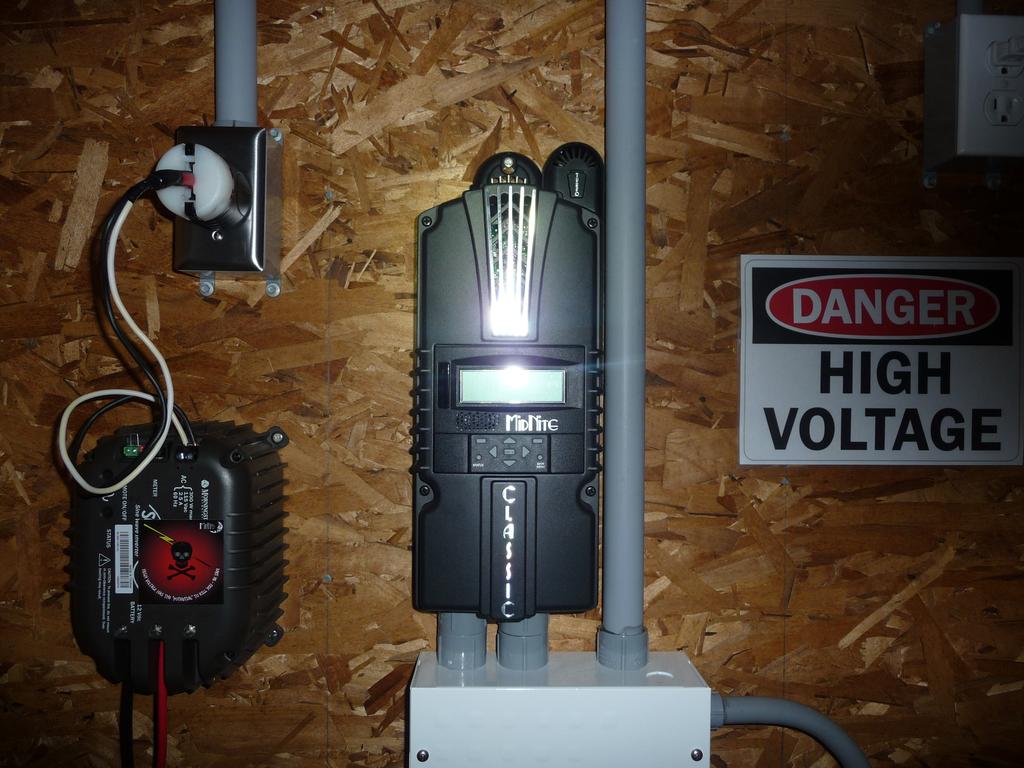
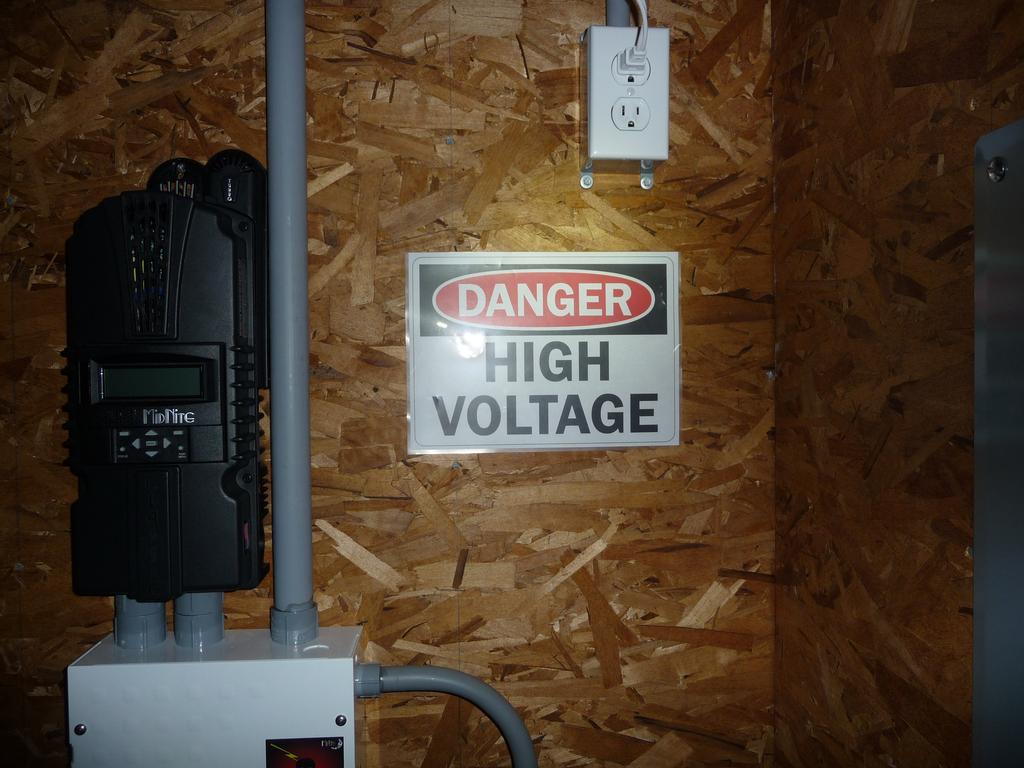
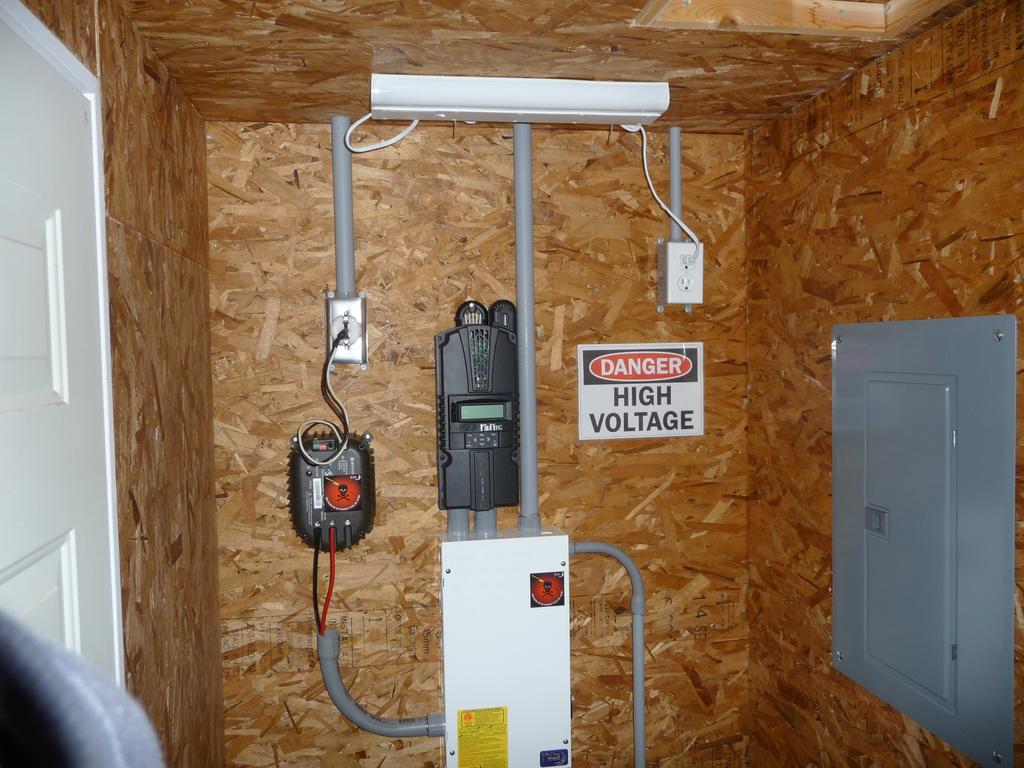
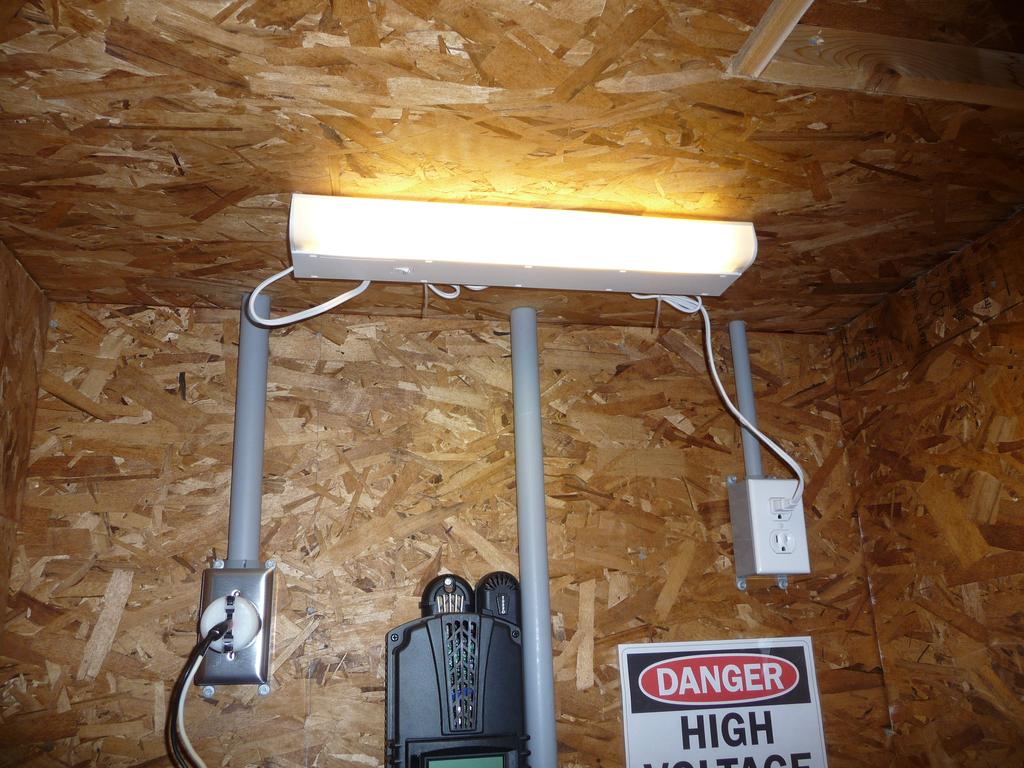
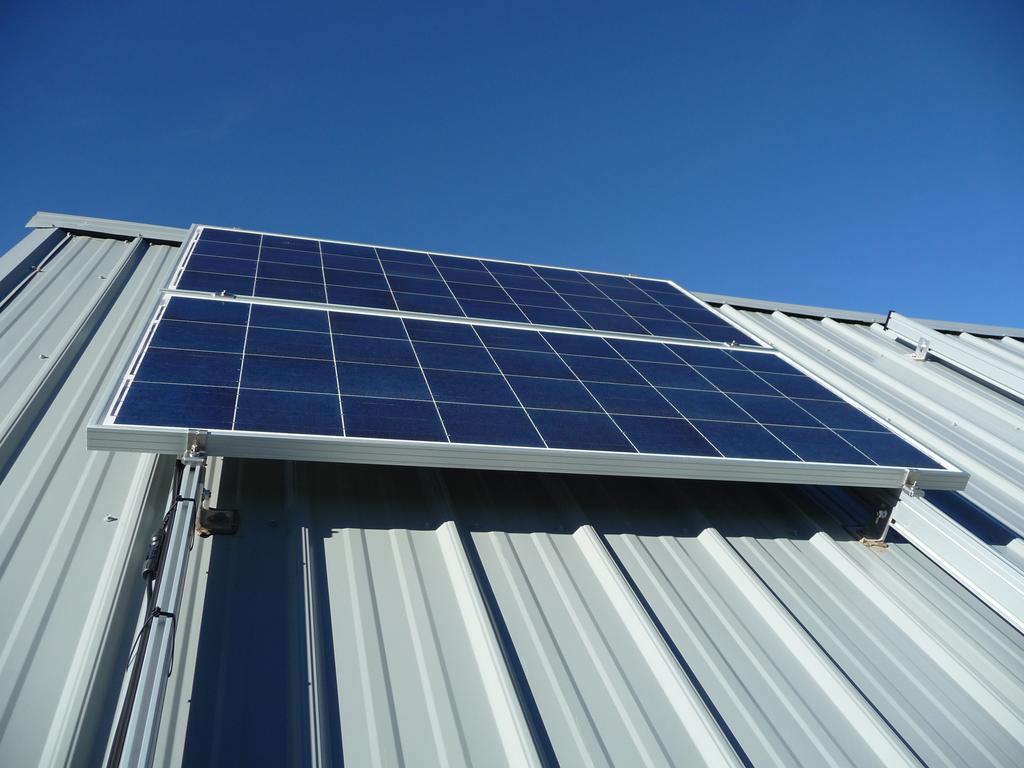
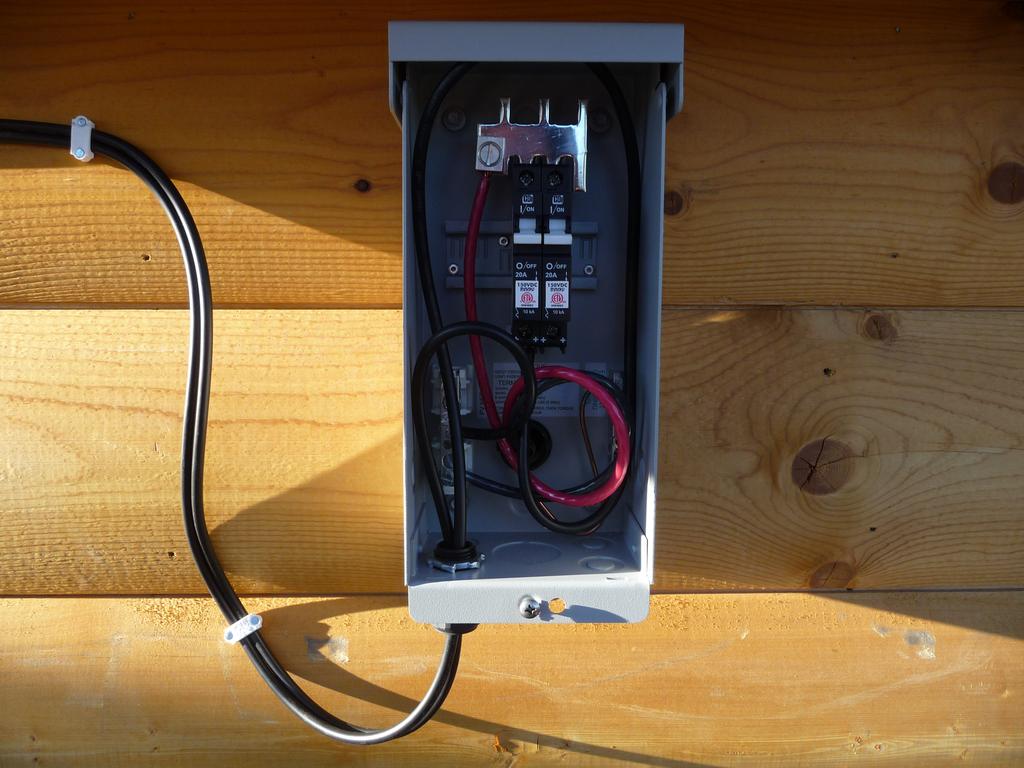
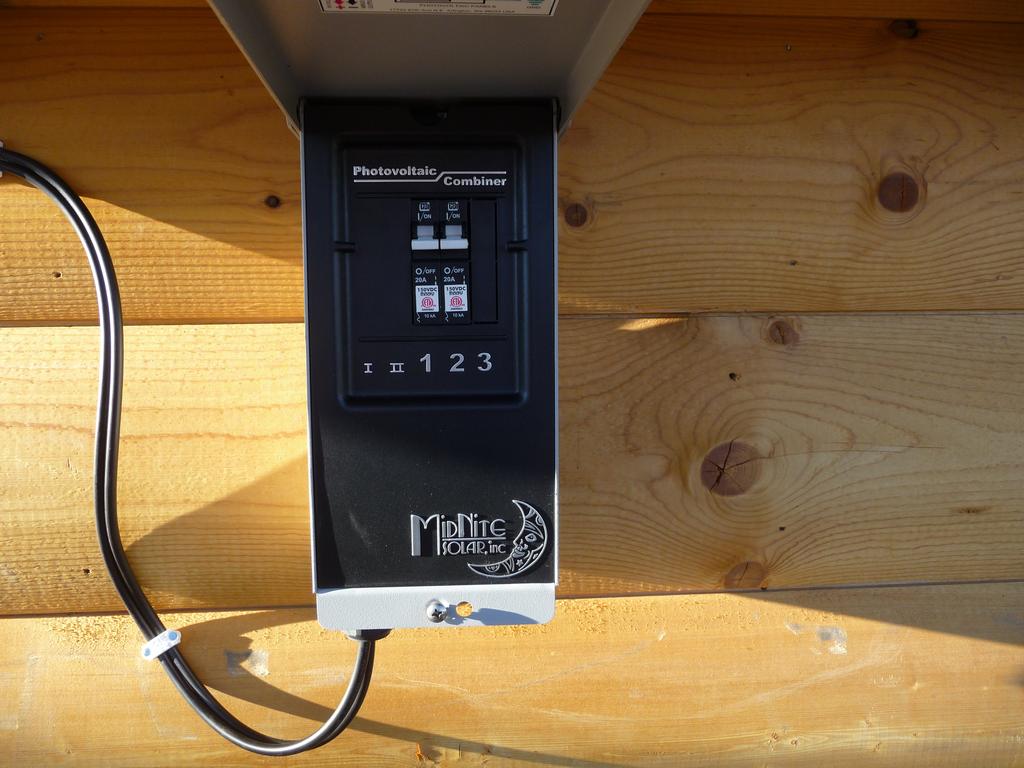
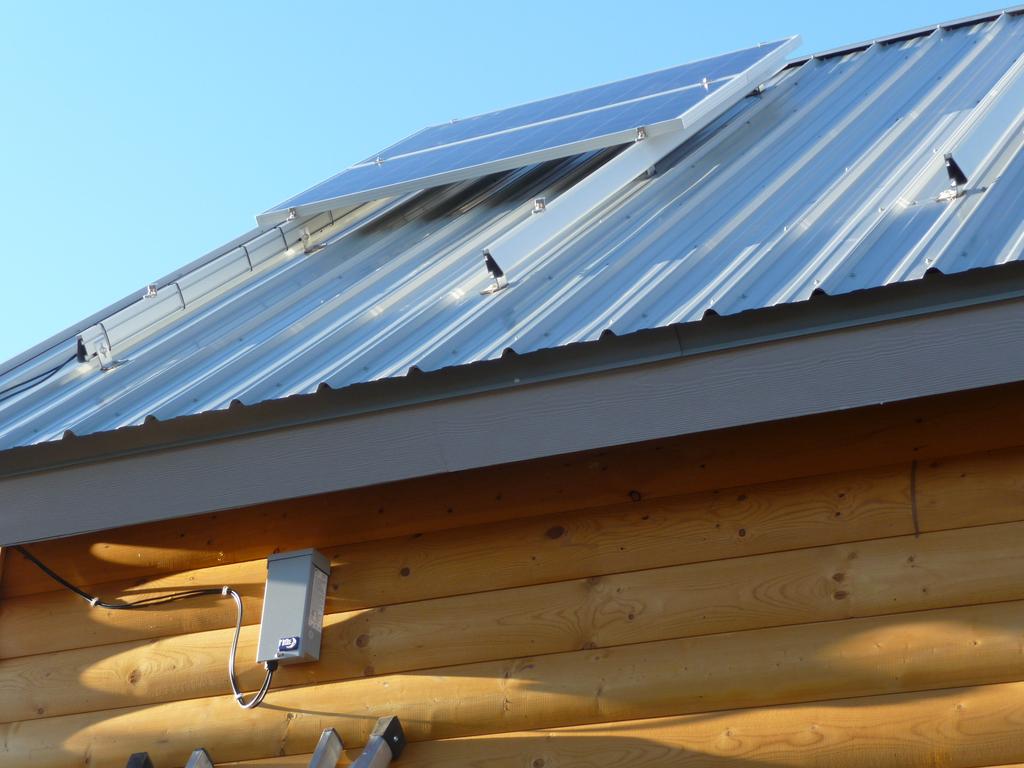
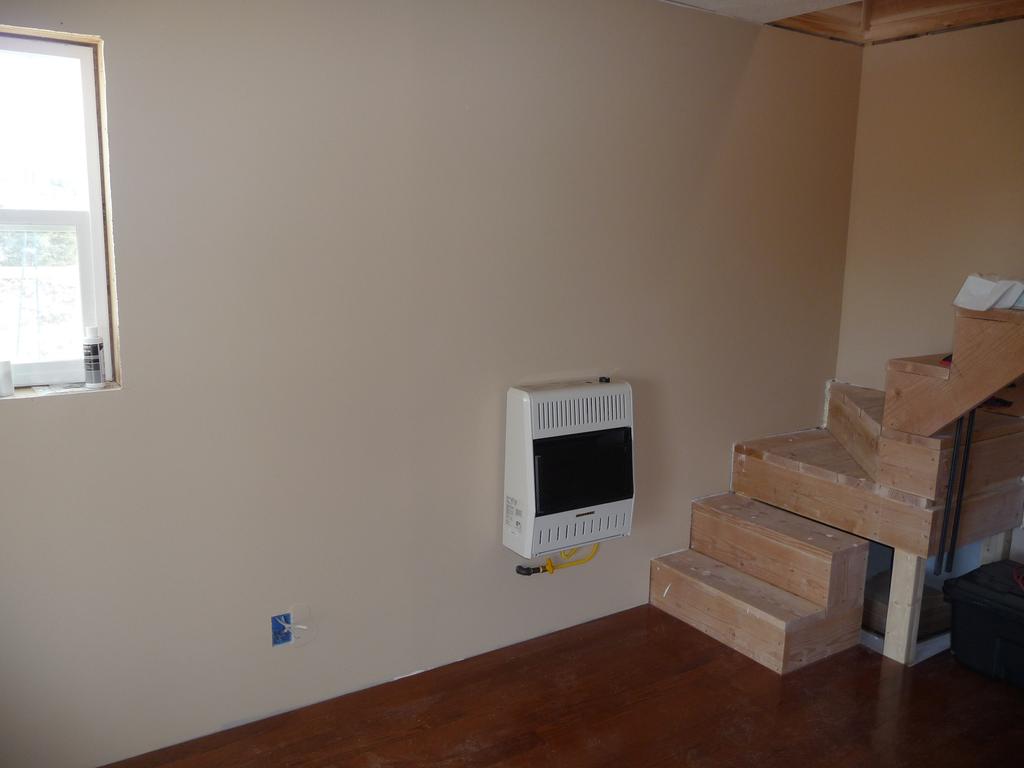
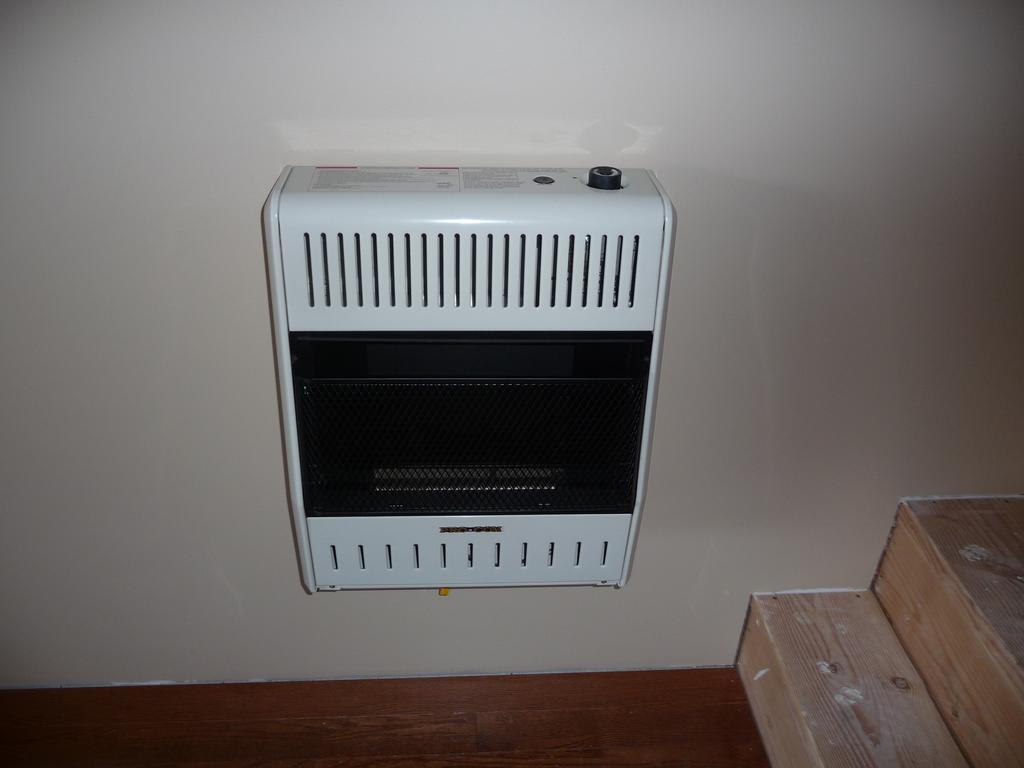
Last week I finally finished with the heater connection, installed most of the solar equipment, and added interior trim on the downstairs windows and doors.
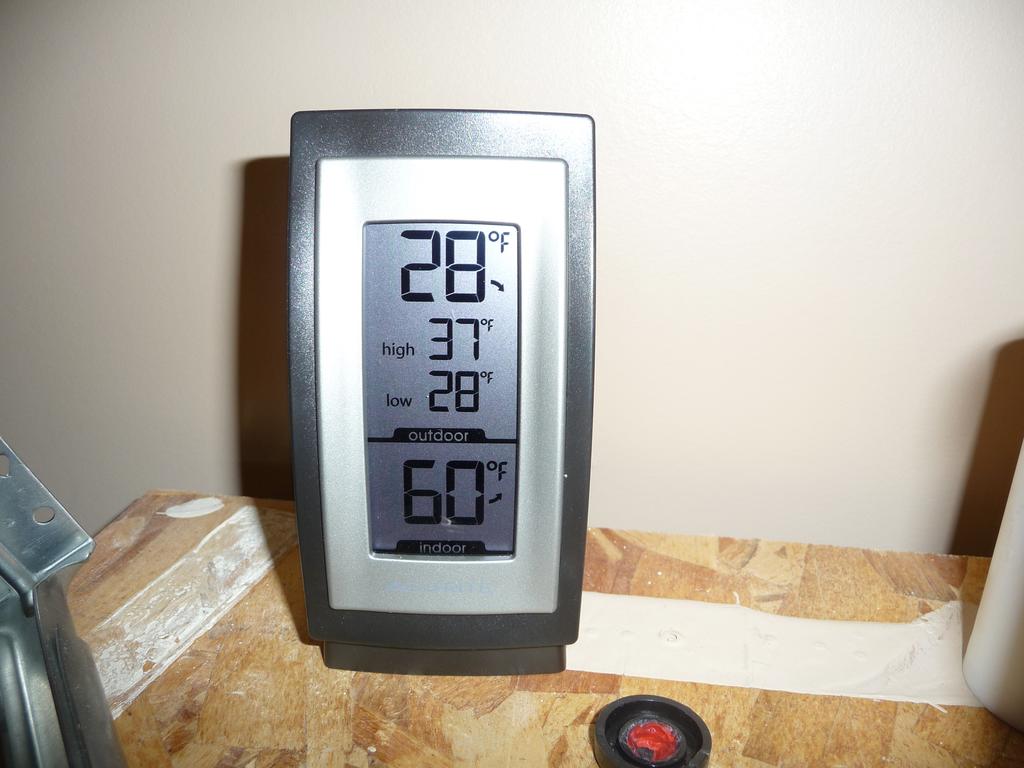
The heater seems to work well and the location near the stairs keeps the loft very close to the same temperature as the first floor. It’s a 20,000 BTU heater and it does take a couple of hours to raise the inside temperature to a comfortable level when it’s cold outside but once reaching the desired point, it doesn’t run much, hopefully indicating the effectiveness of the insulation.
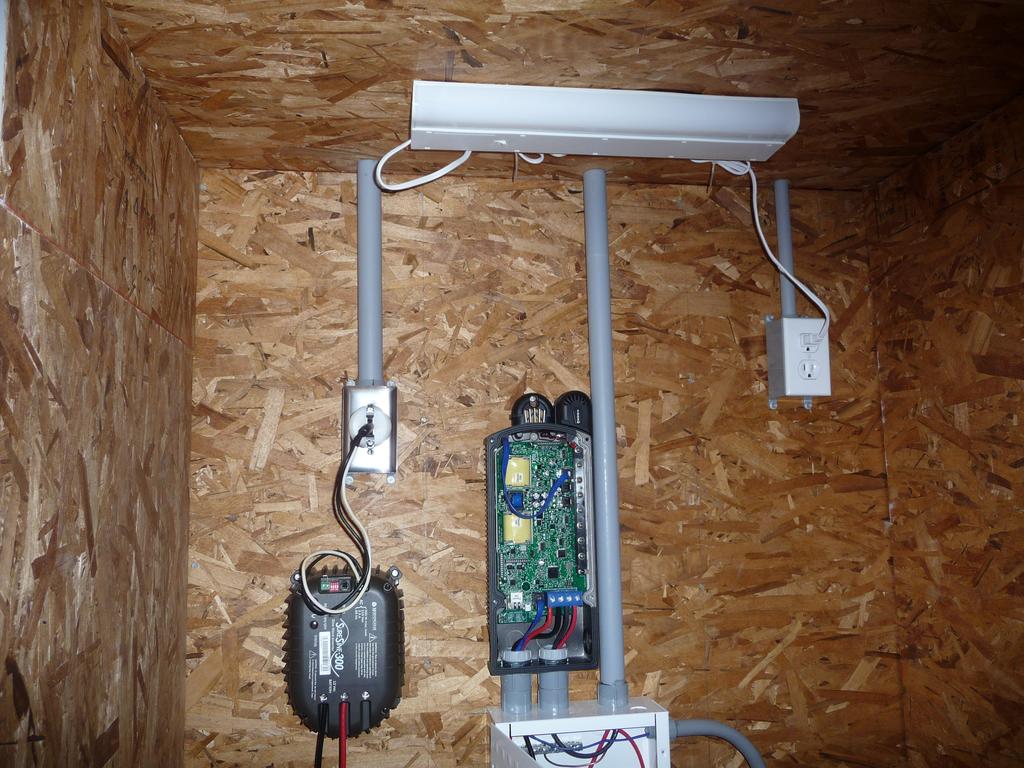
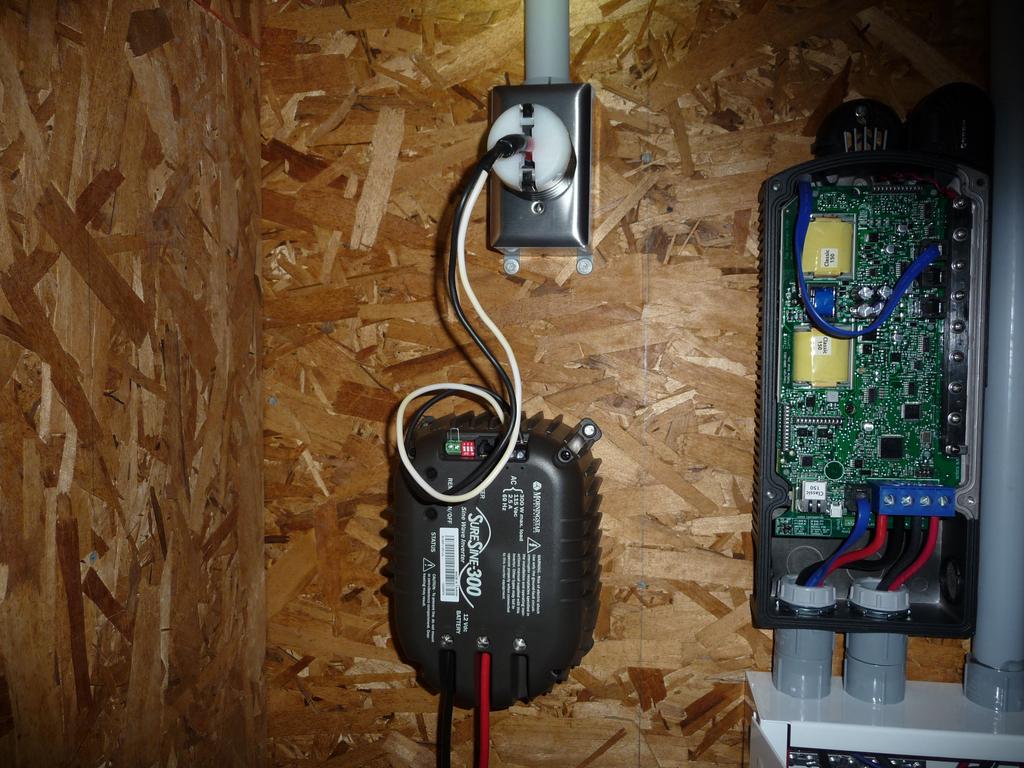
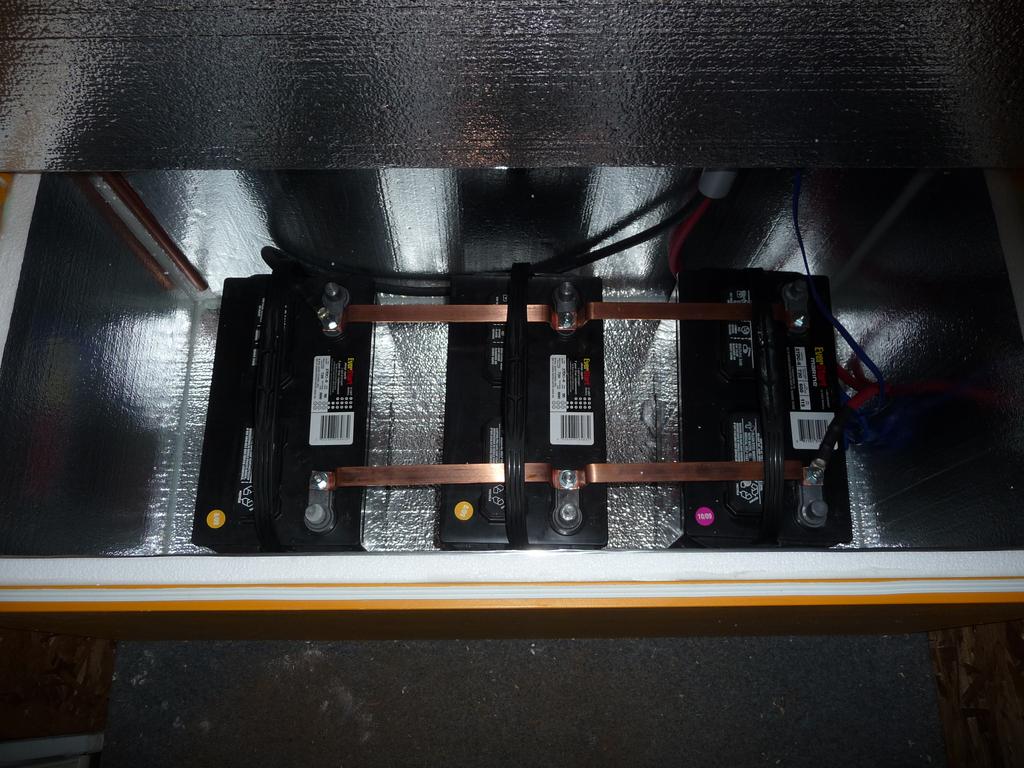
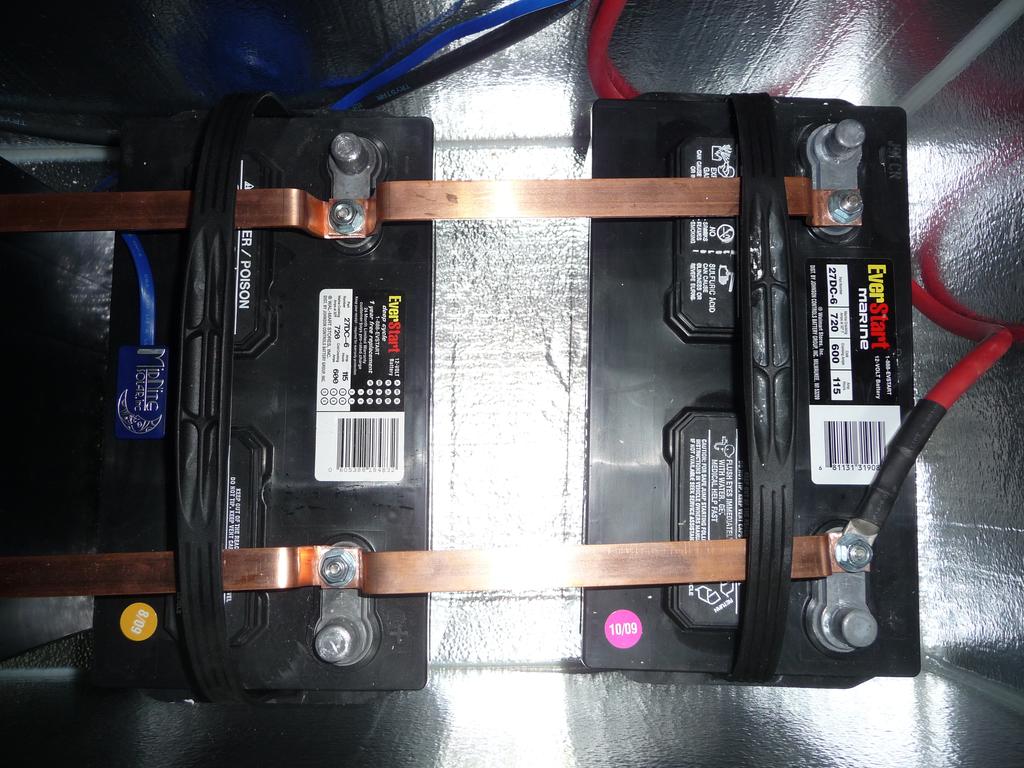
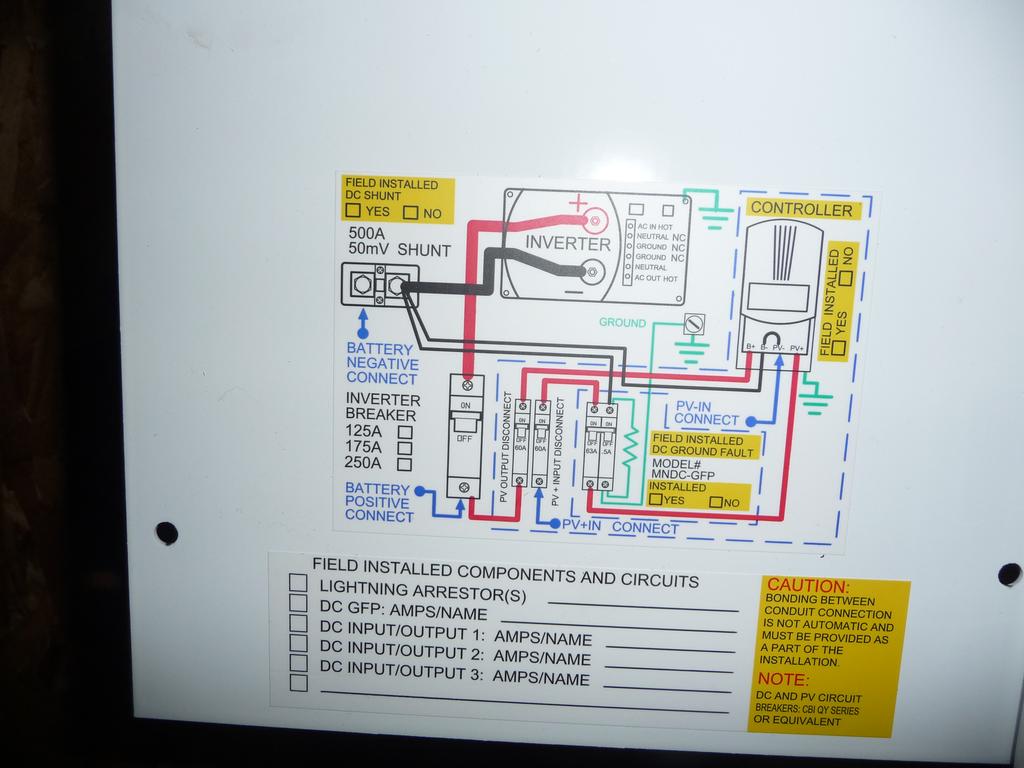
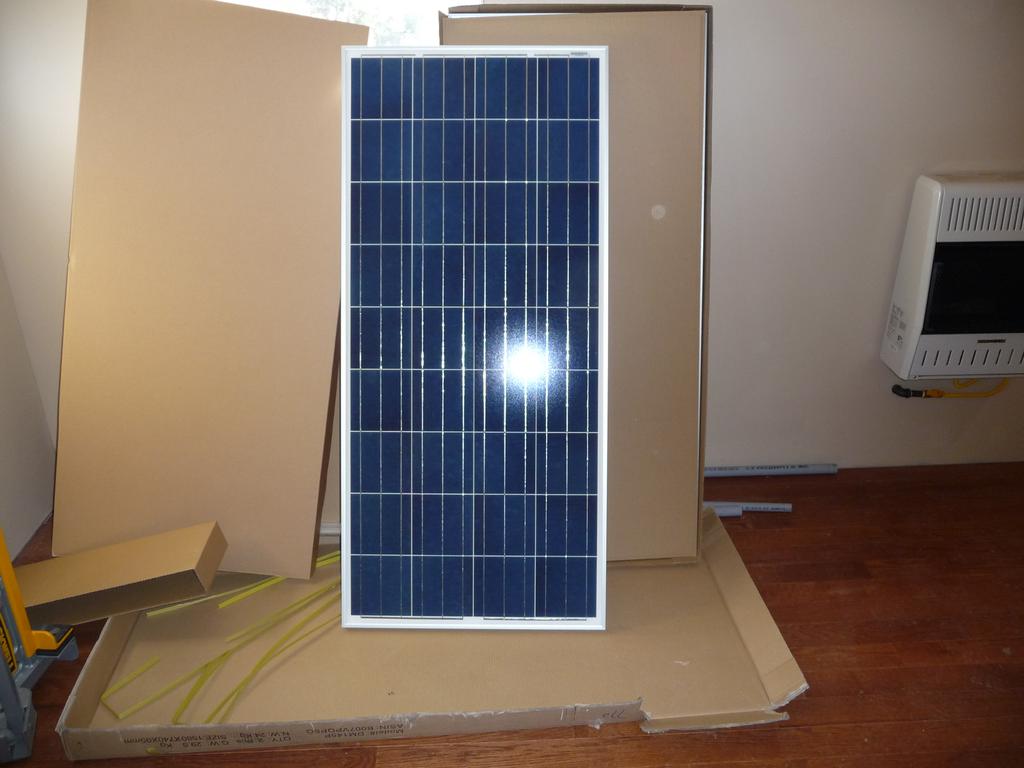
It took most of three days to install the solar equipment and two panels but everything is installed and working. I have four 145W panels but only installed two for now since I’ll only be at the cabin on weekends. I’m currently using three 12V 115Ah marine deep cycle batteries which are not very good for this application but I actually already had them laying around the house unused (left over from a diy ups project) so I’m using them temporarily.
Finally, I did some trim work on the downstairs windows and doors.
Check the annotations on the photos for more details.


Utility Room, Battery Box, and Heater
Monday, Nov 05, 2012
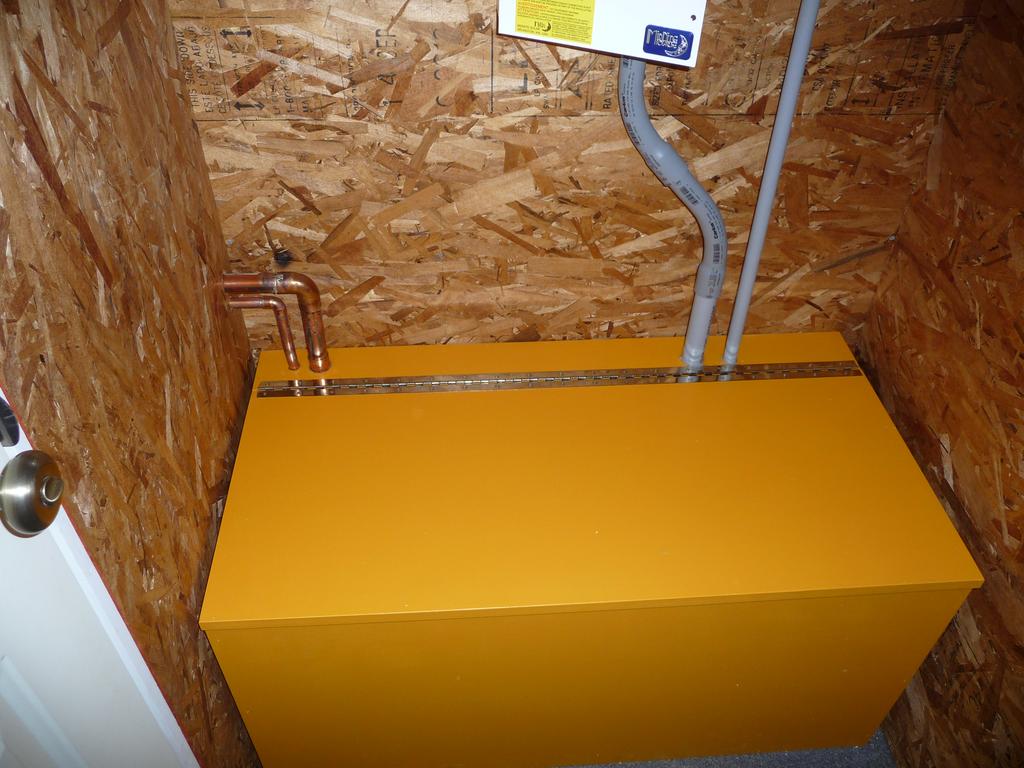
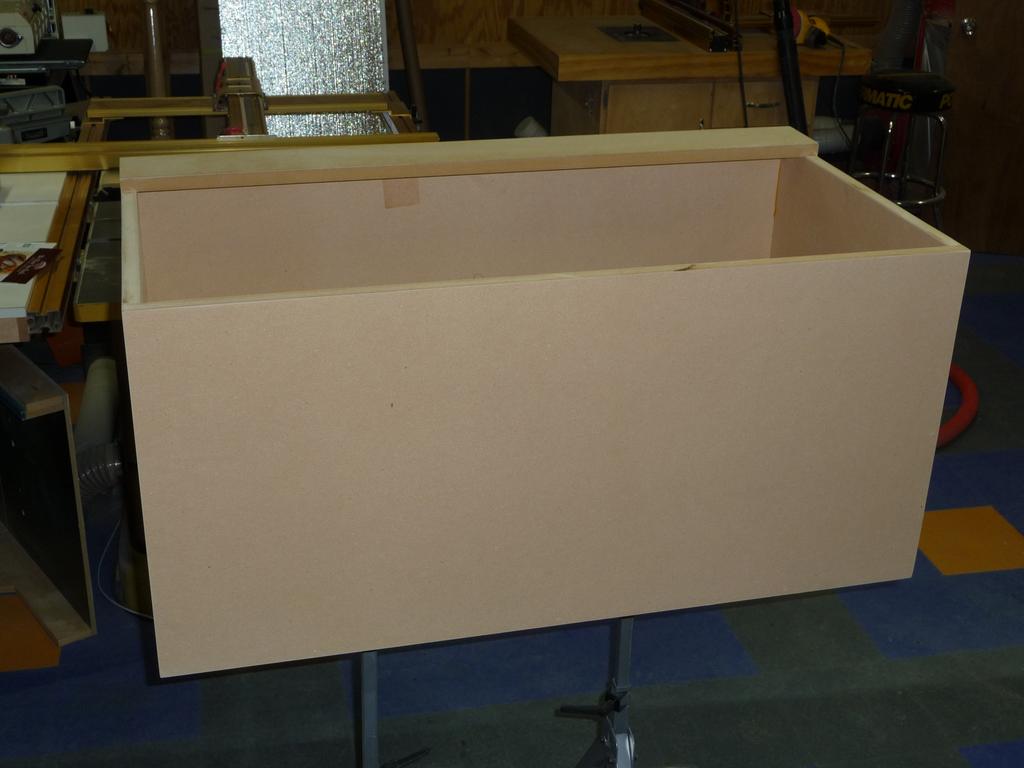
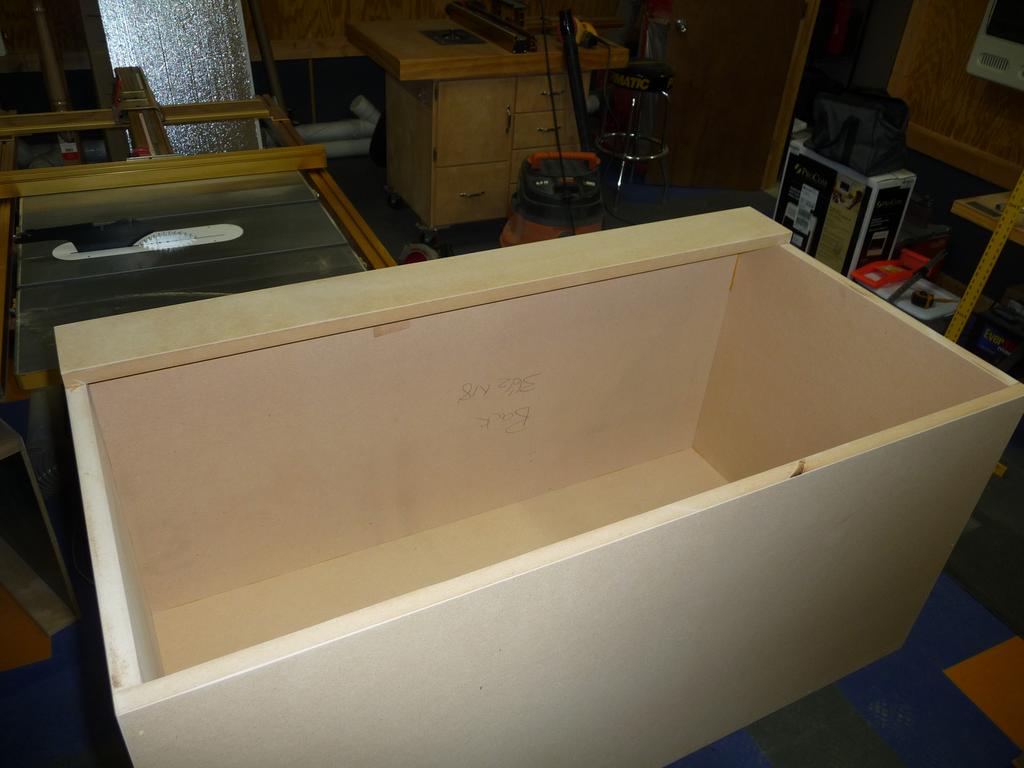
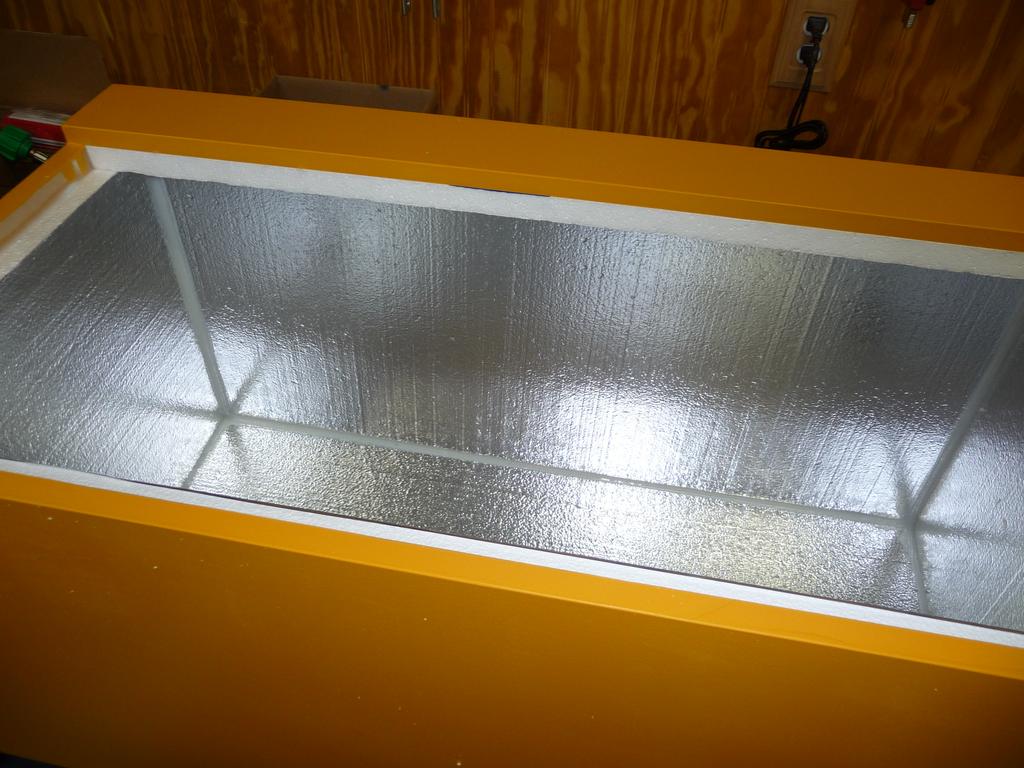
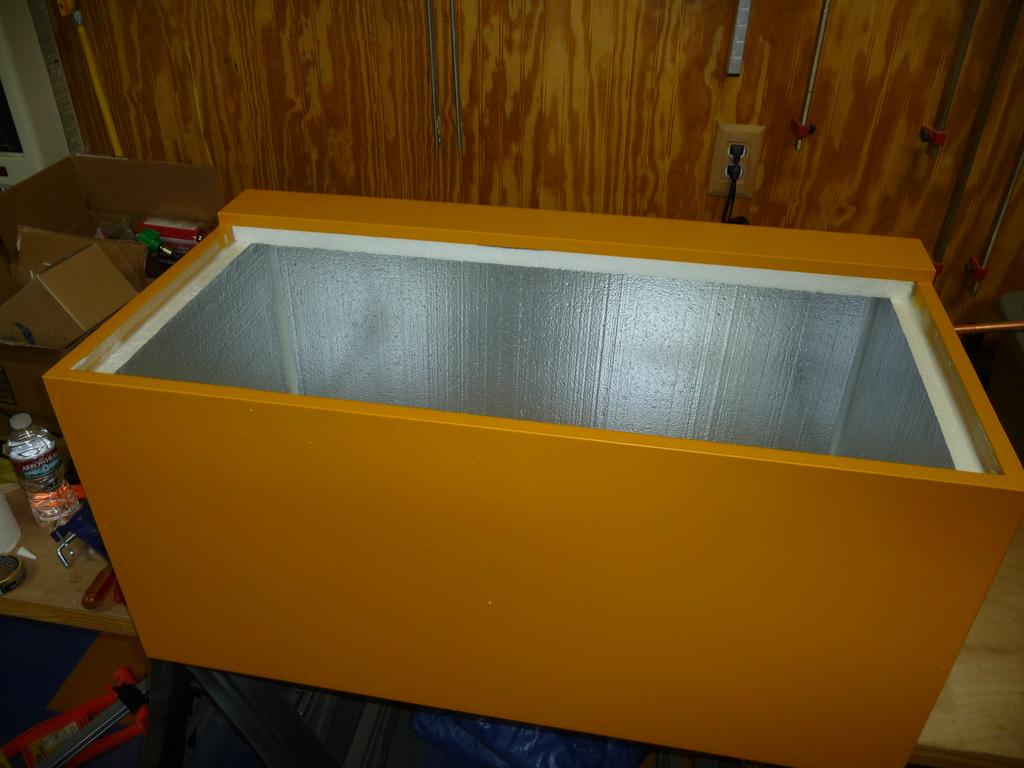
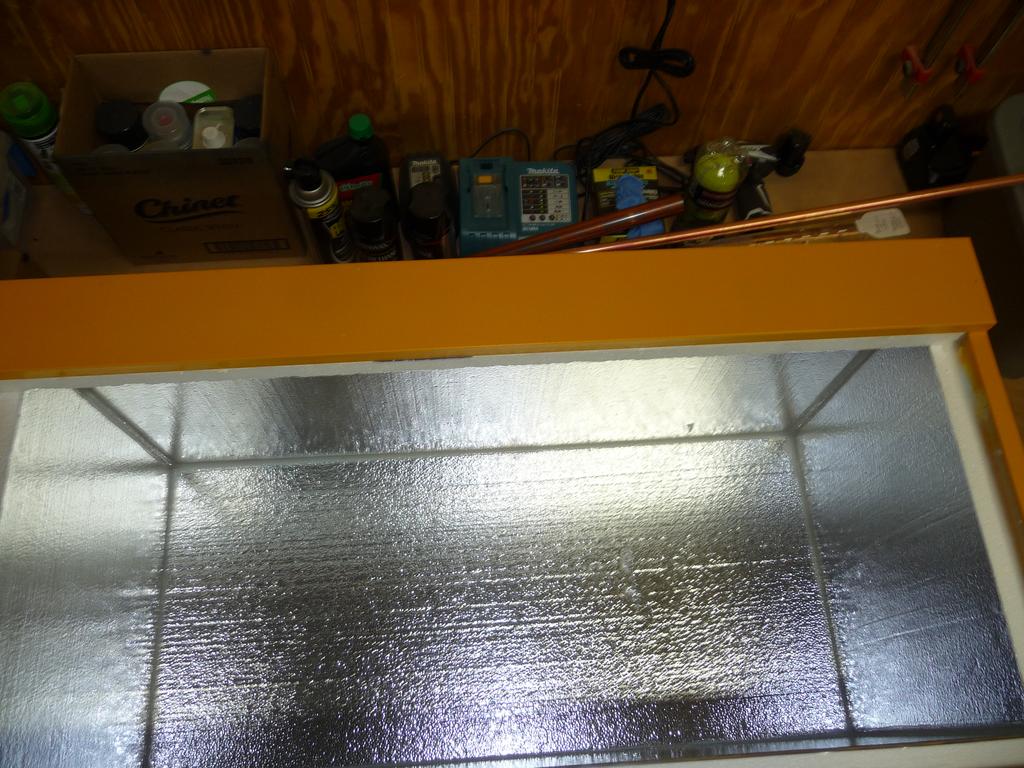
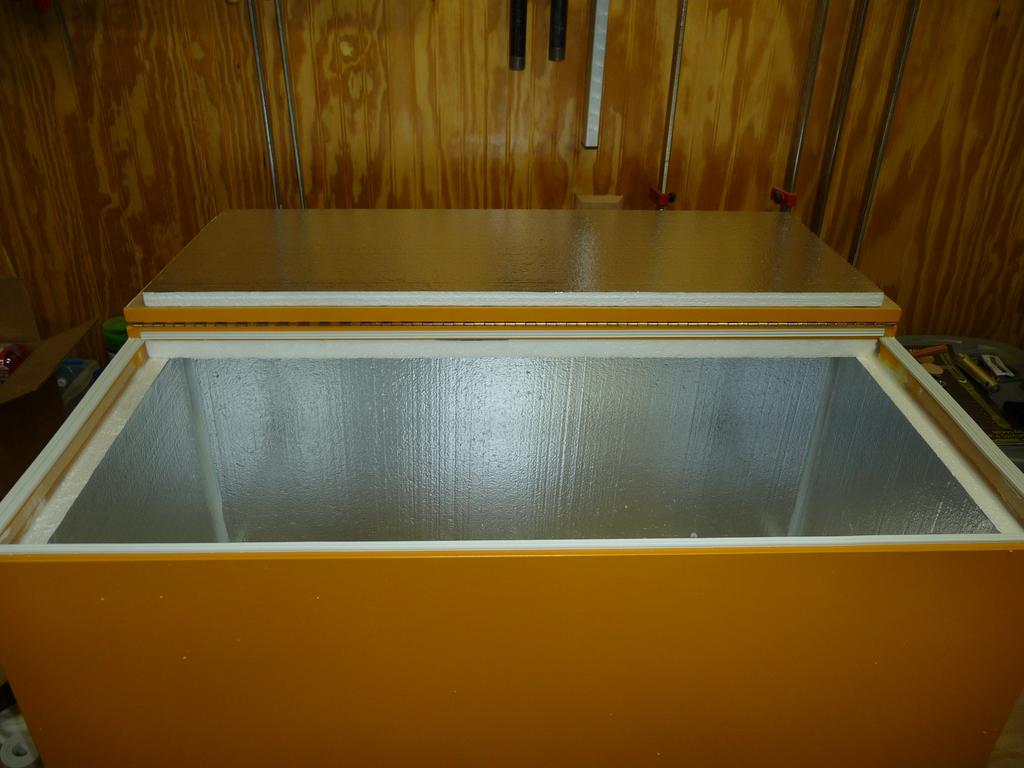
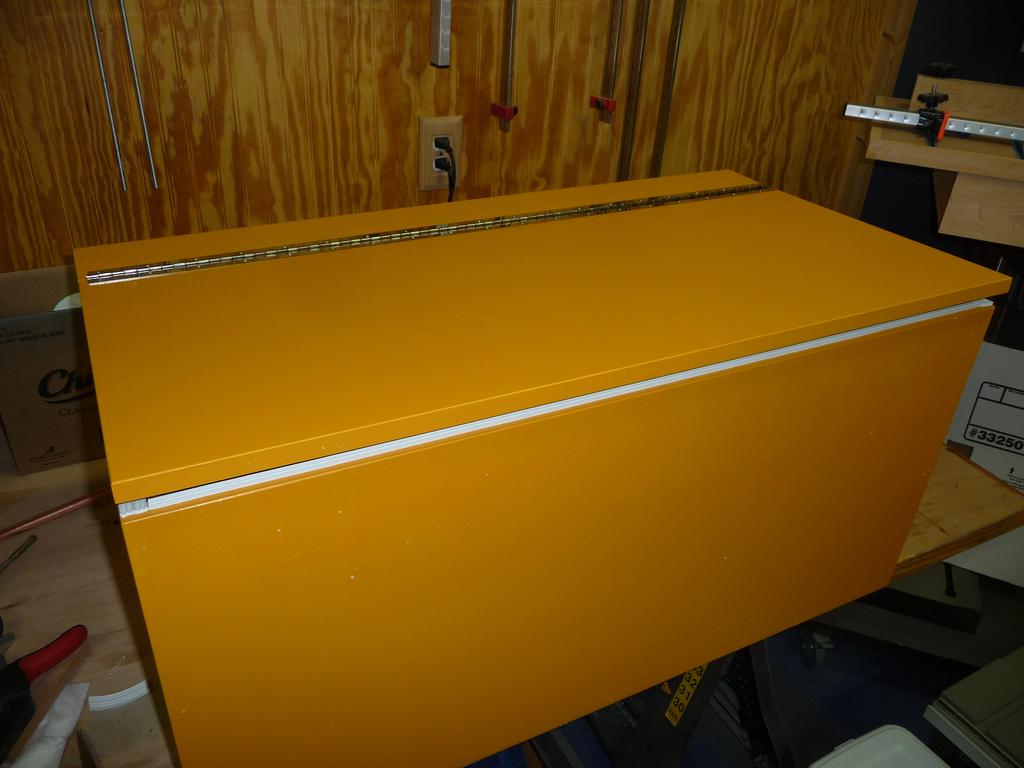
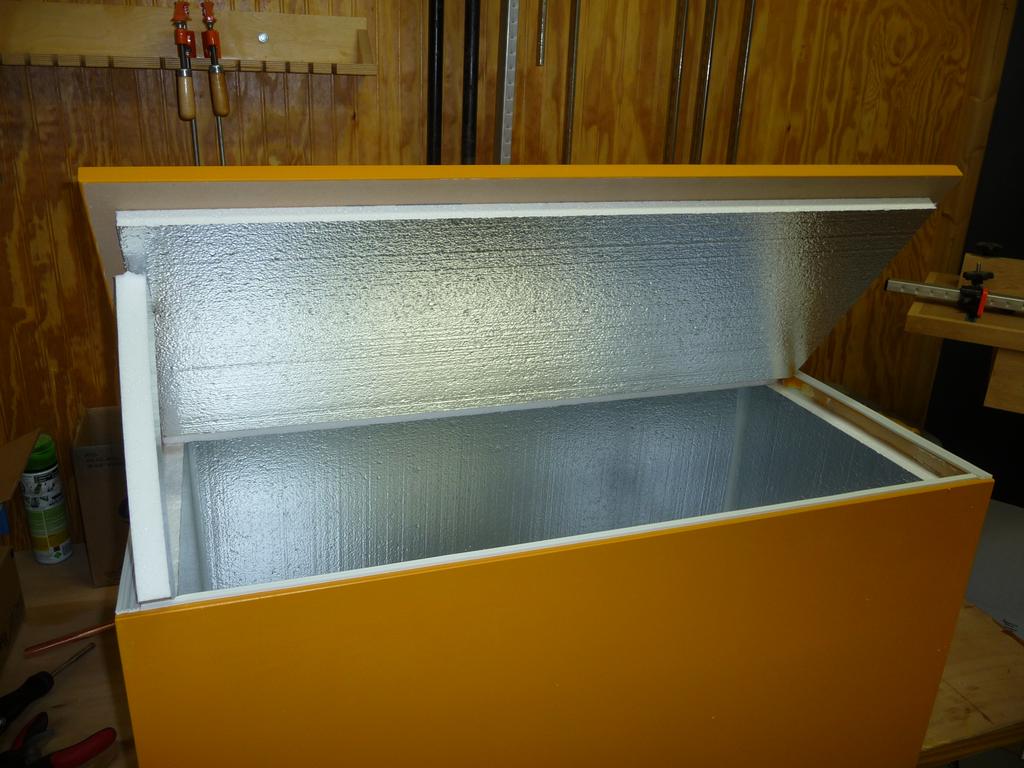
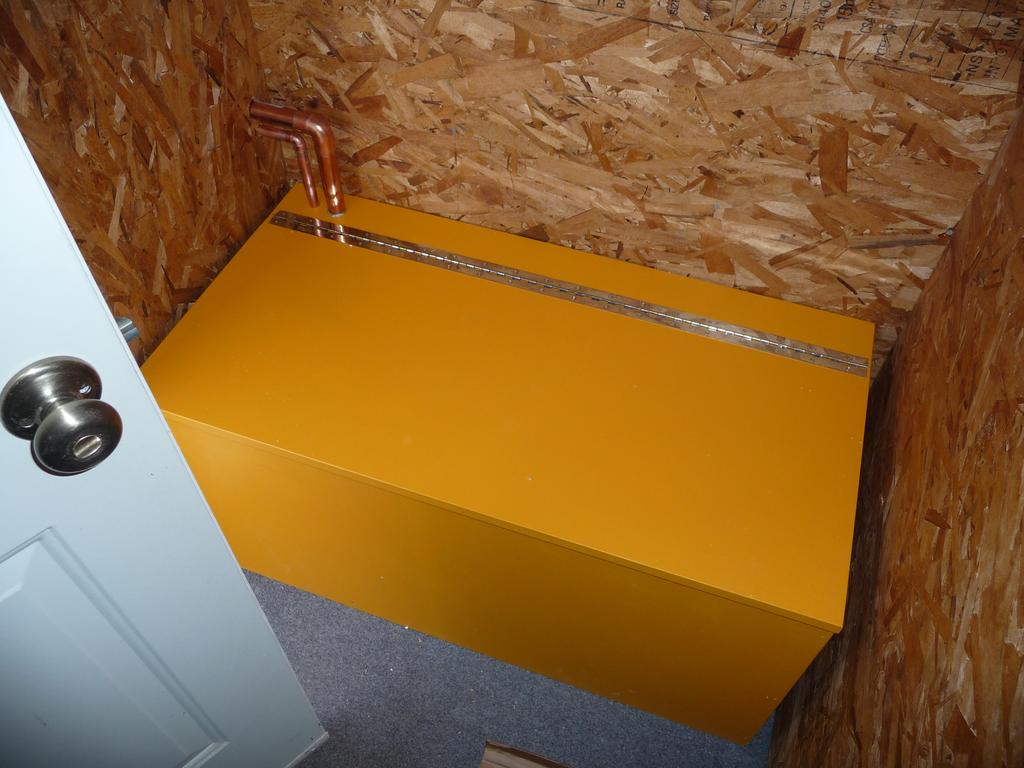
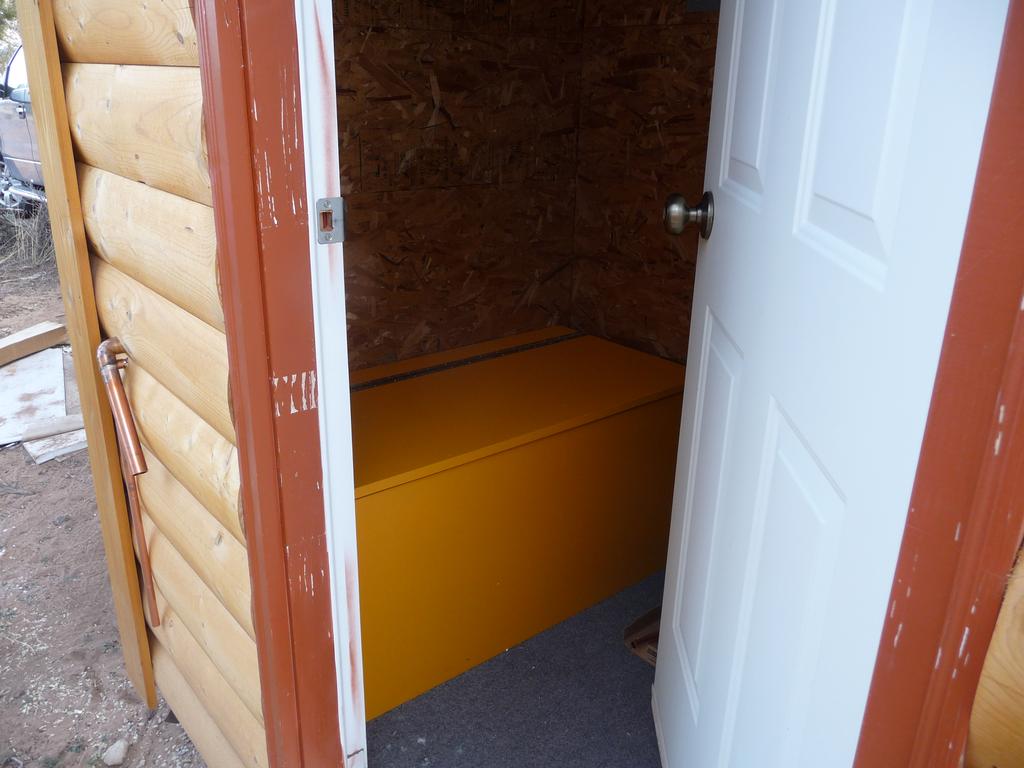
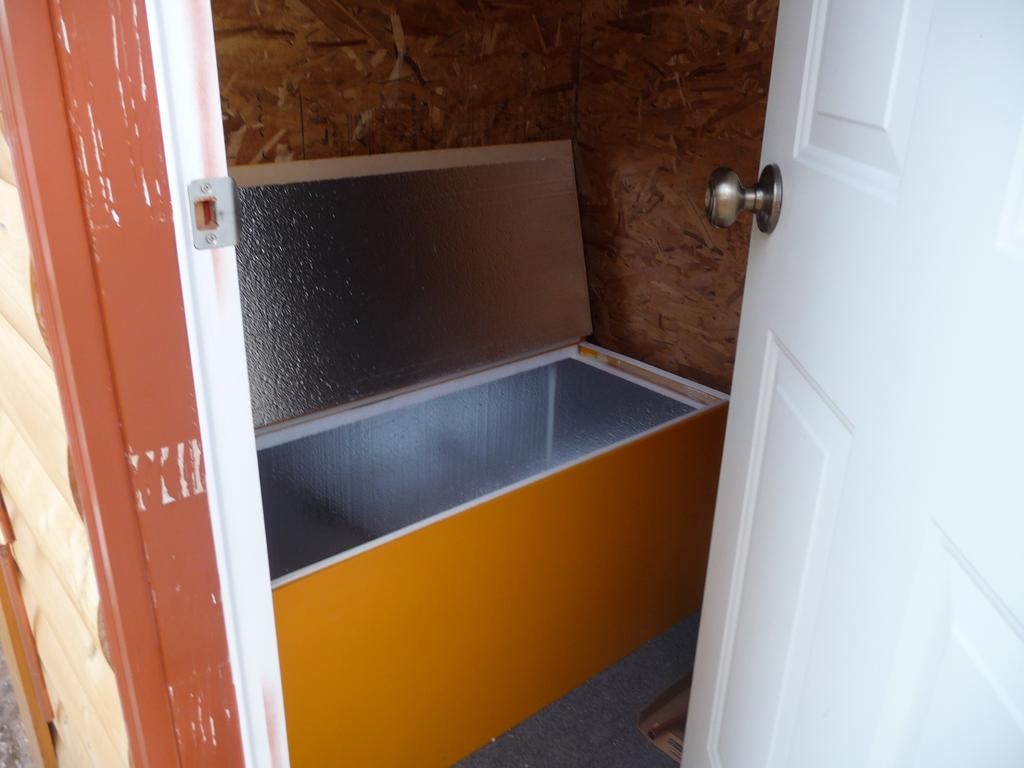
Last week I built a battery box using a single sheet of MDF I had on hand. It’s insulated with 1” and 1.5” foam insulation and painted with some orange paint I had leftover from another project. It should easily hold four golf cart type batteries which I plan to use in the solar system. The purpose of a battery box is to a) keep things from coming into contact with the battery terminals like dropped tools and b) safely vent the flammable hydrogen gas created during certain charging cycles. The box is insulated because the capacity of FLA batteries is negatively effected by colder temperatures. The lid of the box is sealed with some weatherstripping and copper pipe was use to vent the box to the outside.
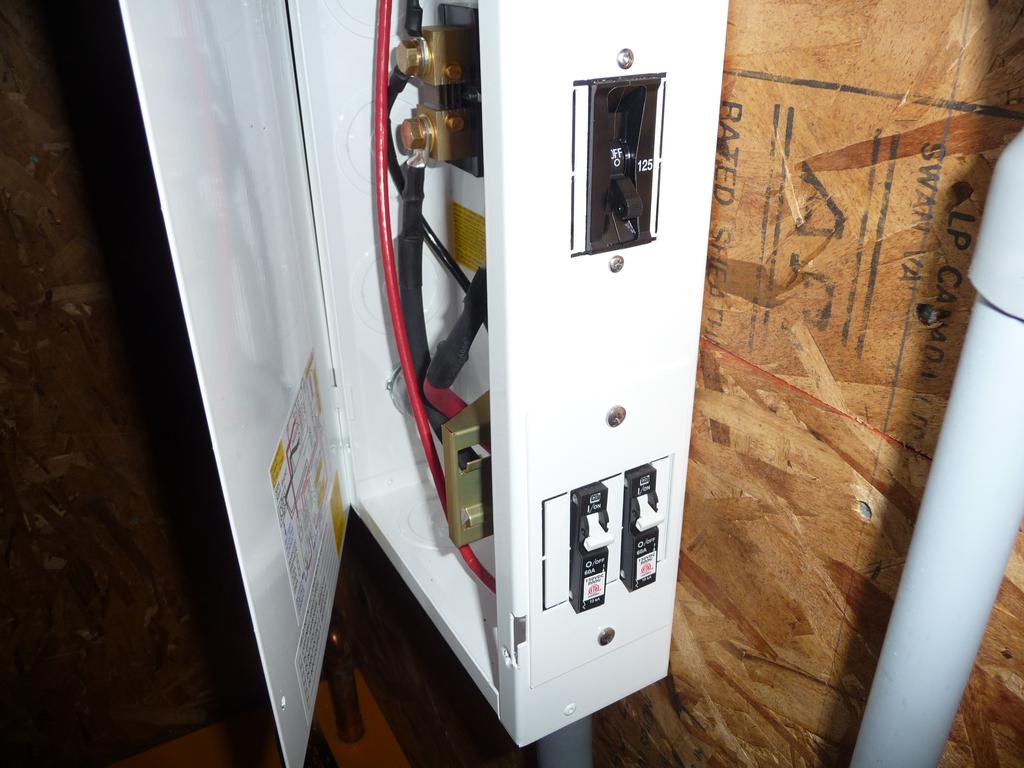
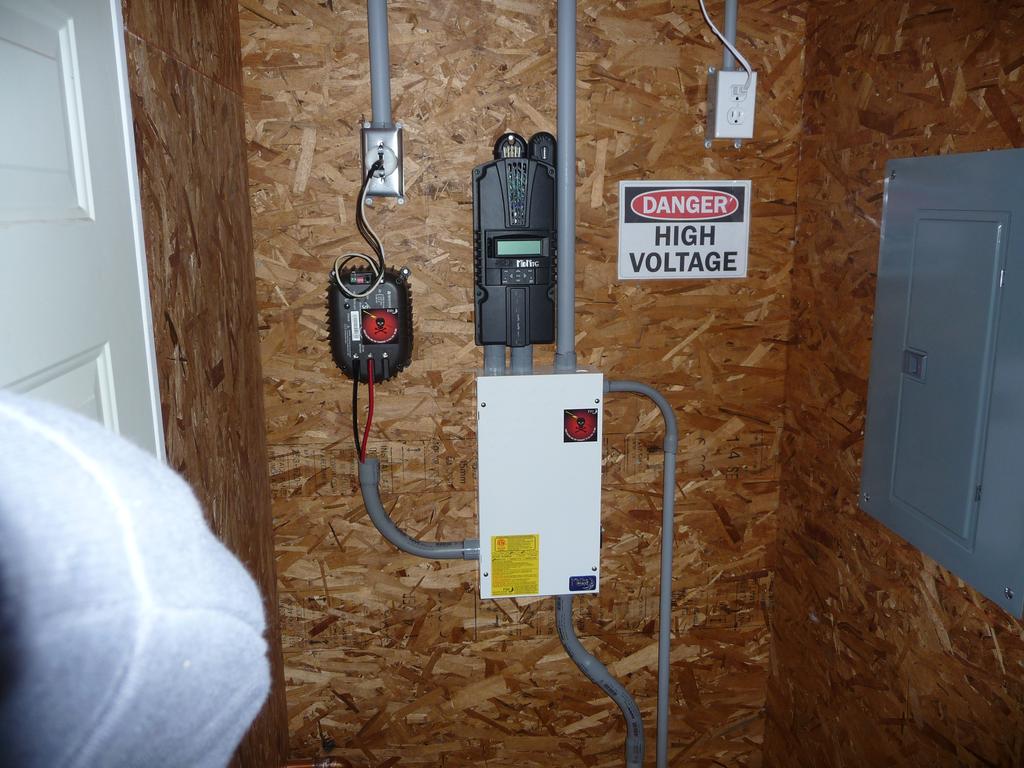
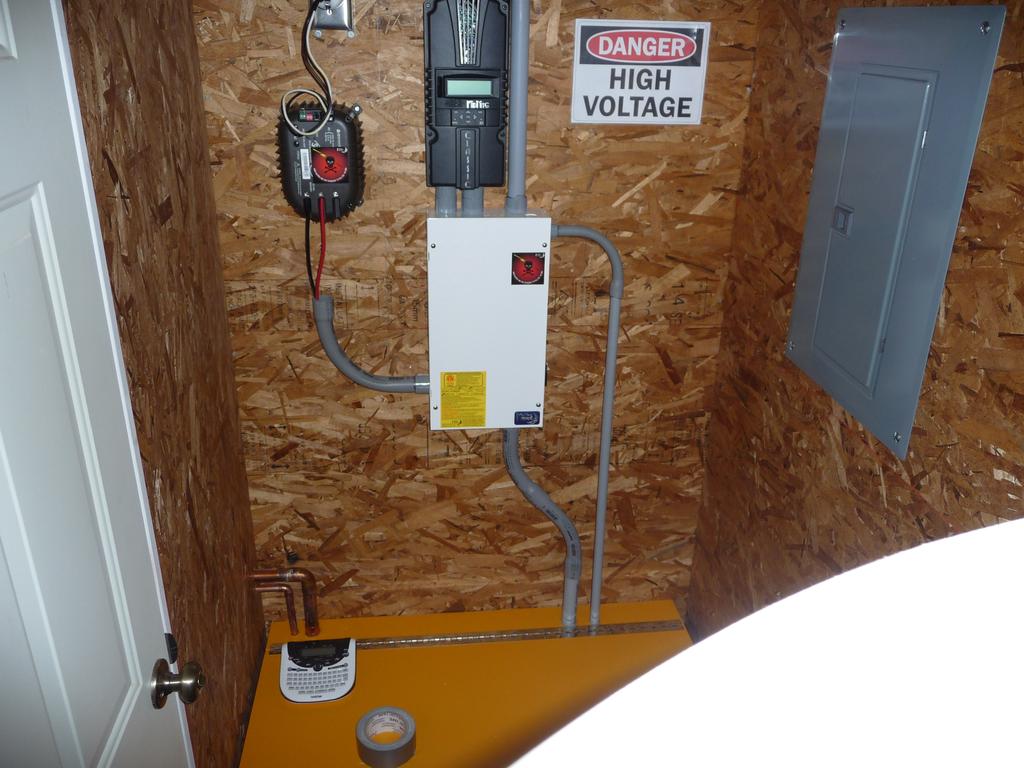
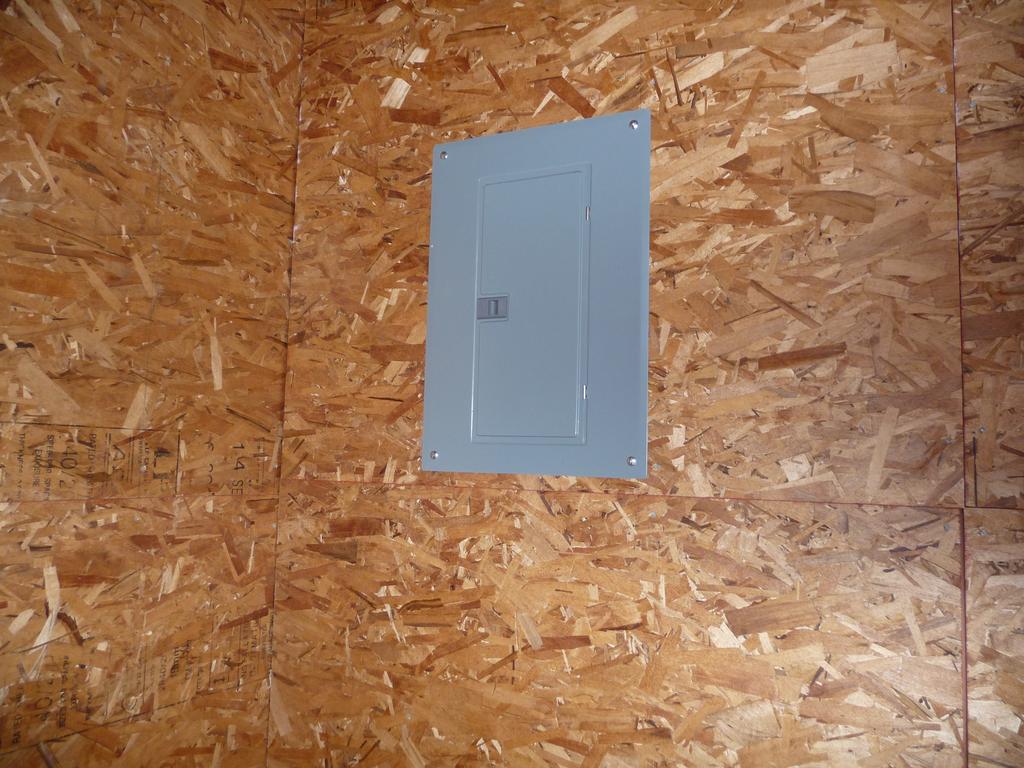
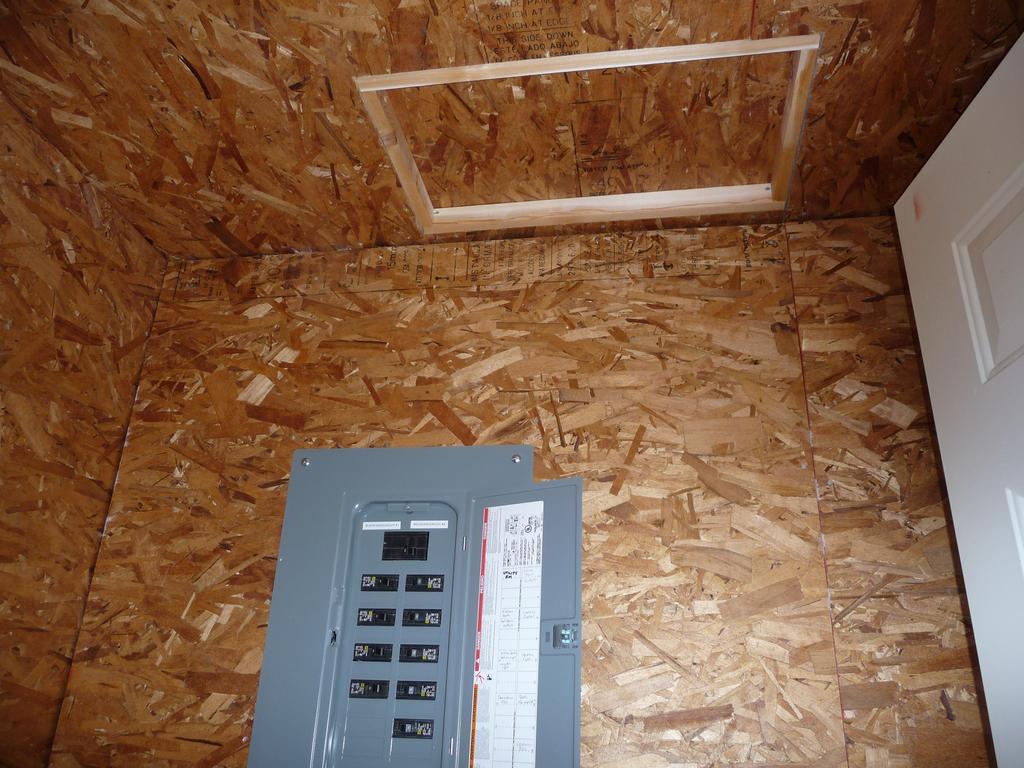
I finished sheathing the inside of the utility room and installed the service panel cover and “attic” access hatch.
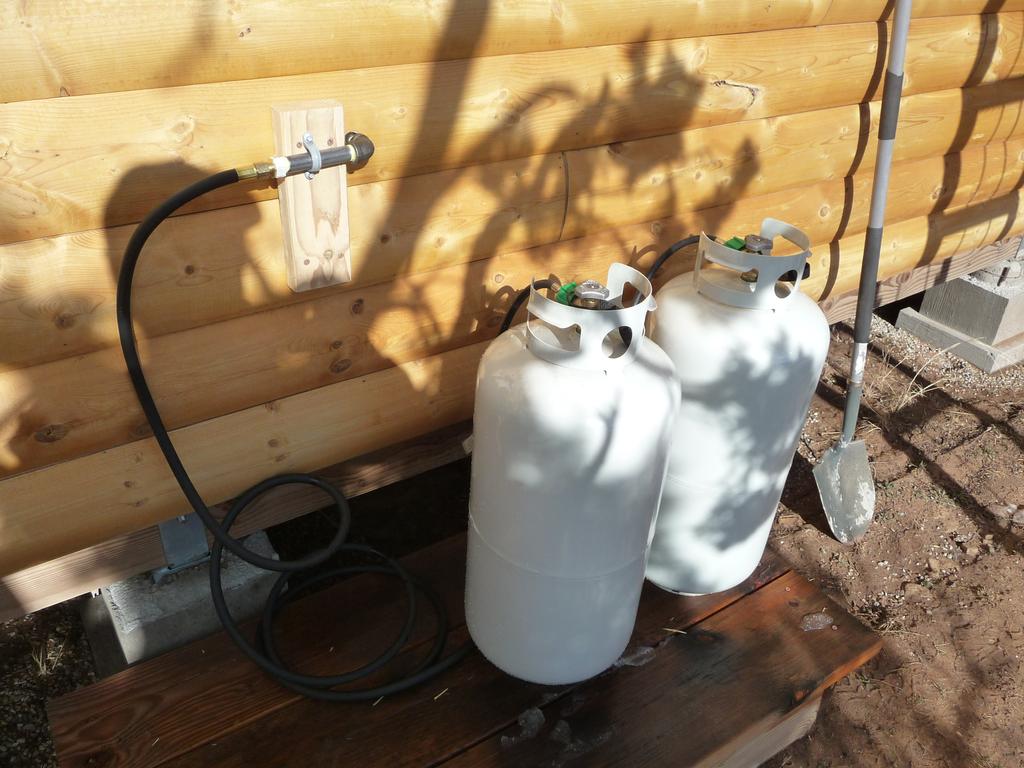
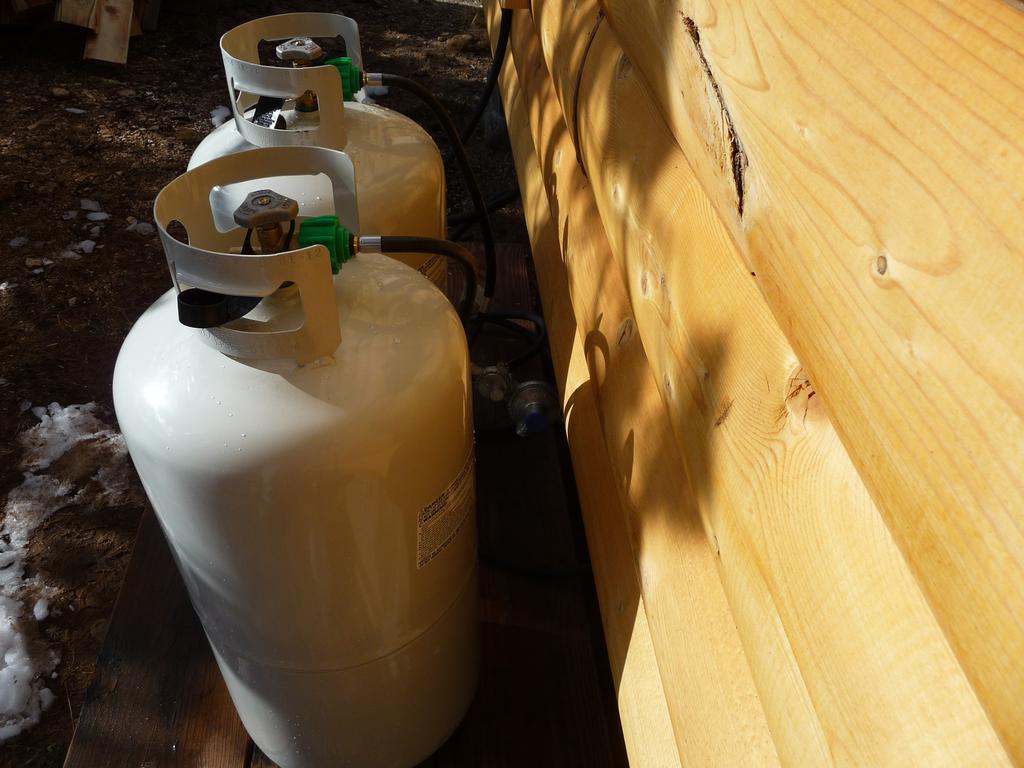
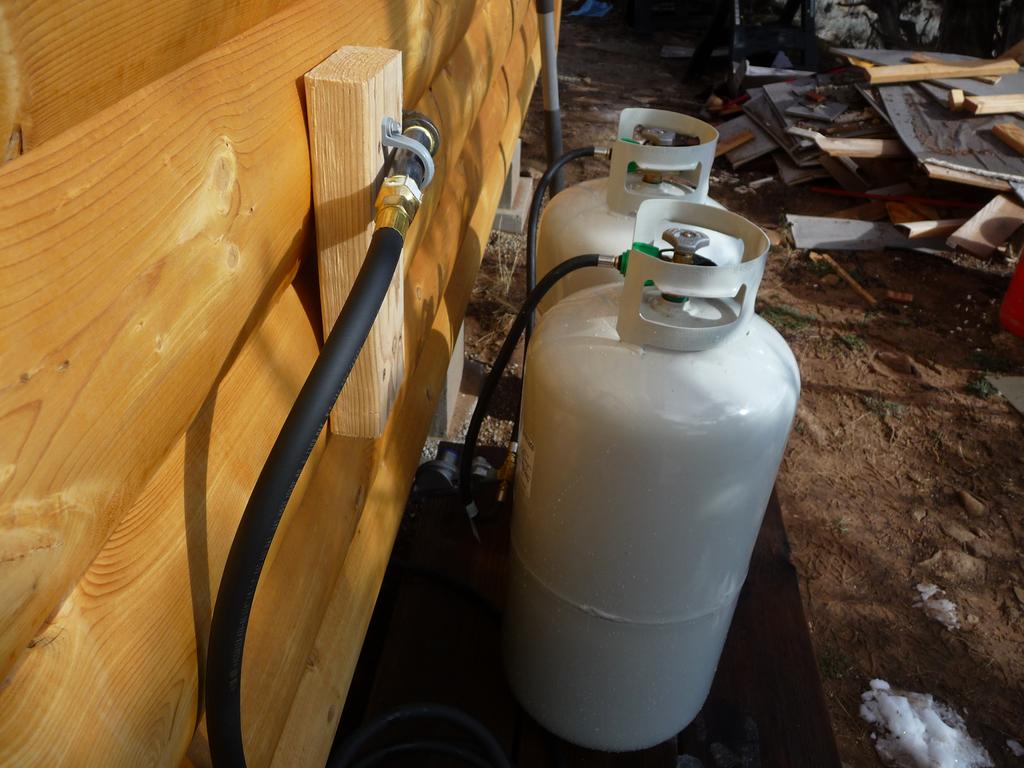
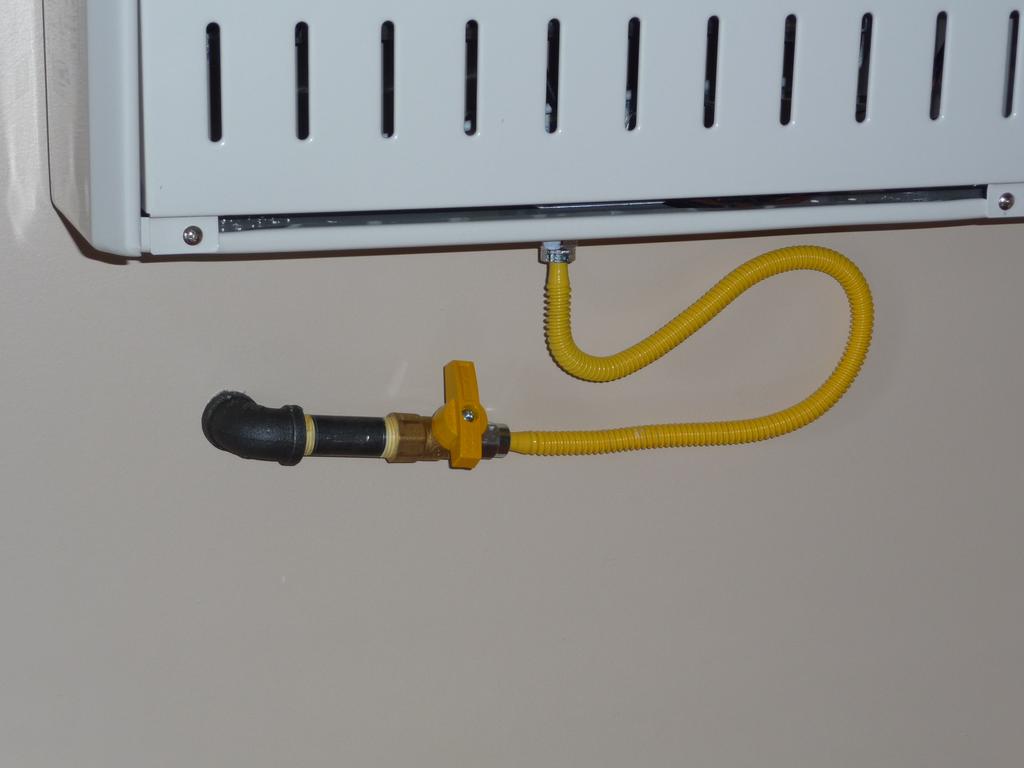
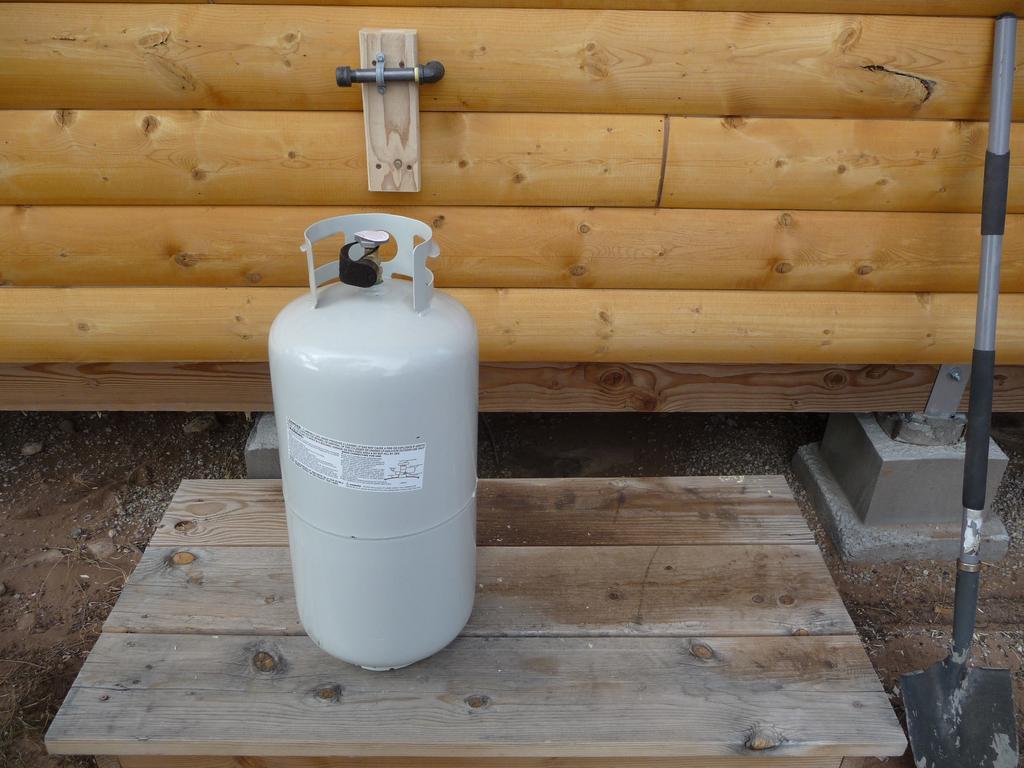
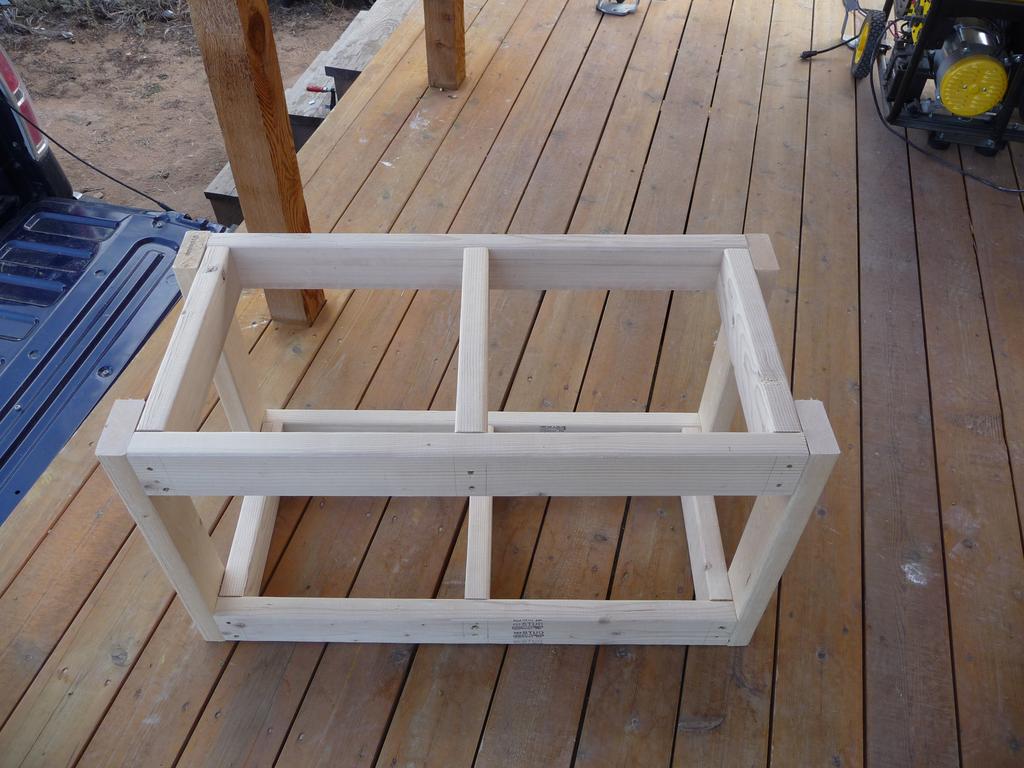
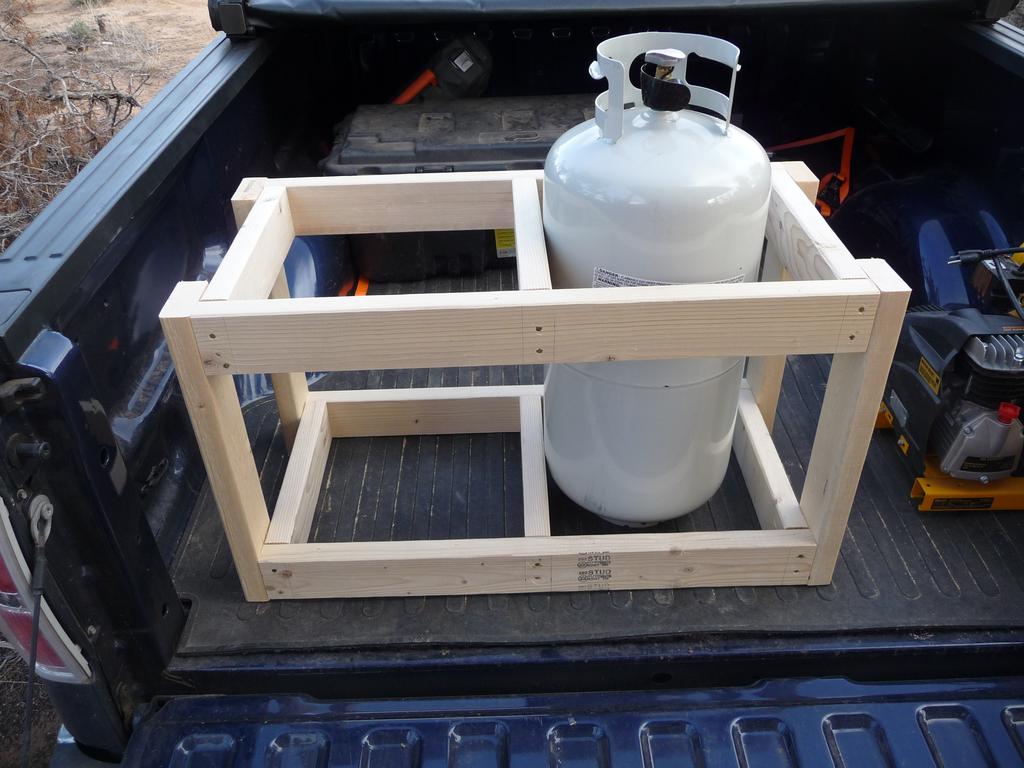
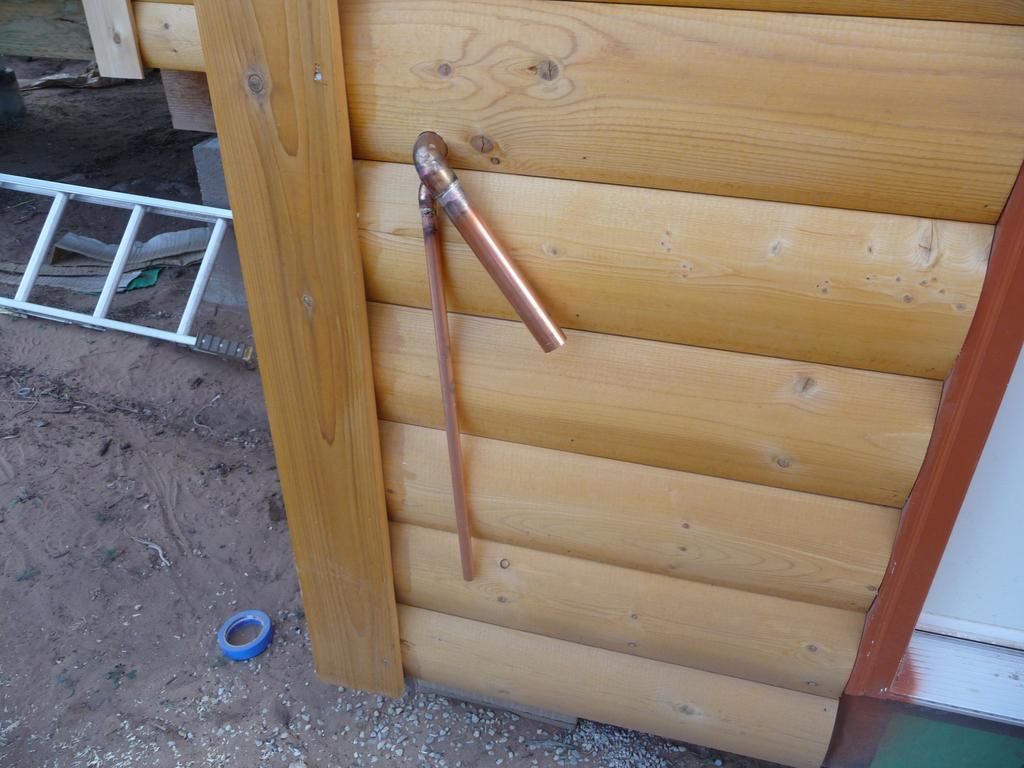
I started installing the heater which will be supplied by two 40lb propane tanks connected simultaneously. Propane tanks are also negatively effected by cold temperatures so using both tanks should provide adequate pressure to the heater in cold conditions. I’m using the two 40lb tanks versus a single 100lb tank for ease of transport and handling. I needed a fitting I didn’t have to connect the tank regulator to the 1/2” steel pipe so I’ll have to finish that next weekend. I threw together a 2x4 “cage” I’ll use to more easily transport the tanks in the truck bed.
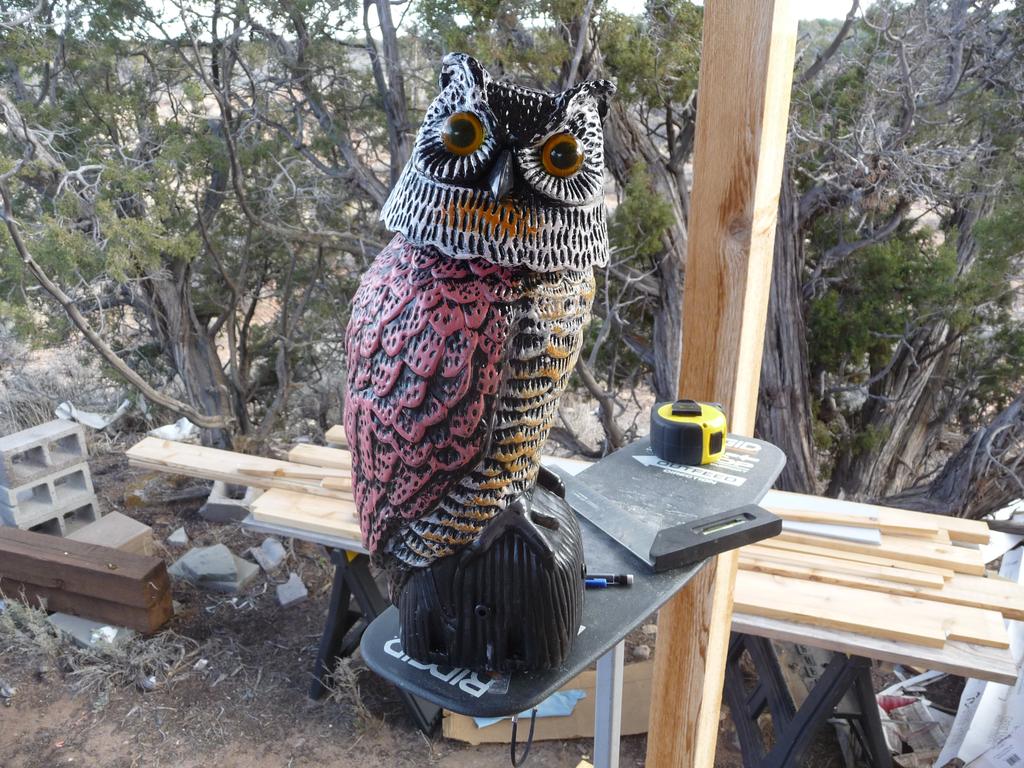
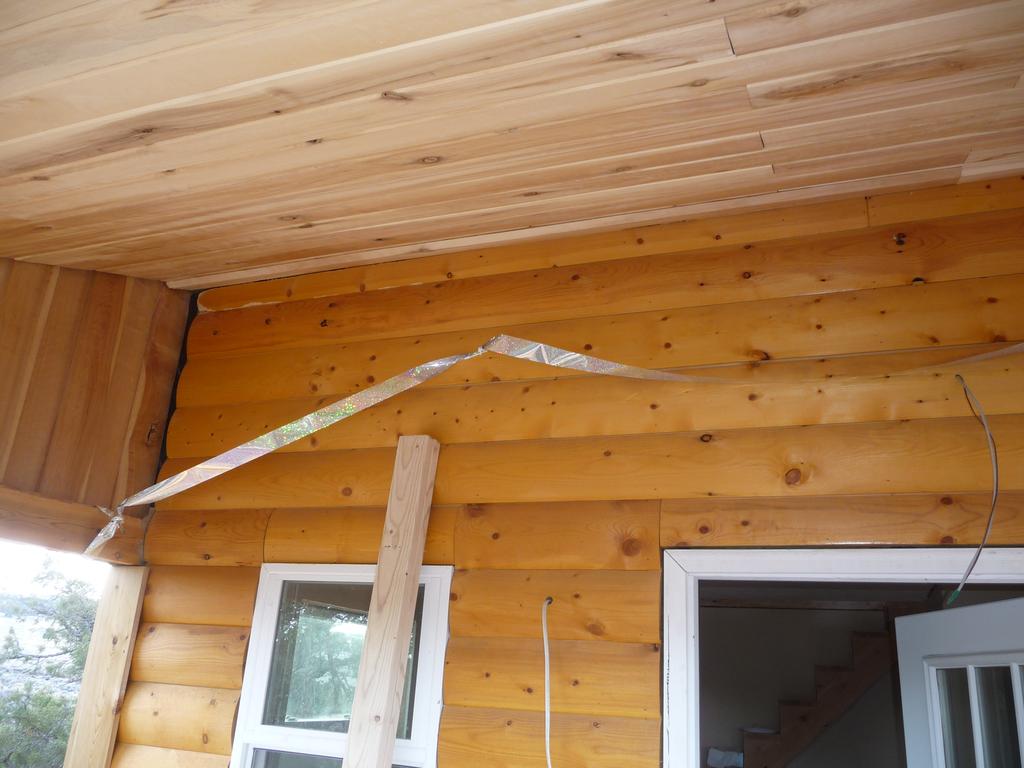
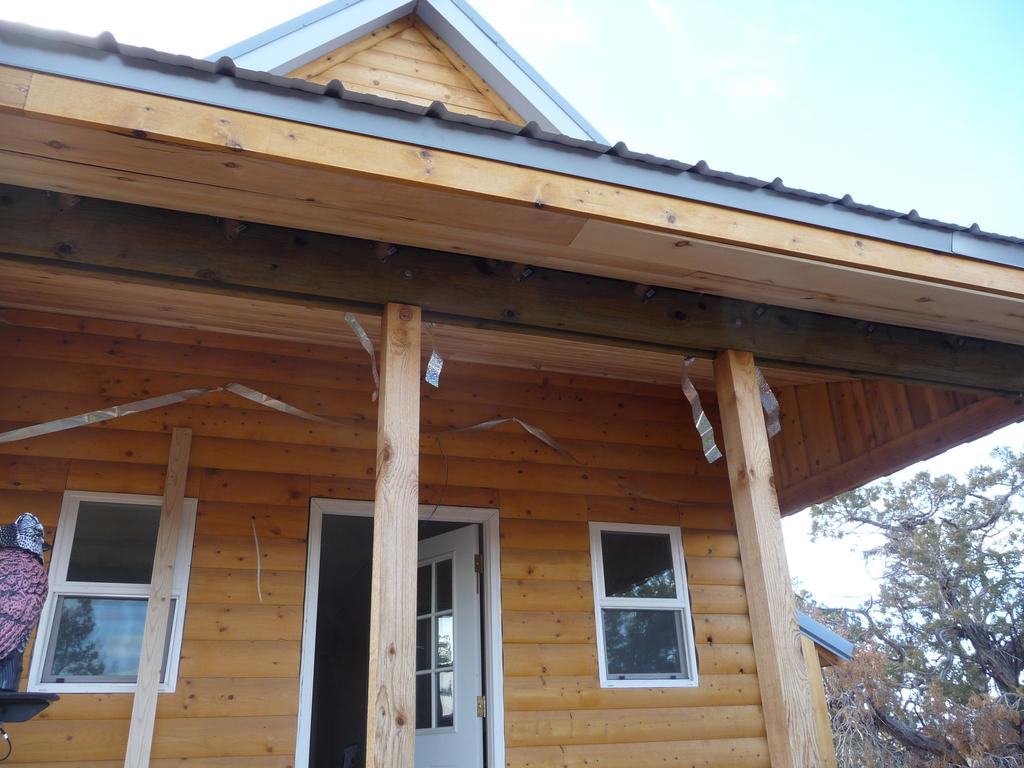
Finally, I’ve been having a problem with birds damaging the cabin’s exterior wood so I added a fake owl and some kind of anti-bird streamer type stuff. Hopefully it will work.
Utility Room, Battery Box, and Heater
Sunday, Oct 28, 2012
Last week I built a battery box using a single sheet of MDF I had on hand. It’s insulated with 1” and 1.5” foam insulation and painted with some orange paint I had leftover from another project. It should easily hold four golf cart type batteries which I plan to use in the solar system. The purpose of a battery box is to a) keep things from coming into contact with the battery terminals like dropped tools and b) safely vent the flammable hydrogen gas created during certain charging cycles. The box is insulated because the capicity of FLA batteries is negatively effected by colder temperatures. The lid of the box is sealed with some weatherstripping and copper pipe was use to vent the box to the outside.
I finished sheathing the inside of the utility room and installed the service panel cover and “attic” access hatch.
I started installing the heater which will be supplied by two 40lb propane tanks connected simultaneously. Propane tanks are also negatively effected by cold temperatures so using both tanks should provide adequate pressure to the heater in cold conditions. I’m using the two 40lb tanks versus a single 100lb tank for ease of transport and handling. I needed a fitting I didn’t have to connect the tank regulator to the 1/2” steel pipe so I’ll have to finish that next weekend. I threw together a 2x4 “cage” I’ll use to more easily transport the tanks in the truck bed.
Finally, I’ve been having a problem with birds damaging the cabin’s exterior wood so I added a fake owl and some kind of anti-bird streamer type stuff. Hopefully it will work.